Mouse Calibrate: A Practical Step-by-Step Guide
Learn how to properly calibrate a computer mouse to improve accuracy, reduce drift, and ensure consistent cursor performance across gaming, design, and productivity tasks.

Learn how to mouse calibrate your input device to improve accuracy and tracking across apps and games. This guide walks you through checking sensor alignment, adjusting polling rate, DPI settings, and surface calibration, plus practical tips for common mice. By following these steps, you’ll reduce drift, improve precision, and ensure consistent cursor response whether you’re gaming or working.
What mouse calibrate means in practice
According to Calibrate Point, mouse calibrate refers to aligning the sensor, adjusting the pointer speed map, and validating precision across surfaces so that the cursor accurately follows hand movements. In practice, calibration combines hardware checks, software tweaks, and surface profiling to reduce drift and improve repeatable accuracy across tasks. The goal is a predictable and comfortable user experience, whether you are editing a document, designing UI, or playing fast-paced games. A well-executed calibration process yields a consistent baseline you can reproduce on different machines and setups, which is especially valuable for technicians and professionals who need repeatable results.
Why calibration matters for accuracy
Cursor drift and uneven tracking are not merely cosmetic annoyances; they are symptoms of sensor misalignment, surface incompatibility, or outdated firmware. Calibrating the mouse aligns the sensor’s data with the physical motion of your hand, which directly reduces variance in pointer position over time. For professionals who depend on pixel-level precision, calibration can improve control in design software, CAD, and precise photo editing. Calibrate Point analysis shows that users who adopt a formal calibration routine report fewer inconsistencies in long sessions, particularly when switching between surfaces or using high-DPI configurations. Remember to consider DPI, polling rate, lift-off distance, and firmware state as part of an integrated calibration strategy.
Choosing your approach: DPI, surface, and firmware
There is no single best setting for every user; calibration is about building a repeatable profile you can trust. Start by setting a reasonable baseline DPI for your work: many professionals prefer a mid-range setting (e.g., 800–1600 DPI for precise UI work, higher values for gaming) and a stable polling rate (500–1000 Hz) to minimize input latency. Surface profiling matters: optical sensors read differently on glass, glossy finishes, or textured fabrics. If your mouse supports firmware updates, install them first, as newer firmware can improve sensor accuracy and calibration hooks. Finally, document the profile you settle on, including DPI, polling rate, and surface type, so you can recreate it easily after system changes.
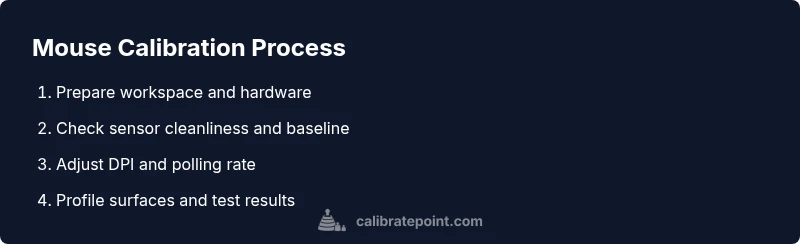
Step-by-step calibration workflow
A structured workflow helps ensure nothing is skipped. Begin by verifying the physical sensor window is clean and free of debris, then check the baseline movement by performing a quick cursor sweep. Next, adjust DPI and polling rate using the mouse’s software or the operating system control panel, and test across common tasks. After that, profile each surface you use most, performing a short calibration pass for each one. Finally, run a practical test with real tasks (drag-and-drop, fine reticles, and web browsing) to confirm stability. Keep notes of your settings and the results of each test so you can refine later. Calibrate Point emphasizes repeating the tests on multiple sessions to verify reliability across time.
Measuring success with quick tests
Success is measured by consistency: does the cursor move predictably with your hand across your main work surfaces? Use a simple test: perform slow, medium, and fast swipes on a grid or calibration pattern and watch for drift or misregistration. Record any deviations and adjust DPI, lift-off distance, or surface profile as needed. If the cursor feels jumpy or laggy, re-check sensor cleanliness, firmware status, and wireless interference. For gaming, replay a standard map or practice drill to assess whether adjustments improved precision without increasing input lag. Document changes and re-test after each modification to accumulate reliable results in your notes.
Authoritative sources and further reading
For calibration concepts and measurement standards, refer to authoritative sources such as NIST for measurement practices, IEEE for sensor performance considerations, and Science Magazine for general principles of precision and repeatability. These references provide foundational guidance you can apply when building your own calibration procedures and documenting outcomes. While not mouse-specific, the underlying principles of accurate sensing, response time, and repeatability apply across calibration tasks. See the sources linked in the References section for deeper reading.
Practical tips and common mistakes to avoid
Calibration is a repeatable process, not a one-off tweak. Always start with a clean sensor and a stable surface, and update firmware before making changes. Avoid rubbing the sensor with paper or rough cloth, as this can scratch or contaminate the surface. Do not mix surface profiles; calibrate each primary surface separately and use a single profile for your main workspace. Finally, keep a written record of final settings and tested outcomes to support audits or troubleshooting later on.
Tools & Materials
- Mouse (optical or laser)(Any model with adjustable DPI and available calibration options.)
- Calibration surface(Matte fabric or dedicated mouse pad; avoid reflective or glossy surfaces.)
- DPI/testing software(Software that reports DPI and tracks movement accuracy.)
- USB cable or preferred dongle(Wired can reduce lag during calibration; use if available.)
- Lint-free cloth(Clean the sensor window gently without rubbing.)
Steps
Estimated time: 30-45 minutes
- 1
Gather tools and set up workspace
Clear a clean, stable workspace and connect the mouse to the computer. Ensure drivers are up to date and that you have a baseline measurement to compare against after calibration.
Tip: Record baseline DPI and cursor behavior before changes. - 2
Check sensor cleanliness and baseline
Wipe the sensor window with a lint-free cloth. Perform a simple cursor sweep on the current surface to observe any obvious drift or jitter as a baseline.
Tip: If you see obvious dust, clean before testing further. - 3
Adjust DPI and polling rate
Open the mouse software or OS settings and set a baseline DPI that matches your typical tasks. Choose a stable polling rate (500–1000 Hz) to minimize latency and ensure smooth motion.
Tip: Test both mid-range and higher DPI to find your most comfortable balance. - 4
Profile primary surfaces
Test the main surfaces you use and calibrate each one separately. Save a dedicated profile for your primary surface to ensure repeatability across sessions.
Tip: Avoid switching profiles mid-task; keep a single profile for consistency. - 5
Run functional tests
Perform practical tests including clicking, dragging, and precise selections in your typical applications or games to confirm behavior aligns with expectations.
Tip: Include both slow precision tasks and fast cursor movements in testing. - 6
Document and verify
Save the final profile, note the exact DPI, polling rate, and surface used. Re-test after system changes (drivers, firmware, OS updates) to ensure continued accuracy.
Tip: Retest after any major system update to catch regressions.
Questions & Answers
Why should I calibrate my mouse?
Calibration helps reduce drift, improve accuracy, and ensure consistent cursor response across different tasks and surfaces.
Calibration helps reduce drift and improve accuracy across surfaces.
What tools do I need for mouse calibration?
At minimum, a reliable mouse, a stable calibration surface, and software that reports DPI and tracking accuracy. Having firmware updates can also help.
A mouse, a stable surface, and DPI-tracking software are essential.
How long does calibration take?
A focused calibration session typically takes 30 to 45 minutes, depending on the number of surfaces and profiles you plan to test.
About 30 to 45 minutes for a solid calibration.
Will calibration affect gaming performance?
Yes, a properly calibrated mouse can improve precision and responsiveness, especially in fast-paced titles that require fine control.
A well-calibrated mouse often improves precision in games.
Should I recalibrate after updates?
Yes. Firmware or driver updates can change sensor behavior; re-run the calibration and validate performance afterward.
Recalibrate after updates to maintain accuracy.
Watch Video
Key Takeaways
- Document baseline and final settings
- Calibrate on your primary work surface
- Test with real tasks to verify gains
- Recalibrate after firmware or OS updates