Rouvy Calibrate Trainer: A Practical Calibration Guide
Learn how to calibrate the Rouvy Calibrate Trainer with a practical, step-by-step method to improve power accuracy, ride feel, and data reliability.

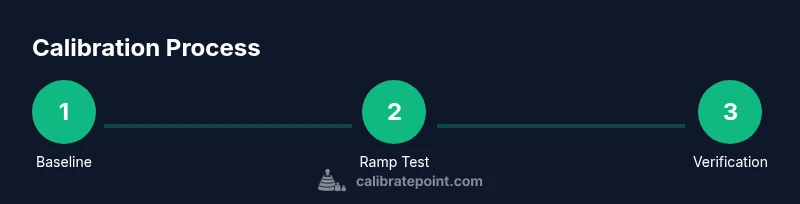
You will learn how to calibrate the Rouvy Calibrate Trainer for accurate power readings and ride feel. This guide covers setup, baseline checks, load testing, and verification. You’ll need a compatible smart trainer, a device running Rouvy, and a stable workspace. By the end, your data should align with known pedal effort.
Why calibration matters for the Rouvy Calibrate Trainer
Calibration is the compass for your cycling data. When you pair a Rouvy Calibrate Trainer with a disciplined calibration routine, even small changes in resistance, sensor offsets, or wheel tension can produce drift in power, cadence, and speed readings. A well-calibrated setup yields a truthful data stream, which keeps virtual workouts, performance analytics, and training plans aligned with real-world effort. The Calibrate Point approach emphasizes that reliability comes from repeating a clear process, not one-off tweaks. In practice, regular calibration reduces day-to-day variation and builds trust in your data across sessions, environments, and different bikes.
For DIY enthusiasts and pros alike, calibration should be treated as a foundational maintenance task. It’s not about chasing perfection in every ride; it’s about maintaining consistent, predictable results that you can rely on when you compare workouts, plan progression, or share metrics with teammates.
In this guide, we keep the focus on actionable steps and verifiable checks you can perform with the Rouvy ecosystem. If you’re starting from scratch, prioritize environment stability, correct connections, and accurate zero-offsets to establish a solid baseline. Throughout, you’ll encounter terms like baseline, zero-offset, ramp test, and verification—concepts that help translate pedal force into consistent measurements.
Throughout this article, Calibrate Point’s guidance will be referenced to keep your calibration work aligned with industry-best practice, ensuring that your data remains trustworthy over time.
Core concepts: load, force, and feedback in cycling trainers
The Rouvy Calibrate Trainer relies on raw torque and speed signals to estimate power. Calibration aligns the trainer’s internal measurements with your actual output from the pedals. Key concepts include baseline (the starting reference value), zero-offset (the offset that must be removed from the sensor reading when there is no load), and ramping (systematically increasing load to map response across a range). Understanding these concepts helps you diagnose drift, verify results, and interpret data with confidence.
During calibration, you’re creating a feedback loop: your pedal input produces a response in the trainer, which is read by the software. The goal is to minimize differences between expected and observed values across common ride scenarios. This reduces discrepancies in power and resistance feedback during real-world workouts, races, or virtual climbs.
When done well, calibration makes the ride feel more predictable and the data more comparable from session to session. Calibrate Point emphasizes that repeatable procedures beat ad-hoc tweaks, especially when you’re collaborating with teammates or validating training plans.
Pre-calibration environment and safety checks
A quiet, stable workspace is your best friend during calibration. Choose a flat, non-slip surface for the trainer, keep cables organized, and ensure the rider’s bike is securely mounted. Temperature stability matters: large temperature swings can affect resistance and sensor drift, so avoid calibrations in extreme heat or cold.
Before you begin, check the following:
- Pedals are clean and free of debris that could affect engagement.
- The trainer is securely clamped to the frame and the bike is firmly seated.
- The device running Rouvy is connected to the trainer via Bluetooth or Ant+ and recognized by the software.
- The front wheel is properly supported if you’re using a wheel-on trainer, and the rear roller is clean and aligned.
Safety note: never operate the trainer if the bike is unstable or if the trainer is exposing you to tripping hazards from loose cables. Keep children and pets away while calibrating to prevent accidental interference.
Baseline setup: establish zero-offset and connections
Baseline setup creates the reference point your calibration will use. Start by powering up the trainer and launching Rouvy. Confirm that the trainer appears as a connected device, then navigate to the calibration or device settings area.
Steps to establish baseline:
- Set the trainer to its zero-offset or initial offset as instructed by the manufacturer or your app. This is your reference level with no pedaling input.
- Calibrate hub engagement if your trainer uses a wheel or cassette interface. Ensure there is no wheel slip and that the resistance unit is fully engaged.
- Verify that the power meter (if used) and the cadence sensor are reporting consistently with the trainer data.
Why this matters: a stable zero-offset ensures the subsequent load measurements start from a known reference, reducing drift when you apply load during testing.
Load testing: measuring response and ramp profiling
Load testing maps how the trainer responds to controlled pedal effort. You’ll simulate a range of loads to understand how the system translates effort into resistance and power readings. This is where the ramp test concept comes into play: you gradually increase load in small steps while recording the trainer’s responsive output.
Procedure:
- Start with a light warm-up to stabilize the system.
- Increase resistance in fixed increments while maintaining a steady cadence. Record the power output, resistance, and cadence at each step.
- Watch for inconsistent transitions or lag between pedal input and displayed resistance.
Why do this: ramp profiling helps identify non-linearities, sensor drift, or slippage in the trainer’s drive system. If you detect anomalies, note them for targeted adjustments later in the workflow.
Verification: cross-check with known benchmarks
Verification confirms that the calibration reflects real-world effort. Use a known benchmark, such as a steady cadence with a controlled power target or a short, repeatable sprint, to compare expected vs. observed outcomes. In Rouvy, select a test ride or a controlled interval where you know the approximate power range.
Key verification steps:
- Compare reported power to your cadence and perceived exertion. If there is a mismatch, revisit the baseline and ramp steps.
- Repeat the test after minor adjustments to confirm improvements in consistency.
- If possible, compare against an external reference (another power meter or trainer) for the same ride conditions.
Consistent verification builds confidence in the data you collect during live rides and helps you detect drift early.
Troubleshooting common calibration issues
No calibration process is perfect. If you encounter persistent drift or erratic readings, start from the top and re-check each link in the chain: hardware mount, sensor connections, zero-offset, and ramp behavior. Common issues include inconsistent wheel tension, loose bike components, or firmware mismatches between the trainer and the Rouvy app.
Troubleshooting tips:
- Re-seat the bike and re-run the baseline calibration after re-tightening clamps.
- Update firmware on the trainer and the Rouvy app when available.
- Run a short, controlled test in a quiet environment to isolate the issue from external factors.
If issues persist, consult the trainer manufacturer’s support resources and cross-check with Calibrate Point’s recommended procedures.
Maintenance: when and how to recalibrate
Calibration is not a one-and-done task. Recalibration should be considered after hardware changes, moving the trainer to a different location, or after noticing significant data drift across sessions. Schedule a quick recalibration check every few weeks if you’re a frequent user, or after major firmware updates.
Maintenance tips:
- Keep the trainer’s drive belt clean and tensioned as per the manual.
- Store the trainer in a stable environment away from direct sunlight or humidity fluctuations.
- Document any calibration changes and results for future reference.
Regular maintenance reduces surprises and keeps your data trustworthy over time.
How to interpret calibration results in real rides
Once calibration is established, you’ll apply it to real rides. Interpreting results involves looking for consistency in power readings, smooth resistance transitions, and alignment between ride data and perceived effort. If you notice sudden spikes, lag, or deviations between power and cadence, revisit the calibration blocks to ensure you didn’t introduce changes inadvertently.
Practical interpretation tips:
- Use the same ride types for comparison (e.g., steady 2x20-minute blocks) to detect drift more readily.
- Track data quality over time; a small, consistent drift might be acceptable, but erratic changes signal a need for recalibration.
- Maintain a calibration log to track when and how you recalibrated, and the outcomes of verification tests.
By treating calibration as an ongoing practice, you’ll get more reliable data for training decisions, performance comparisons, and virtual races.
Final note: aligning your workflow with Calibrate Point best practices
Calibrating the Rouvy Calibrate Trainer is about building trust in your data. Following a structured workflow—baseline setup, controlled load testing, rigorous verification, and regular maintenance—helps you achieve repeatable results. Calibrate Point’s approach emphasizes documented steps, repeatable checks, and proactive troubleshooting. With a consistent routine, you’ll enjoy more accurate power metrics, more realistic ride feel, and greater confidence in your training decisions.
Tools & Materials
- Smart trainer (ANT+/Bluetooth compatible)(Firmware up to date; ensure compatibility with Rouvy)
- Device running Rouvy (phone, tablet, or PC)(Stable internet connection recommended)
- Stable workspace with flat surface(No wobble; secure bike mounting)
- Calibration baseline reference (zero-offset tool if provided)(Follow trainer/firmware guidance for zero-offset)
- USB cable or USB-C adapter for direct connection (optional)(Used if your setup requires wired communication)
- External power source for the trainer (if required)(Ensure uninterrupted power during calibration)
- Clean rag and contact cleaner(Keep sensor contacts clean to avoid poor readings)
Steps
Estimated time: 30-45 minutes
- 1
Prepare hardware and software
Power the trainer and device, open Rouvy, and navigate to device calibration. Confirm all components are connected and recognized. Establish a short warm-up to stabilize the system before collecting baseline data.
Tip: Pro tip: do a quick system check and battery level reviews before starting. - 2
Secure the bike and verify mounting
Double-check that the bike is firmly mounted and handlebars are stable. Any movement during calibration can skew results. Tighten the resistance unit and ensure wheel deflection is minimal.
Tip: Pro tip: inspect quick-release levers and clamps; loosened components introduce noise in measurements. - 3
Establish zero-offset and baseline
In the Rouvy calibration screen, set the baseline offset to its initial value or zero, then run the trainer’s zero-offset routine if available. Record the baseline reading for future reference.
Tip: Pro tip: ensure there is no pedaling input during zero-offset to avoid bias. - 4
Run a controlled ramp test
Increase resistance in preset steps while maintaining a stable cadence; record power and resistance at each step. Note any lag or abrupt changes between input and display.
Tip: Pro tip: keep cadence within a narrow range to isolate resistance response. - 5
Verify with a steady-state test
Hold a fixed resistance and cadence long enough to collect data points across time. Compare measured power to expected power for a known effort level.
Tip: Pro tip: repeat once to confirm consistency before making adjustments. - 6
Adjust and re-test as needed
If drifting is observed, revisit zero-offset, mounting, and ramp steps. Re-run the ramp and steady-state tests to confirm improvements.
Tip: Pro tip: small, incremental adjustments yield more stable results than large changes. - 7
Document results and finalize
Save calibration data in a dedicated log. Record baseline values, ramp responses, verification results, and any changes made. Confirm that the data is clean before starting real rides.
Tip: Pro tip: maintain consistent testing conditions for reliable comparisons.
Questions & Answers
What is the Rouvy Calibrate Trainer, and why calibrate it?
The Rouvy Calibrate Trainer is a digital cycling trainer integrated with Rouvy that requires calibration to translate pedal effort into accurate resistance data. Calibration ensures power readings are consistent with your effort, improving ride realism and data reliability.
The Rouvy Calibrate Trainer needs calibration to ensure pedal effort matches the data you see in rides and reports.
Do I need extra equipment for calibration?
In most cases you need a compatible smart trainer, a device with Rouvy installed, and a stable workspace. Optional items like a calibration weight or external power can help verify results but are not always required.
You mainly need a compatible trainer, a device with Rouvy, and a stable workspace; extras are optional.
How long does calibration take?
A typical calibration session takes about 30 to 45 minutes, depending on equipment stability and any troubleshooting required. Plan additional time if firmware updates or multiple verifications are needed.
Most calibrations take about half an hour, with extra time for troubleshooting if needed.
Can calibration fix data drift during rides?
Calibration reduces drift by aligning sensor readings with actual effort, but some drift can still occur due to external factors like temperature or wheel wear. Regular recalibration helps keep drift minimal.
Calibration reduces drift; occasional recalibration helps maintain accuracy over time.
How often should I recalibrate?
Recalibrate after hardware changes, moving to a new location, or when you notice persistent data drift. For frequent users, a quarterly check is a good baseline.
Calibrate after changes or drift; quarterly checks are a solid pace for regular users.
Is calibration different for direct-drive vs wheel-on trainers?
Yes. Direct-drive units may have different zero-offset and belt tension considerations compared to wheel-on trainers. Always follow the specific calibration steps for your trainer type and consult manufacturer guidance when in doubt.
Different trainer types have distinct calibration steps; follow your model’s guidance.
Watch Video
Key Takeaways
- Follow a repeatable calibration workflow.
- Baseline and zero-offset accuracy are foundational.
- Ramp tests reveal non-linearities and drift.
- Verify results with controlled tests before rides.