How to Calibrate Zwift for Accurate Power Data
Learn how to calibrate Zwift for consistent power data across workouts with a practical, step-by-step approach covering spin-down, sensor checks, and validation.

Calibrating Zwift means syncing your trainer’s power readings with Zwift’s metrics to deliver accurate ride data. You’ll update firmware, run trainer spin-down or sensor calibration, and validate results in Zwift. This guide covers setup, steps, and troubleshooting for reliable workouts.
Understanding Zwift calibration basics
Calibration in Zwift refers to aligning the power and speed readings from your physical trainer and sensors with the actual output you are generating while pedaling. A precise calibration helps ensure your virtual ride power numbers match your real effort, which in turn makes workout zones, FTP tests, and race simulations meaningful. According to Calibrate Point, maintaining consistent calibration across sessions reduces data drift and improves repeatability of workouts. If you skip calibration, small changes in tire pressure, temperature, or drivetrain wearing can cause noticeable gaps between real effort and displayed power. Start by identifying your hardware: trainer model, wheel-on or direct-drive, and the sensors you rely on. Then plan to calibrate whenever you notice unexpected jumps in power data or after changes such as tire pressure adjustments or firmware updates. Zwift itself provides built-in prompts and links to your trainer’s calibration flow; using these alongside a regular calibration routine delivers the most reliable data.
Aligning trainer power with Zwift metrics
Power meters and trainers use different reference points, and even the same device can drift with use. The key is to align trainer-derived power with Zwift’s reference ecosystem. Start by confirming wheel circumference in your bike settings is accurate for your wheel size; if you ride with a wheel sensor rather than a direct-drive, ensure the sensor's circumference input matches your tire diameter. Check that the trainer's firmware is up to date, and that the Zwift Companion App or desktop client shows the correct device as connected. The Calibrate Point team notes that consistent calibration across devices—sensor, trainer, and software—yields the most stable power curve for workouts and group rides. After any firmware update or device swap, re-run the calibration sequence to re-sync the data path from crank torque to pedal cadence, through the trainer, to Zwift. Finally, keep environmental variables steady: room temperature, fan usage, and bike placement can affect readings and should be controlled during calibration.
Compatibility and setup across trainer types
Most modern indoor trainers support some form of calibration. Direct-drive trainers generally offer spin-down calibration within the trainer app or the Zwift interface, while wheel-on trainers rely on the wheel sensor calibration plus tension adjustment. For smart trainers with built-in power meters, you may perform spin-down tests and use the Zwift pairing screen to confirm signal strength. If you use a separate power meter, calibrate it following the meter’s own recommendation, then verify readings in Zwift by performing a short, hard effort and comparing to the target power. For those using speed sensors with a connected cadence sensor, ensure your magnet position is consistent and the sensor alignment is correct. The important takeaway is to avoid mixing calibrations from different devices without validation. The Calibrate Point guidance emphasizes verifying results with a repeatable test protocol rather than relying on a single spin-down session.
Practical calibration workflow for indoor cycling setups
Our recommended workflow begins with a clean, warm-up-free environment: mount your bike securely, bring the trainer to a neutral resistance, and ensure tire pressure is consistent. Then update firmware for your trainer, sensor, and Zwift app. Connect all devices in Zwift, or use the dedicated trainer companion app if available. Run the calibration routine: for direct-drive, perform a spin-down, then compare the measured power to the target value; for wheel-on, verify speed calibration and cadence readings. Record the result, noting any deviations and environmental factors. If results are outside expected ranges, perform a second spin-down after checking cable connections and mounting tightness. The goal is a repeatable, stable power curve across sessions. After calibration, ride a short test block to validate the numbers in real riding conditions.
Interpreting results and when to recalibrate
Interpreting calibration results involves looking for consistency rather than chasing a perfect number. If power output remains within a narrow band across multiple spin-downs and test rides, you are likely well calibrated. Large deviations or inconsistent drift across sessions indicate a calibration issue, sensor misalignment, or a mounting problem. Temperature and equipment changes often require recalibration, especially after changing tires, lubing the chain, or moving the trainer. Calibrate Point recommends keeping a simple log of calibration events and test results to spot trends. If you notice persistent discrepancies after re-calibration, consider professional inspection of the trainer or sensor alignment.
Troubleshooting common calibration issues and pitfalls
Common problems include loose bike mounting, tire slip, sensor misalignment, and stale firmware. Start by re-checking the mounting and ensuring the trainer is on a stable surface; then verify sensor alignment and magnet position. Update firmware to the latest version and re-run the preset calibration. If spin-down results are consistently high or low, compare to a known reference or another sensor to isolate the fault. Finally, remember that calibrating is about repeatability across sessions; if your results differ between sessions, duplicate the setup as closely as possible and perform multiple tests for confidence.
Tools & Materials
- Zwift-compatible trainer(Direct-drive or wheel-on with power readings; ensure device is mounted securely)
- Speed sensor and cadence sensor(Check alignment and battery level)
- ANT+/Bluetooth dongle or built-in adapter(Needed for connections to Zwift on PC/mac)
- Smartphone or tablet with Zwift app(For in-app calibration prompts and pairing)
- Reliable power meter (optional)(If you own a separate power meter, calibrate it per its manufacturer guidelines and verify in Zwift)
- Tire pump and pressure gauge (wheel-on only)(Maintain consistent tire pressure during calibration)
- Trainer mat or stable mounting surface(Stability and noise reduction)
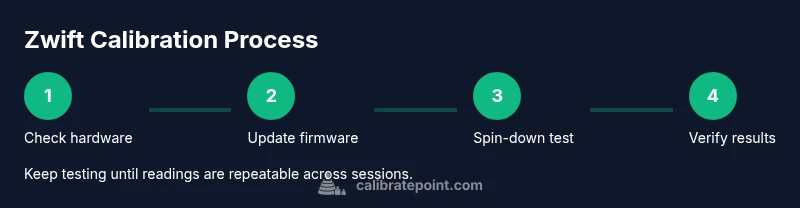
Steps
Estimated time: 20-40 minutes
- 1
Prepare setup and update firmware
Power on all devices and ensure the trainer is mounted securely. Check tire pressure if wheel-on and confirm that the trainer firmware, sensor firmware, and the Zwift app are up to date. This ensures compatibility with the calibration routines and reduces drift from outdated software.
Tip: Always update firmware before calibrating to ensure the calibration routines are compatible with the latest features. - 2
Connect devices and verify data streams
Pair the trainer and sensors in Zwift or the trainer companion app. Confirm that power, speed, and cadence fields show green and stable data without drops. This confirms a clean data path from pedal to screen.
Tip: Use stable USB/BT connections; avoid nearby wireless interferences during pairing. - 3
Run the calibration routine (spin-down or sensor check)
Initiate the trainer calibration flow. If you have a direct-drive trainer, perform a spin-down test as instructed; if wheel-on, complete wheel-speed calibration and cadence checks. Do not pedal during the spin-down to avoid skewing results.
Tip: Follow on-screen prompts precisely; consistency is key for repeatable results. - 4
Record results and compare to baseline
Log the measured power vs target across multiple attempts. Note any deviations and environmental factors (temperature, room airflow, mounting tightness). This helps identify when recalibration is needed.
Tip: Keep a dedicated calibration log to spot trends over time. - 5
Validate with a short test ride
Complete a brief ride at a steady power and compare the observed data to your expected zones. If readings drift, repeat steps or reassess hardware placement and connections.
Tip: Use a consistent test block to validate accuracy before hard workouts.
Questions & Answers
Do I need a separate power meter to calibrate Zwift?
Not always; Zwift supports calibration using trainer sensors. If you have a separate power meter, calibrate it according to the meter’s guidelines and verify within Zwift.
No, you don’t necessarily need a separate power meter. Zwift can calibrate using your trainer, but if you have one, calibrate it per its guidelines and check the results in Zwift.
How often should I calibrate Zwift?
Calibrate whenever you install a new trainer or sensor, after firmware updates, and when you notice inconsistent power readings. Regular checks help maintain data accuracy.
Calibrate when you change hardware or notice inconsistent data to keep readings reliable.
What should I do if spin-down results vary between sessions?
Check for mounting stability, tire pressure changes, and sensor alignment. Re-do spin-down after securing components and ensuring consistent conditions.
If results vary, re-check mounting and try again with the same setup.
Will calibration fix power drops during workouts?
Calibration helps accuracy but may not fix hardware faults like loose mounts or degraded sensors. Inspect hardware and connections.
Calibration helps, but it won’t fix bad hardware. Check mounts and sensors first.
What equipment is essential for Zwift calibration?
A stable trainer, connected sensors, and a device to run Zwift. Ensure firmware is up to date.
You’ll need a trainer, sensors, and a device with Zwift.
Can Zwift calibrate automatically?
Zwift guides you through calibration steps, but most hardware requires manual calibration via the trainer or companion app.
Zwift prompts you, but you usually calibrate with your hardware.
Watch Video
Key Takeaways
- Calibrate Zwift regularly to maintain power accuracy.
- Keep firmware and sensors up to date for reliable results.
- Use spin-down tests and sensor checks to validate readings.
- Document calibration events to track drift over time.
- Recalibrate after hardware changes to preserve data integrity.