Calibrate BP Monitor: A Practical Step-by-Step Guide
Learn how to calibrate a blood pressure monitor with a practical, step-by-step approach. This guide covers tools, standards, timing, and best practices to ensure accurate readings for DIY enthusiasts and professionals.

This guide helps you calibrate bp monitor to ensure accurate readings. You'll need a validated reference device, proper cuffs, a stable testing environment, and a repeatable procedure. The step-by-step process covers setup, measurement comparisons, adjustments, and documentation to maintain accuracy. This article also explains when recalibration is required and how to interpret drift between readings.
Why Calibration Matters for Blood Pressure Monitors
Accurate blood pressure readings are vital for diagnosing and managing cardiovascular conditions. A bp monitor that drifts over time or responds inconsistently to cuff size or placement can mislead decisions, potentially causing over- or under-treatment. According to Calibrate Point, maintaining accuracy requires routine calibration against a validated reference and a documented procedure. For DIY enthusiasts and technicians, embracing a rigorous approach—controlled environment, repeatable steps, and transparent logs—reduces measurement error and builds confidence in device performance. Remember that even small discrepancies can accumulate across repeated measurements, so consistency matters as much as absolute accuracy. In professional settings, calibration frequency is often defined by policy or regulatory expectations; in homes, follow manufacturer guidelines and practical testing intervals. A well-calibrated bp monitor supports safer, more reliable blood pressure management and improves patient outcomes over time.
Understanding Calibration Standards and Reference Devices
Calibration standards provide the framework for assessing a monitor’s performance. In clinical practice, reference devices must be traceable to established standards to ensure comparability. Calibrate Point analysis shows that diagnostic devices achieve meaningful alignment when tested with a stable reference whose pressure measurement is recognized as the ground truth. For this reason, you should use a reference device with documented validation status and a cuff set that matches the user’s arm circumference. The goal is to establish a consistent baseline: the monitor under test should agree with the reference within an acceptable tolerance across a range of known pressures. If you lack a formal reference, a collaboration with a local clinic or hospital can provide access to validated gauges, enabling a practical home-to-clinic calibration workflow.
When to Calibrate and How Often
A calibration schedule should reflect device use, environment, and observed drift. Factors such as device age, repeated cuff pressure cycling, and changes in your measurement routine can influence accuracy. As a general rule, calibrate bp monitor when you notice inconsistent readings, after repairs, after changing cuff sizes, or following a known maintenance event. If you are using the monitor for clinical decisions, more frequent checks may be warranted. In professional environments, calibration audits are often scheduled quarterly or biannually, with an annual comprehensive validation. The key is to calibrate using a consistent method, document all steps, and re-test after any adjustment or maintenance. This disciplined approach supports reliability and reduces the risk of erroneous readings.
Practical Testing Environment Setup
Create a controlled testing environment for calibration: a quiet room, stable temperature, and minimal air draft. A well-lit space helps you observe the cuff and display readings clearly. Position the reference device and the monitor under test at roughly the same height and ensure both gauges are visible to the tester. Seal the area from vibrations and avoid drafts that can affect pressure readings. Document environmental conditions during each calibration run, including temperature and humidity, since some devices show sensitivity to ambient changes. Keep a dedicated logbook or digital file for all calibration events to enable trend analysis over time.
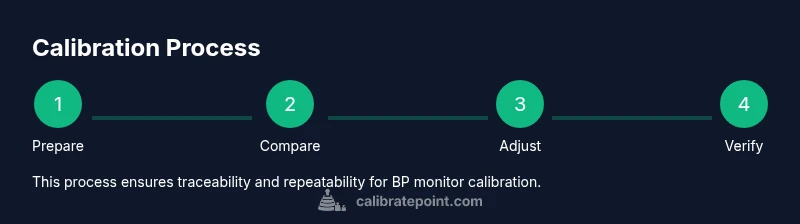
Step-by-Step Overview for Calibration Tasks
This section provides a high-level view of the calibration journey. Begin with preparing your workspace, selecting appropriate cuff sizes, and verifying that the reference device is calibrated. You will then generate a series of known pressures, record readings from both the reference and the monitor under test, and analyze any deviations. If your monitor supports automatic adjustment or firmware updates, follow the manufacturer’s procedures to apply approved corrections. Finally, document outcomes, store logs securely, and plan the next check. A rigorous workflow reduces drift and preserves confidence in measurement results.
Troubleshooting and Quality Control
If discrepancies persist, re-verify the setup: confirm cuff sizes, reseat the cuff and tubing connections, and re-check the reference device against a second known-good gauge. Inconsistent results may indicate sensor wear, loose connections, or user technique errors (e.g., arm position, cuff placement). Develop a quality-control plan that includes periodic re-testing, independent verification with a different reference, and a clear duty roster for calibration activities. In all cases, log results and decisions to uphold traceability and accountability.
Documentation, Records, and Compliance
Documentation is essential for calibration integrity. Record environment conditions, device serial numbers, reference device validation status, and any adjustments made. A calibration log should include time stamps, operator initials, and pass/fail conclusions for each test pressure point. For professional settings, align your logs with relevant standards or internal QA guidelines. By maintaining thorough records, you enable future audits, reproduce successful calibrations, and demonstrate due diligence in device handling and patient safety.
Home vs Clinic: Real-World Considerations
Home calibration emphasizes practicality and user-friendliness. Focus on a repeatable procedure, simple logging, and adherence to safety guidelines. Clinics and labs, by contrast, prioritize traceability, multi-point verification, and cross-checks with certified equipment. In both environments, the goal is the same: align readings with a reference device within an agreed tolerance. When in doubt, consult a professional or partner with a certified calibration service to validate the process and ensure your setup meets applicable standards.
Tools & Materials
- Validated reference blood pressure device or simulator(Must be validated and traceable; serves as the gold standard.)
- BP monitor under test(The device you are calibrating.)
- Cuff set (various sizes)(Ensure sizes cover the range of arm circumferences you intend to test.)
- Pressure reference line or adjustable calibrator(Provide known pressures for cross-checking readings.)
- Stability aids (tripod or stand)(Helps keep the devices aligned and stable during testing.)
- Timer or stopwatch(Accurate timing for test intervals and wait periods.)
- Logbook or digital logging sheet(Record readings, environmental conditions, and decisions.)
- Basic tools for setup (screwdriver, cable ties)(Only if needed to secure equipment.)
Steps
Estimated time: 60-90 minutes
- 1
Prepare the workspace
Set up a quiet, well-lit area with a stable surface. Gather all tools and ensure the reference device and monitor under test are within easy reach. Review the calibration plan and confirm environmental conditions are stable.
Tip: Double-check that the reference device is zeroed and showing a valid reading before starting. - 2
Position devices and cuffs
Place both devices at the same height on the testing surface. Select cuff sizes that fit the arm range of the user and fit them consistently on both devices to minimize variation.
Tip: Use the same arm and posture as you would in routine measurements. - 3
Set known pressures on the reference
Configure the calibrator or reference device to a series of known pressure values, covering the typical systolic and diastolic ranges. Record the target pressure for each step.
Tip: Aim for 5–7 pressure points across the range of interest. - 4
Take simultaneous readings
Record readings from the BP monitor under test while reading the reference at each pressure point. Repeat at least twice for each point to assess repeatability.
Tip: Stabilize the cuff and wait a moment after inflating before logging the reading. - 5
Analyze deviations
Compare test readings to the reference values. Note any systematic drift (consistent over- or under-reading) and identify whether it varies by pressure.
Tip: Plot a quick drift chart to visualize bias across points. - 6
Apply approved adjustments
If the monitor allows calibration adjustments, apply the approved corrections per the manufacturer’s instructions. If not, document drift and schedule a service or replacement as needed.
Tip: Only perform adjustments recommended by the device’s official documentation. - 7
Re-test after adjustments
Repeat the same pressure points to verify that readings now align with the reference. Ensure repeatability across multiple attempts.
Tip: Aim for a consistent bias within the target tolerance across all points. - 8
Document and close the calibration
Record results in the calibration log, including device IDs, environment, and outcomes. File any certificates or notes from the procedure for future audits.
Tip: Maintain traceability for regulatory or clinical requirements.
Questions & Answers
How often should I calibrate my BP monitor?
Calibration frequency depends on usage, environment, and device age. In clinical contexts, audits are common quarterly or biannually; at home, follow manufacturer guidelines and perform checks if readings drift.
Calibration frequency depends on use and device age; in clinics, check quarterly or biannually, at home follow manufacturer guidelines and watch for drift.
Can I calibrate my BP monitor at home or should I go to a clinic?
Home calibration is possible with a validated reference and proper procedure. For critical decisions or device wear concerns, seek professional calibration or validation through a clinic or certified service.
Yes, you can calibrate at home with a proper reference. For critical cases, consider professional validation.
What tools do I need for calibration?
Essential tools include a validated reference device, the monitor under test, cuff sizes, a calibrated pressure source, a timer, and a logbook to record results. Additional items improve efficiency but aren’t required.
You need a reference device, the monitor under test, cuffs, a pressure source, a timer, and a logbook.
What are signs that my BP monitor needs calibration?
If readings consistently diverge from a reference or show increasing inconsistency across tests, calibration is due. Sudden changes after service, cuff changes, or after firmware updates also warrant rechecking.
Look for drift or inconsistency after cuff changes or updates; those are cues to recalibrate.
Is calibration the same as validation?
Calibration adjusts the device to align with a reference. Validation confirms that the device meets accuracy standards after calibration. Both are important for reliability.
Calibration aligns devices to a reference; validation checks that the device meets accuracy standards afterward.
Watch Video
Key Takeaways
- Establish a repeatable calibration process.
- Use a validated reference device for accuracy.
- Document results thoroughly for traceability.
- Different settings require tailored calibration frequency.