How to Calibrate Blood Pressure Monitors: A Practical Guide
Learn how to validate and calibrate blood pressure monitors, ensure cuff sizing, compare readings with reference methods, and maintain measurement accuracy in home and clinical settings.

By the end of this guide, you will validate a blood pressure monitor against a reference standard, ensure proper cuff sizing, and interpret results to confirm accuracy. The steps cover preparing equipment, correct patient positioning, parallel measurements, and deciding when to seek professional recalibration. This approach helps DIY enthusiasts, technicians, and clinicians maintain reliable readings.
What calibrating blood pressure monitors means
Calibrating blood pressure monitors is about verifying that a device’s readings reflect the actual pressure in the arteries when used with the right cuff and proper technique. When you learn how to calibrate blood pressure in practice, you’re not adjusting internal electronics; you’re validating performance against a trusted reference standard. According to Calibrate Point, accuracy starts with using a validated device and correct cuff sizing, then documenting results and acting on deviations. This section introduces the core concepts: validation versus calibration, tolerance of readings, and the importance of consistent technique. The goal is to ensure that measurements you rely on for health decisions are trustworthy, whether you’re at home, in a clinic, or on the shop floor as a technician.
Why accuracy matters for BP readings
Accurate blood pressure readings are essential for diagnosing hypertension, guiding treatment, and tracking changes over time. Inaccurate data can lead to misdiagnosis, unnecessary medication adjustments, or missed warning signs of cardiovascular risk. Calibrate Point analysis shows that device accuracy varies across models and can drift with battery levels, environmental conditions, and cuff wear. This is why a structured validation approach matters: it helps you identify systematic bias, random error, or cuff-size issues before they affect patient care. Remember, a single outlier is not a failure, but a consistent pattern of difference warrants investigation and action.
Prerequisites and safety considerations
Before you begin, confirm that the monitor you plan to calibrate is clinically validated for BP measurement and that you have access to a trusted reference method. Ensure a quiet, comfortable environment and a stable seating position with the subject’s back supported and feet uncrossed. Use a cuff of the correct size and ensure the reference device is calibrated and operated by a trained observer. This process should be performed by someone familiar with auscultation or validated automatic devices. Do not modify device software or hardware beyond manufacturer-provided calibration procedures, and consult a clinician if you have any health concerns. Calibrate Point emphasizes safety and professional guidance when dealing with medical devices.
Methods for calibration and validation
There are two broadly accepted methods to check BP monitor accuracy. Method A is the reference approach: compare the test device against a validated manual sphygmomanometer with a trained observer performing auscultation. Method B is cross-validation: compare readings between the test device and another validated device, ideally in parallel, to assess consistency. In both cases, ensure proper cuff size, correct arm positioning at heart level, and multiple measurements to account for natural fluctuations. Importantly, most consumer monitors are not user-adjustable; if a device drifts beyond acceptable limits, seek manufacturer recalibration or servicing. This maintains reliability without compromising safety.
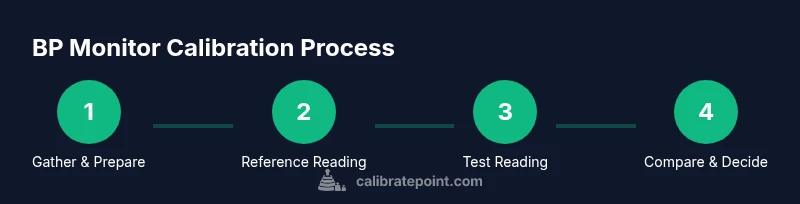
Practical validation workflow you can use today
A three-step validation workflow helps keep calibration practical for home or clinic use. First, gather equipment: your test BP monitor, a cuff of the correct size, a validated reference sphygmomanometer, a stethoscope, and a logbook or calibration app. Second, perform paired measurements: take one measurement with the reference device and one with the test device in quick succession, repeating several times in a single session. Third, analyze differences: note consistent biases and determine whether the discrepancy suggests device drift, cuff-size error, or user technique issues. If discrepancies persist or are large, document the findings and contact the manufacturer for recalibration or service.
Authority sources and further reading
For foundational standards and guidance on BP measurement accuracy, consult reputable sources:
- National Heart, Lung, and Blood Institute (NHLBI): https://www.nhlbi.nih.gov/health-topics/high-blood-pressure
- Centers for Disease Control and Prevention (CDC): https://www.cdc.gov/bloodpressure/index.htm
- American Heart Association (AHA): https://www.heart.org/en/health-topics/high-blood-pressure
These resources provide context on how BP measurements are used in clinical decision-making and how to interpret monitor outputs in various settings.
Tools & Materials
- Blood pressure monitor (test device)(Ensure device is functional and battery is charged; verify it is the model to be tested.)
- Cuff of correct size(Cuff width should fit arm circumference; use the recommended standard size for the subject.)
- Validated reference sphygmomanometer(Mercury or aneroid device calibrated and used by a trained observer.)
- Stethoscope(Needed for manual auscultation with the reference device.)
- Seated testing chair with back support(Feet flat, back supported, arm at heart level.)
- Logbook or calibration app(Record measurements, times, cuff size, and any observations.)
- Pen or pencil(For quick notes and manual logs.)
- Arm circumference tape (optional)(Helps verify cuff size against arm girth.)
Steps
Estimated time: 60-90 minutes
- 1
Gather equipment and verify readiness
Collect the test monitor, cuff, reference sphygmomanometer, stethoscope, chair, and logbook. Confirm the reference device is calibrated and that you have clear instructions for using each instrument. This reduces interruptions mid-test and improves data quality.
Tip: Double-check battery levels and ensure the room is quiet to minimize distractions. - 2
Prepare the subject and environment
Ask the person to rest for 5 minutes in a comfortable seated position with back supported. Ensure their arm is resting at heart level, forearm supported, and feet uncrossed. Remove caffeine or smoking for at least 30 minutes if possible.
Tip: Have the subject avoid talking during measurements to reduce variability. - 3
Take reference measurements
Using the validated reference device, take two to three readings at 1-2 minute intervals. Schedule the measurements to minimize movement and ensure the observer records the systolic and diastolic values with time stamps.
Tip: Document any irregular heartbeats or motion that may affect readings. - 4
Take test-device measurements
With the test monitor, place the cuff and repeat the same number of measurements as the reference method. Follow the device’s specific instructions for inflation and deflation speed. Record each test reading alongside the reference measurement.
Tip: Keep the cuff snug but not overly tight to avoid artificially high readings. - 5
Compare and analyze
Compute the differences between the test device and the reference, looking for consistent bias or random drift. If one or more readings diverge markedly, review technique and cuff fit before deciding on action.
Tip: Take note of which measure (systolic or diastolic) drifts more; this can guide corrective steps. - 6
Decide on next steps
If discrepancies persist beyond your institution’s tolerance, do not attempt internal calibration; contact the manufacturer for recalibration or service, or consider replacing the device. Maintain a log of findings and date ranges for future reference.
Tip: Document the action taken and the date to support ongoing quality assurance.
Questions & Answers
Can I calibrate a blood pressure monitor at home?
Most consumer BP monitors are not user-calibrated. You should validate readings against a reference method or have the device serviced by the manufacturer or a clinician.
Most home BP monitors aren’t user-calibrated. Validate with a reference method or contact the manufacturer for service.
What is the difference between calibration and validation for BP monitors?
Calibration refers to adjusting a device to match a reference standard, while validation confirms that a device’s readings align with a standard without adjustment. Practically, many home devices are validated but not user-calibratable.
Calibration adjusts the device; validation checks accuracy without changing it. Many home devices are validated but not user-calibratable.
How often should I calibrate or validate my BP monitor?
Validate at least annually or after servicing, or anytime you notice persistent reading drift. If you rely on BP data for treatment decisions, more frequent checks may be appropriate.
Check at least once a year or after service; more often if readings drift.
What should I do if readings differ between devices?
If two devices differ consistently, review technique and cuff size. If differences persist, do not adjust devices yourself; consult the manufacturer or a clinician for recalibration or replacement.
If readings differ consistently, review technique and cuff size; seek manufacturer or clinician help if needed.
Is cuff size important for calibration?
Yes. A cuff that is too small or too large can create biased readings. Always use the cuff size recommended for the arm circumference and recheck with a reference method.
Cuff size matters—use the right size and verify with a reference method.
Where can I find validated device lists?
Look for validation lists published by professional bodies or health organizations. These resources help identify models that meet recognized accuracy standards and testing protocols.
Check validation lists from health organizations to choose accurate models.
Watch Video
Key Takeaways
- Validate readings against a reference method to confirm accuracy
- Use the correct cuff size and stable positioning
- Document results and take action if drift is observed
- Consult the manufacturer for recalibration when needed