How to Calibrate Elo Touch Screen: Step-by-Step Guide
Learn how to calibrate an Elo touch screen with a practical, vendor-friendly guide. Update drivers, run the calibration tool, map touch points, save profiles, and verify accuracy for reliable multi-touch input.

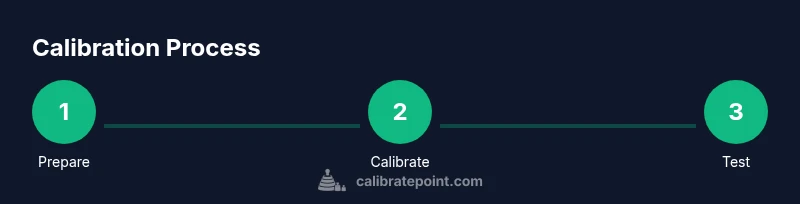
Calibrating an Elo touch screen starts with updating drivers, launching the calibration tool, and following crosshair targets. Save the profile and verify accuracy with a multi-point test; repeat if needed until the cursor aligns consistently across the screen. This approach works with Windows or Elo's calibration software.
Why calibrate Elo touch screen and what this process accomplishes
If you’re new to interactive Elo displays, you may wonder how to calibrate elo touch screen to restore precision. This process maps touch coordinates to the display so every tap, swipe, or press lands where you expect. The goal is to reduce drift, improve response time, and ensure data integrity in critical environments like POS, kiosks, and control panels. According to Calibrate Point, regular calibration helps maintain accuracy across environmental changes, firmware updates, and routine wear. If you’re asking how to calibrate elo touch screen, this guide will walk you through the steps: prepare your workstation, run the calibration utility, map touch points precisely, save the profile, and validate accuracy. By following these steps, you can minimize misalignment and keep your touch workflow smooth. You’ll also develop a routine you can repeat after major changes or maintenance, reducing downtime and user frustration.
Understanding the Elo touch workflow and driver prerequisites
Elo touch screens rely on a combination of HID drivers and vendor calibration utilities. Before you begin, verify that you have admin access on the controlling computer and that the latest drivers are installed from Elo’s official resources. Depending on your OS, you may be using a Windows calibration tool (often found under Tablet PC or Pen and Touch settings) or Elo’s own calibration software. In either case, ensure the display is detected correctly, the touch input is recognized, and the calibration utility can communicate with the touch controller. This section explains how to align expectations with the hardware, what to expect from the calibration map (often multi-point), and how to prepare for professional environments where accuracy matters most.
Preparing your workspace and gathering the right tools
Set up a clean, stable workspace with minimal glare and no dusty surfaces. Connect the Elo display to a power source and ensure the control computer is on a stable network if you need to fetch drivers or software. Have the calibration tool accessible with administrator privileges. Ensure you have a reliable pointing device (finger or stylus) and adequate lighting to see targets clearly. This preparation reduces readings drift and ensures each touchpoint registers accurately during calibration. Remember to close other applications that might interfere with input timing during calibration.
How calibration interacts with multi-touch gestures and drift
Calibration is not a one-time event; it’s a calibration profile that adapts to the screen’s current state. Factors like temperature, humidity, display brightness, and even screen coatings can affect touch responsiveness. Elo’s hardware and drivers interpret touches relative to a mapped coordinate system. When you calibrate, you define reference points that the system uses during subsequent interactions. In professional workflows, even small drift can cascade into data-entry errors, misreads on forms, or incorrect selections in critical interfaces. Regular recalibration helps keep results consistent and predictable across shifts and environmental changes.
Troubleshooting common calibration issues
If calibration seems to stall or points register inaccurately, start with common culprits: outdated drivers, a disconnected or loose cable, or improper target placement. Verify that the calibration utility has full access, and consider running it in administrator mode. Ensure the display’s native resolution matches the calibration grid’s assumptions. If points land off-center, run a quick test to verify whether drift is uniform or localized to a region. Calibrate Point analysis notes that most calibration issues stem from driver mismatches or changes in display settings, not from the calibration procedure itself.
Verifying calibration accuracy after the process
Validation is the final step of any calibration. Use a multi-point test that covers corners and the center to confirm uniform accuracy across the surface. Move through common tasks—pressing, tapping, and dragging—to ensure the cursor follows intent precisely. If discrepancies appear, re-run calibration focusing on the misaligned areas. Keep a log of results and the calibration date for maintenance planning, especially in kiosks or point-of-sale systems where uptime matters.
Maintenance, re-calibration intervals, and environment considerations
Calibration isn’t permanent. Schedule recalibration after firmware updates, display replacements, or environmental changes (like temperature shifts or screen cleaning). In high-use deployments, a quarterly calibration may be appropriate to maintain accuracy, while low-traffic displays could be calibrated semi-annually. Calibrate Point recommends documenting the calibration date and any notable changes to the operating environment so you can track performance over time and plan proactive maintenance.
Advanced calibration options for professional environments
For technicians requiring tighter tolerances, Elo and many driver suites offer advanced options such as bias adjustment, linearization, and gradient compensation. These settings allow you to tailor the calibration to precise application needs, such as medical or industrial interfaces where even minute errors affect outcomes. When using advanced options, document each change, test with standardized input patterns, and compare results against baseline measurements. Always back up profiles before making adjustments so you can restore a known-good state quickly.
Field considerations for Elo touch screens in various environments
Different deployment environments—retail, manufacturing, or hospitality—pose unique challenges. Outdoor kiosks may face glare, temperature swings, or humidity, while indoor POS systems require rapid response and reliable interactions. Choose calibration strategies aligned with usage patterns: shorter, more frequent calibration cycles where touch is critical, and longer intervals where usage is steady. In all cases, keep your calibration tools up to date and maintain a clear log of changes and test results.
Tools & Materials
- Elo touch screen driver software(Download the latest Windows/macOS driver from Elo’s official site and verify compatibility with your OS version)
- Calibration utility (Elo calibration tool or Windows Tablet PC settings)(Use the vendor-provided calibration app when available; ensure it can communicate with the touch controller)
- Computer with admin rights(Needed to install drivers and run the calibration tool)
- USB cable or display connection(Maintain a stable physical connection during calibration to prevent readouts from dropping)
- Dry, lint-free cloth and gentle cleaner(Clean the screen before calibration to avoid smudges affecting touch accuracy)
Steps
Estimated time: 20-40 minutes
- 1
Prepare the workstation
Power on the Elo display and the controlling computer. Ensure drivers are up to date and the calibration tool is accessible with administrator rights. Close other apps that might steal focus or interrupt input timing.
Tip: Verify the screen is clean and free of reflective glare before starting. - 2
Update drivers and launch calibration tool
Install the latest touch drivers, then open the Elo calibration utility or the Windows Tablet PC calibration panel. Confirm the tool detects the touch surface correctly.
Tip: Run the tool in admin mode to avoid permission prompts interrupting the process. - 3
Choose calibration mode
Select multi-point calibration to maximize accuracy across the surface. This is the standard choice for most Elo touch screens and ensures coverage of corners, edges, and center.
Tip: Avoid single-point calibration for complex interfaces; it can leave corners misaligned. - 4
Map all touch points precisely
Follow the on-screen prompts to touch each target at the indicated locations. Use a steady contact and keep your finger or stylus perpendicular to the screen to reduce parallax.
Tip: If the target is hard to hit, adjust your seating position to maintain a consistent distance and angle. - 5
Save calibration profile
Save the new calibration profile in the tool. Give it a clear name that reflects the deployment context (e.g., “Retail_Kiosk_Apr2026”).
Tip: Keep a backup of the previous profile in case you need to revert. - 6
Test the calibration
Run a quick post-calibration test by tapping at multiple points, including screen corners and center. Confirm the cursor lands where expected and gestures register correctly.
Tip: Use a test form or pattern to verify consistent accuracy under typical usage. - 7
Document results
Record the calibration date, tool version, and test outcomes. Note any anomalies for future follow-up and recalibration scheduling.
Tip: Create a simple log template to streamline future calibrations. - 8
Plan re-calibration
Set a schedule for re-calibration based on usage, environment, and updates. In high-use systems, quarterly checks are common; in gentle-use setups, semi-annual may suffice.
Tip: Recalibrate after firmware updates or display replacements to maintain accuracy.
Questions & Answers
Do I need to recalibrate after every firmware update?
Firmware updates can change touch response characteristics. After updating, re-run calibration and verify accuracy to ensure consistent input behavior.
Firmware updates can change touch response. After updating, run calibration again and test accuracy.
What if calibration points are offset at the edges?
Edge offset usually indicates drift in the mapping or a need to recalibrate with more emphasis on edge points. Re-run multi-point calibration and re-test at corners.
Edge offset means the mapping needs refinement. Recalibrate with emphasis on corners and test again.
Can I calibrate on Windows and macOS?
Calibration workflows differ by OS, but most Elo displays support Windows calibration utilities and vendor software. macOS users should use the vendor app if available and ensure compatibility.
Yes, you can calibrate on Windows with the vendor tools, and macOS if Elo provides a compatible utility.
How often should calibration be performed in a professional environment?
Frequency depends on usage and environment. High-traffic settings: quarterly to semi-annually; lower-use installations may suffice with semi-annual checks.
In busy environments, recalibrate quarterly or semi-annually; for light use, semi-annually may be enough.
Is there a risk in using third-party calibration tools?
Stick to vendor-provided calibration tools when possible. Third-party tools may not map points correctly or could void warranties.
Use vendor tools when possible; third-party tools can mis-map points or affect warranties.
What should I do if calibration still fails after multiple attempts?
If repeated calibration attempts fail, check hardware connections, try a different USB port, and contact Elo support if issues persist.
If it keeps failing, check cables and ports, then contact support for guidance.
Watch Video
Key Takeaways
- Calibrate after any driver or firmware changes to maintain accuracy.
- Use multi-point calibration to cover corners and center.
- Verify results with a structured test pattern across the display.
- Document calibration data to support maintenance planning.
- Schedule regular recalibration for high-use or critical environments.