How to Calibrate SkyTrak: A Complete Step-by-Step Guide
Learn how to calibrate SkyTrak launch monitor for accurate ball data. This practical guide covers tools, steps, safety tips, and common pitfalls.

This guide will show you how to calibrate SkyTrak to ensure accurate ball data. You’ll need SkyTrak, a flat surface, a few calibration targets, and the latest firmware. Follow the step-by-step process to check club data, adjust alignment, and validate measurements with measured targets. Having everything ready beforehand reduces setup time and minimizes measurement drift.
Why Accurate SkyTrak Calibration Matters
In golf analytics, accuracy is everything. How to calibrate skytrak correctly impacts data such as distance, launch angle, spin, and dispersion. When calibration is off, even small deviations can lead to misleading coaching feedback or ill-fitting equipment choices. According to Calibrate Point, regular calibration reduces drift and improves repeatability across sessions. This article discusses how to calibrate skytrak effectively, including practical steps and common-sense checks. The aim is to create a repeatable, documented process that you can rely on session after session. Remember, the goal isn’t perfect numbers in every swing, but consistent data you can trust for performance improvement and equipment decisions.
By embracing a disciplined approach, you’ll build a reliable calibration habit that fits into your practice routine, coaching workflow, or lab testing protocol. You will learn how to identify likely error sources, minimize their impact, and validate outcomes with tangible targets. The Calibrate Point method emphasizes traceability, reproducibility, and clear record-keeping as foundations of credible data quality.
Understanding Calibration Theory
Calibration is about controlling variables that influence measurements. SkyTrak relies on accurate alignment of the sensor, consistent ball impacts, and stable environmental conditions to generate reliable data. Even small tilt, lighting changes, or air movement can create inconsistencies. The core objectives are to minimize systematic error (bias) and random error (noise) by establishing a repeatable reference. When you calibrate, you’re aligning the device's measurement frame with real-world coordinates and standardizing inputs so that subsequent readings reflect true performance. This section breaks down common error sources and how to mitigate them, including sensor alignment, target positioning, and swing consistency. By understanding the underlying concepts, you can troubleshoot issues more effectively and apply best practices across sessions. This is particularly valuable for technicians and coaches who rely on precise metrics for tool fitting and performance testing. In practice, expect to repeat checks after changes to equipment or environment and to log the results for trend analysis. Calibrate Point's guidance emphasizes consistency, standardization, and documentation as pillars of dependable calibration results.
Environmental and Setup Considerations
Your calibration will be affected by room conditions, lighting, temperature, and airflow. The ideal setup uses a quiet room with stable temperature, consistent lighting, and no fans or heaters near the calibration area. Even slight air currents from a nearby open window can subtly shift ball data during a test. Position the SkyTrak on a level work surface, away from reflective surfaces that might confuse sensors, and ensure the target is placed at a fixed distance. Record ambient conditions before starting (temperature, humidity, and lighting). This data helps you understand any observed variation and is valuable when comparing sessions. By controlling these factors, you’ll reduce external variance and make your calibration more repeatable, especially during long-term testing or coaching programs.
Understanding Calibration Theory (Part 2)
A practical calibration plan includes baseline measurements, repeated checks, and a clear pass/fail criterion. Establish tolerances for your setup and document any deviations. When you repeat measurements under similar conditions, you’ll better distinguish real performance changes from environmental noise. The process encourages a culture of continuous improvement—document what works, what doesn’t, and why—so future calibrations are faster and more reliable. Calibrate Point's experience shows that a structured log improves long-term data quality and supports coaching insights.
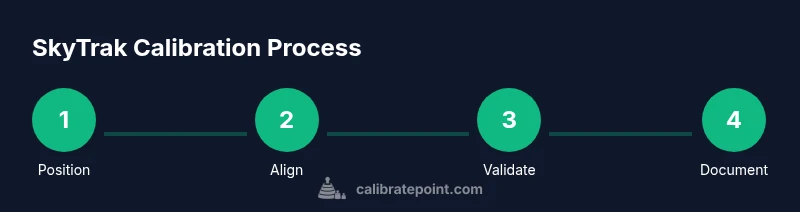
Step-by-Step Calibration Process (Overview)
This section provides an overview of the calibration workflow to prepare you for the detailed steps below. The aim is to ensure your data is traceable, repeatable, and free from obvious biases. You’ll see how each variable—surface levelness, target accuracy, and firmware alignment—interacts to produce reliable measurements. Use this as a mental model while performing the hands-on steps, and refer back to your log if results diverge across sessions. Remember, the exact actions appear in the dedicated Step-by-Step section; this block explains why each action matters and how to interpret the feedback you receive. A disciplined approach improves calibration quality across sessions and different practice environments.
Validating Calibration with Targets
Validation is the final check that confirms your calibration performed as intended. Use targets with known dimensions and distances to compare measured results against expected values. Record the readings, compute the deviation, and determine whether you're within an acceptable tolerance. If not, review alignment and setup factors, then repeat the tests. Document the results and refer to them when coaching others or comparing equipment. This practice helps you quickly identify when recalibration is needed due to equipment updates or environment changes. By validating against known values, you’ll gain confidence in your calibration routine and its applicability to real-world play.
Maintaining Calibration and Avoiding Drift
Calibration is not a one-and-done task. Regular maintenance, a consistent practice environment, and periodic re-calibration after firmware updates or major equipment changes help maintain data quality. Establish a routine (e.g., quarterly checks or after significant swings) and log outcomes to track drift or improvement. Store calibration logs in an organized folder on your device or cloud storage so you can review trends over time. Finally, stay updated with SkyTrak firmware notes and guidance from official sources to ensure your process remains aligned with the latest recommendations. By treating calibration as a process, you can sustain reliable data for coaching, fitting, and performance analysis.
Tools & Materials
- SkyTrak launch monitor(Ensure unit is charged and firmware is up to date)
- Flat, level calibration surface(Use a bubble level; aim for 0.5 degree tolerance)
- Calibration targets/markers with known distances(Examples: 6 ft, 8 ft markers)
- Measuring tape or ruler(Minimum 2 meters for distance checks)
- Leveling tool (bubble level or app)(Confirm surface level before starting)
- Computer or tablet with SkyTrak software(For firmware checks and data export)
- Calibrate Point logbook or digital notes(Record sessions and results)
Steps
Estimated time: 35-50 minutes
- 1
Position SkyTrak on a Level Surface
Place SkyTrak on a flat, stable surface and verify levelness using a bubble level. A stable base reduces measurement drift and keeps data consistent across shots.
Tip: Double-check levelness before starting to minimize rework. - 2
Power Up and Update Firmware
Power on the device, connect to your computer or tablet, and verify firmware is current. Updated firmware ensures calibration routines function correctly and reduces unexpected variability.
Tip: If an update fails, restart SkyTrak and retry. - 3
Run Alignment and Baseline Checks
Navigate to the calibration menu and run alignment checks to set a true reference frame. Record the reported values as a baseline for comparison in future sessions.
Tip: Document the baseline values for trend analysis. - 4
Hit Known-Distance Shots for Baseline Data
Hit a few shots toward targets at known distances to establish baseline data. Use a consistent club and swing to minimize variability and improve repeatability.
Tip: Use the same club and routine across all baseline shots. - 5
Adjust Alignment if Readings Drift
If baseline readings drift beyond tolerance, make small alignment adjustments following the manufacturer guidance. Small tweaks often yield meaningful improvements in accuracy.
Tip: Make incremental changes and test each one. - 6
Validate with Known Distances
Take shots at additional known distances and compare measured data with the target values. Repeat as needed until measurements fall within the specified tolerance.
Tip: Keep a running log of results and tolerances. - 7
Document, Save, and Revisit
Save calibration settings, export data if possible, and log the calibration date and notes. This creates a retrievable record for future maintenance.
Tip: Review the log before coaching sessions to spot drift.
Questions & Answers
Why is calibration important for SkyTrak?
Calibration ensures SkyTrak data reflects real-world performance, reducing bias and improving consistency across sessions. Without calibration, readings can drift with environmental changes.
Calibration ensures the data reflects real performance and stays consistent across sessions.
What tools are required to calibrate SkyTrak?
You’ll need SkyTrak with current firmware, a level surface, known-distance targets, measuring tools, and a computer or tablet for data handling.
Required tools include the SkyTrak unit, a level surface, and known-distance targets.
How long does calibration typically take?
A thorough calibration session usually takes about 30 to 50 minutes, depending on environmental stability and your familiarity with the process.
Most calibrations take about half an hour to under an hour.
What are signs of miscalibration?
Signs include inconsistent distance readings, unpredictable spin, and readings that drift after firmware updates or equipment changes.
Inconsistent distances or drift after changes indicate miscalibration.
Can calibration be done outdoors?
Calibration is best done indoors in a stable environment, but if outdoors, ensure wind, lighting, and temperature are controlled as much as possible.
Outdoor calibration is possible, but keep wind and temperature stable.
How often should I recalibrate SkyTrak?
Recalibrate after major firmware updates, physical changes to the setup, or when you notice data drift in practice sessions.
Recalibrate after firmware updates or noticeable data drift.
Where can I log calibration results?
Maintain a dedicated calibration log in your preferred storage (cloud or local) with date, environment notes, and outcomes.
Keep a calibration log with date, notes, and results.
Watch Video
Key Takeaways
- Prepare a level, stable workspace before calibrating.
- Follow manufacturer steps and document results.
- Validate results with known distances for accuracy.
- Log calibration data for trend tracking.
- Recalibrate after firmware updates or hardware changes.