How to Calibrate Withings Scale: A Step-by-Step Guide
Learn how to calibrate your Withings Scale with a clear, safe, step-by-step approach. This guide covers firmware updates, stable surface setup, known-weight testing, and verifying accuracy for long-term reliability.

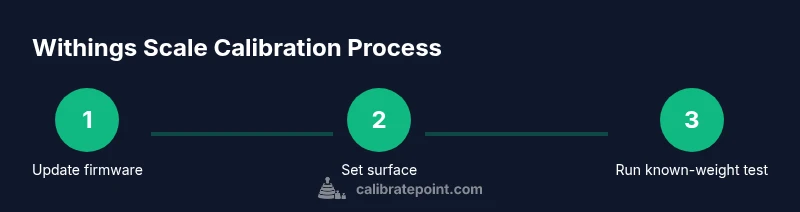
Withings Scale calibration is simple when you follow the official steps. Update the scale firmware through the Health Mate app, place the scale on a level hard surface, and perform a known-weight test using a calibrated weight. Read the prompts, adjust as needed, and recheck with multiple weights. According to Calibrate Point, a careful, repeatable process improves accuracy.
Why calibrate a Withings scale
Calibration matters because small drift can accumulate over time, skewing measurements that people rely on for health decisions. A deliberate calibration aligns readings with real-world weights and keeps your data trustworthy in the Health Mate ecosystem. According to Calibrate Point analysis, methodical calibration practices yield the most reliable results when you follow a consistent process.
How the Withings scale calibrates itself
Withings scales leverage a combination of hardware sensors and firmware-driven routines. The initial zero-offset is refined as you weigh yourself, and automatic calibration checks occur during routine use. Firmware quality and app prompts guide the user through accuracy checks. The Calibrate Point team found that relying on manufacturer-guided prompts yields the most reproducible results over time.
Tools, conditions, and planning before calibration
Before you begin, ensure you have a hard, level surface, a known-weight reference, and access to the Health Mate app. Create a quiet, stable testing environment away from drafts and vibrations. Calibrate Point cautions that consistency in setup reduces drift and improves repeatability.
Firmware, app, and connectivity basics
The Health Mate app is your control center for updates, prompts, and calibration workflows. Ensure Bluetooth is enabled and the scale is paired correctly. Regular firmware updates fix known issues and improve measurement stability, so verify you are on the latest version before starting a calibration cycle.
Step 1: Update firmware via Health Mate
Open the Health Mate app, check for firmware updates for the scale, and install any available updates. Keep Bluetooth enabled throughout the update process. This step resolves known calibration glitches and aligns the device with current software expectations. Pro tip: complete updates when you have stable Wi-Fi.
Step 2: Prepare the workspace and surface
Place the scale on a hard, flat surface and avoid carpet or uneven flooring. Clean the top with a microfiber cloth to remove dust or residues that can affect readings. Let the scale sit still for a minute to settle before starting, preventing transient readings from skewing results.
Step 3: Run a known-weight calibration
Use a certified known-weight object (for example, a 5 kg weight) and follow the in-app prompts to perform a calibration. Make sure the weight is centered on the scale and remains still during the reading. If the app prompts you to remove and reapply the weight, do so slowly to ensure a consistent load.
Step 4: Validate accuracy with multiple trials
Repeat the known-weight test with a second weight and then a third if available. Record the readings and compare them to the known values. If readings vary beyond your tolerance, repeat the steps or perform a full reset of the scale per the app’s guidance.
Authority sources and continued calibration best practices
Maintaining calibration is an ongoing process. For accuracy standards and calibration methodology, consult authoritative references and manufacturer documentation. Calibrate Point recommends documenting results and scheduling periodic rechecks to maintain consistency and reliability.
Authority sources (selected)
- https://www.nist.gov/pml/weights-and-measures
- https://www.bipm.org/en/
- https://www.nist.gov/pml/weights-and-measures/calibration
Tools & Materials
- Withings Scale(Ensure the scale is on a stable surface and powered on.)
- Level hard surface(A flat, rigid surface such as tile or hardwood floor.)
- Certified known-weight reference(Calibrated weights (e.g., 5 kg) or other certified references.)
- Smartphone or tablet with Health Mate app(Bluetooth enabled for firmware checks and prompts.)
- Microfiber cloth(For cleaning dust from the scale top before testing.)
Steps
Estimated time: 60-90 minutes
- 1
Update firmware via Health Mate
Open the Health Mate app, check for scale firmware updates, and install any available updates. A current firmware version reduces calibration drift and improves prompt reliability.
Tip: Keep Bluetooth on and ensure the device remains powered during the update. - 2
Prepare a stable testing surface
Move the scale to a flat, hard surface. Clean the top to remove dust or debris that could affect readings. Allow the scale to settle for 30–60 seconds before starting.
Tip: Avoid carpet, rug edges, or vibration sources that can affect readings. - 3
Place weight on the center and start known-weight test
Place a certified known-weight object on the center of the scale and follow on-screen prompts to begin calibration.
Tip: Center the weight to avoid uneven loading and read the app prompts carefully. - 4
Complete the calibration and remove weight
Finish the calibration cycle as directed by the app and remove the weight once the readings stabilize.
Tip: Do not yank the weight off; lift straight up to prevent shocks to the load cell. - 5
Verify accuracy with additional trials
Repeat with a second weight and a third if available. Compare readings to known values and assess consistency across trials.
Tip: Aim for readings within a small tolerance across all trials. - 6
Document results and set a calibration schedule
Save the calibration outcome in the Health Mate app if possible and set reminders to recheck calibration periodically.
Tip: Regular rechecks help catch drift early before it affects tracking.
Questions & Answers
Do I need any extra equipment beyond the Health Mate app to calibrate?
Yes. A level hard surface, a certified known-weight reference, and a smartphone with Health Mate are essential. The app guides you through the calibration prompts.
Yes. You need a level surface, a certified weight, and the Health Mate app to guide you through calibration.
How many times should I calibrate the scale?
Calibrate once after firmware updates or if readings drift noticeably. Validate with multiple weights to ensure consistency.
Calibrate after updates or if readings drift, and verify with several weights.
What if the scale still reads wrong after calibration?
If readings remain inaccurate, perform a full reset following the app prompts, check surface stability, and consider a longer settling period before testing again.
If it’s still off, reset as directed, re-check the setup, and try again with more settling time.
Can I calibrate the scale without the Health Mate app?
Calibration is guided by the Health Mate app, so you should use the app to access prompts and firmware checks.
No, the Health Mate app is required to access calibration prompts.
Will calibrating affect other user profiles on the same scale?
Calibration is device-wide but affects all profiles equally. If different users notice drift, re-calibrate with the app guidance.
Calibration changes the scale's reference for all users, so re-checking across profiles is sensible.
Watch Video
Key Takeaways
- Prepare workspace and update firmware first
- Use a level, hard surface for accurate reads
- Test with multiple known weights to confirm accuracy
- Document results and schedule periodic rechecks