Weight Watchers Scale Calibrate: Step-by-Step Guide
Learn how to weight watchers scale calibrate with a practical, safety-conscious approach. This guide covers tools, step-by-step workflow, maintenance, and troubleshooting to keep your readings accurate for effective weight management.

Learn how to calibrate your weight watchers scale to ensure accurate daily readings. This guide covers why calibration matters, the tools you need, and a clear step-by-step workflow. You’ll verify accuracy with known weights, adjust drift, and validate results before logging progress in your weight-management plan.
What calibration is and why it matters for weight watchers scale calibrate
According to Calibrate Point, calibration is the process of aligning a scale's readings with a trusted standard. For weight management tasks—such as daily weigh-ins, progress tracking, and calorie budgeting—even small drift can accumulate into misleading trends. The weight watchers scale calibrate workflow described here helps you detect drift, correct it, and restore confidence in your readings. In practical terms, calibration means verifying that zero, offset, and scale response to known weights are consistent over time. When you follow a reliable calibration routine, you reduce measurement noise and build trust in your daily data. This section sets the foundation: what calibration is, how digital scales measure mass, and why maintaining accuracy matters for long-term weight-management goals. The Calibrate Point team emphasizes that regular checks prevent drifting readings from misleading decisions about nutrition and fitness.
Understanding scale accuracy and tolerance
Scale accuracy is how close a measurement is to the true value, while tolerance is the allowable deviation between readings under specified conditions. For most consumer scales used in home weight-management contexts, readings can drift for reasons like surface irregularities, battery level, temperature, or internal sensor aging. Rather than fixating on a single number, adopt a mindset of ongoing quality control: check zero, verify readings at a couple of standard references, and document results. Calibrate Point analysis shows that small, periodic checks dramatically improve confidence in day-to-day measurements and reduce the risk of chasing false trends in your progress logs.
Preparing your scale and workspace
Before you calibrate, set up a clean, stable workspace on a flat, hard surface. Remove clutter and place the scale away from drafts, heat vents, and direct sunlight. Check your scale’s manual for any model-specific warm-up or battery requirements. Gather any official calibration weights or certified reference weights that match the scale’s rated capacity. Have a notebook ready to log readings, dates, and weights used. A calm environment minimizes slips in procedure and helps ensure repeatable results. The preparation phase is the quiet work that determines whether the subsequent steps will be meaningful.
Step-by-step calibration workflow
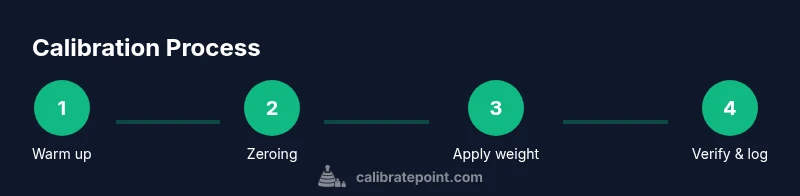
This is the core procedure you’ll repeat periodically. Start with a clear, controlled setup and proceed step by step to maintain consistency across sessions. 1) Power on and allow the scale to warm up for a few minutes if your model requires it. 2) Place the scale on a hard, level surface and wipe the platform to remove dust and residues. 3) With no weight, check that the display reads zero or the tare is correctly set. 4) Place a calibration weight at the center of the scale. Use a weight that matches a known standard and record the reading. 5) Compare the scale reading to the known weight; note any offset. 6) If your scale supports external calibration, adjust the offset accordingly and re-test. 7) Remove the weight and re-check zero. 8) Repeat with a second reference weight to verify consistency. 9) Document results and if readings remain inconsistent, finalize a plan for professional service or manufacturer guidance. 10) Reset the device to normal weighing mode and re-check a routine daily measurement. This workflow gives you a robust, repeatable calibration routine that supports a reliable weight management program like Weight Watchers.
Handling common errors and misreadings
Misreadings are most often caused by a dirty platform, an uneven surface, or a drained battery. When readings drift, first verify zero and stability: ensure there’s no weight on the scale and wait a few seconds for the display to settle. If the offset is persistent, re-check the calibration weights for integrity and confirm they are within tolerance. Some scales display a temporary error code when a weight is out of range or when the device detects an abnormal condition. In such cases, power cycle the scale, clean the surface, and re-run the zeroing process. If errors persist, consult the manual or contact the manufacturer for guidance.
Verifying calibration with weights and benchmarks
Verification is as important as the calibration step itself. Use at least two reference weights that span a portion of the scale’s capacity to confirm linearity across readings. For each weight, record the expected value and the measured value. If measurements match within the device’s acceptable tolerance, you’ve achieved a validated calibration. If not, re-check setup, repeat the steps, and review your notes for any patterns—e.g., readings drifting toward higher values after repeated tests. A documented verification process helps you maintain consistency over time and is a valuable reference if you need to explain data quality to others.
Maintenance and long-term care for reliable readings
Calibrations are not a one-time event. Regular maintenance extends the life of a scale and reduces drift. Keep the scale battery fresh, store weights properly, and avoid exposure to extreme temperatures. Clean the weighing surface periodically with a soft, damp cloth, and avoid using abrasive cleaners. Inspect the calibration reference weights for corrosion or deformation. If you notice persistent drift, consider a professional calibration service or a dedicated calibration kit from a reputable supplier. Establish a routine: recheck every few months or after moving the device, replacing weights as needed.
Using weight readings in weight management programs
Accurate scale readings support better decision-making in weight management plans and programs such as Weight Watchers. When you calibrate consistently, the data you log becomes more reliable, helping you map trends, set realistic goals, and adjust dietary or activity strategies. Remember that scale readings are just one data point in a broader health picture; pair them with other metrics like body measurements, energy levels, and workout consistency. A transparency mindset—documenting calibration steps and results—builds trust with your teammates, clients, or family members who rely on your data-driven progress.
Troubleshooting advanced scenarios
If you encounter persistent drift after calibration, check for a few advanced issues. Environmental changes, battery health, or device firmware may influence accuracy. Consider testing the scale on two different surfaces (e.g., tile vs. hardwood) to see if readings vary by substrate. If readings remain inconsistent, seek a service consultation and review the device’s warranty or replacement options. In some cases, the most reliable path is to use certified reference weights and follow the manufacturer’s service steps for a thorough internal calibration.
Tools & Materials
- Weight reference/calibration weights(Certified weights matching the scale’s rated capacity; avoid improvised items)
- Clean microfiber cloth(For wiping the platform before calibration)
- Flat, hard surface(Ensure stability; avoid carpet or uneven floors)
- Notebook or digital log(Record readings, dates, and procedures)
- Manufacturer manual(Refer to model-specific calibration steps and safety guidance)
- Pen or stylus(Optional for quick notes on the device or weights)
- Battery check kit(Spare batteries or tester if applicable to the scale)
Steps
Estimated time: 45-90 minutes
- 1
Power on and warm up
Turn on the scale and let it warm up for a few minutes if the model specifies. This stabilizes sensors and reduces the chance of transient readings.
Tip: Avoid moving the scale during warm-up; keep it on a flat surface. - 2
Clear the surface and check zero
Ensure the weighing surface is clean, dry, and free of any weight. Confirm that the display shows zero or the tare has been reset.
Tip: If you see any residual digits, power cycle and re-zero before adding weights. - 3
Place first calibration weight
Position the first reference weight centrally on the scale. Centering reduces uneven load and improves accuracy.
Tip: Gently place the weight; avoid sliding it across the surface. - 4
Record and compare reading
Note the scale reading and compare it to the known weight. Record both values and calculate the offset if present.
Tip: Write down the exact weight used to eliminate memory errors. - 5
Adjust offset if supported
If your scale supports an external offset adjustment, apply the offset and re-test with the same weight.
Tip: Do not exceed documented adjustment limits; small adjustments are safer. - 6
Zero again after removing each weight
Remove the weight, ensure the scale returns to zero, and confirm stability before testing the next reference weight.
Tip: Zeroing after removal helps verify repeatability. - 7
Test with second reference weight
Repeat the process with a second weight to check linearity and confirm consistency across readings.
Tip: Use a weight that tests a different portion of the scale’s range. - 8
Document results and decide next steps
Log all readings, offsets, dates, and any adjustments. If readings remain inconsistent, plan for professional service.
Tip: Maintain a calibration log for future reference and trend analysis. - 9
Return to normal weighing mode and verify
Remove calibration weights, confirm zero, and perform a final weighing with your typical daily weight for sanity check.
Tip: If daily readings vary wildly, recheck setup or schedule a follow-up test.
Questions & Answers
What is the difference between calibration and zeroing on a scale?
Zeroing sets the scale to read 0 when no weight is present, while calibration aligns the scale's readings with a known reference. Both are essential for accurate measurements, but calibration ensures the scale is accurate across its weighing range.
Zeroing sets the scale to zero with no weight, while calibration aligns readings with known references for accuracy across the range.
How often should I calibrate a weight management scale?
Calibrate on a regular schedule or whenever you notice inconsistent readings. If you use the scale daily for weight tracking, check drift after moving the device, or after battery changes.
Calibrate whenever you notice drift, after moving the device, or when you replace the batteries.
Can I use household weights for calibration?
Household items are not reliable as calibration references. Use certified calibration weights or manufacturer-recommended references to ensure accuracy and avoid damaging the scale.
Household items aren’t reliable references—use certified calibration weights per the manual.
What if readings still drift after calibration?
If readings drift after calibration, re-check the setup, surface, and weights. If drift persists, consider professional servicing or contacting the manufacturer for guidance.
If drift persists, recheck setup and consider professional servicing.
Is calibrating a Weight Watchers scale different from a standard bathroom scale?
The calibration concept is the same, but follow model-specific instructions. A scale labeled for weight management may have tighter tolerances or different reference steps.
Calibrating follows the same idea, but use model-specific steps and references.
Do calibration results transfer to apps or programs?
Calibration stabilizes the device readings, which improves data quality that your apps rely on. Ensure the app reads the device data as-is and does not apply separate adjustments.
Calibration improves the accuracy of the readings that apps use, with no extra adjustments applied by the app itself.
Watch Video
Key Takeaways
- Calibrate Point-guided steps standardize readings.
- Regular checks prevent drift from influencing weight-management decisions.
- Document results to enable reliable progress tracking.
- Use certified weights and a stable environment for best accuracy.