How to Put a Scale in Calibration Mode: Step-by-Step
Learn how to put a scale into calibration mode with a vendor-agnostic, step-by-step approach. Get ready with certified weights, a stable surface, and a clear log to ensure accurate, repeatable measurements across your workspace.

This guide shows how to put a scale into calibration mode, why it matters, and how to verify accuracy after calibration. You’ll need certified calibration weights, a clean workspace, and the device manual for your model’s exact sequence. Follow the vendor-agnostic steps to minimize drift and ensure repeatable results.
What calibration mode does and why you should use it
Calibration mode is a controlled state that isolates the measurement path so you can adjust offsets, gain, and linearity without influencing normal weighing results. In this mode the scale relies on known reference weights rather than random loads, ensuring that displayed values reflect true mass within the device’s specified accuracy. According to Calibrate Point, starting from a clean baseline and documenting every step is essential for traceability. This approach reduces drift caused by environmental factors and mechanical wear, and it helps build confidence when the scale is used for critical measurements. While not every scale exposes a formal calibration routine, most devices with a digital readout provide a dedicated mode or a service sequence for performing these adjustments. Understanding the concept behind calibration mode will help you interpret the readings more accurately and serves as the foundation for the rest of the guide.
Preconditions: safety, environment, and prep
Before you enter calibration mode, ensure the environment is stable and safe. Place the scale on a flat, level surface away from drafts, vibrations, or air currents that can affect readings. Temperature fluctuations can also cause drift, so perform calibration in a quiet, thermally stable room. Clean the scale’s weighing platform and remove any debris that could add uneven mass. Have the device manual at hand to follow the exact sequence for your model, and keep a logbook or digital notes to capture every step and reading. If you’re calibrating multiple scales, use the same setup for consistency. Finally, verify you have certified calibration weights appropriate for the scale’s range; using improvised lumps of metal will compromise accuracy. In all cases, safety comes first: handle weights carefully and avoid dropping them on the scale, which can damage sensors.
Tools, weights, and references you’ll need
- Certified calibration weights appropriate for the scale’s range (preferably NIST-traceable)
- A clean, level work surface and a stable power source
- A soft cloth or brush to remove dust from the platform
- The device’s user manual or service guide for model-specific calibration steps
- A notebook or digital log to record weight values, readings, and offsets
- A portable spirit level or a small level to verify surface flatness
- Optional: a calibration jig or mounting plate if your scale uses a dedicated calibration fixture
Notes:
- Use weights in known increments that cover 20% to 100% of the scale’s maximum capacity when possible.
- If you cannot obtain certified weights, document the weights you use and include a statement of uncertainty in your log.
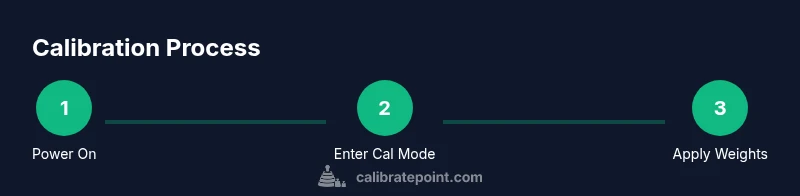
Step-by-step overview: entering calibration mode
Most scales have a dedicated calibration or service mode. The high-level process is the same across vendors: power up the device, initiate the calibration sequence, choose the correct calibration type (single-point or multi-point), place known weights, collect readings, adjust offsets or gain as needed, and exit calibration mode. Always begin with a clean baseline, then perform multiple measurements to confirm repeatability. The exact button presses or menus vary by model, so follow the manual precisely. If your scale uses a short password-like entry or a combination of keys, write it down and store it securely so you don’t lose access during the process. The goal is to produce stable, repeatable readings that align with the traceable weights you’re using.
Step-by-step: Step 1 — Power on and access calibration mode
Power up the scale and navigate to the calibration or service menu as described in the user guide. If warm-up is recommended, wait the advised time for readings to stabilize. Accessing calibration mode ensures you are operating in a dedicated state for adjustments and not in normal weighing mode. Record the current baseline readings and confirm you are in the correct calibration context before proceeding.
Step-by-step: Step 2 — Select calibration type and prepare weights
Choose the appropriate calibration type (single-point, multi-point) as recommended by the manufacturer. Prepare certified weights in the required increments, verify their mass, and place them where the scale expects them. Center the weights carefully to avoid off-center loading that could bias readings. Have a second set of reference weights ready if the device supports multiple-point calibration for better linearity checks.
Step-by-step: Step 3 — Place known weights, stabilize, and record readings
Place the smallest calibration weight in the center of the platform and wait for the reading to stabilize. Record the measured value and compare it to the true mass. Repeat this for the next weight increment, allowing a consistent settling time. For each weight, take at least three readings and average them to reduce random noise. Keep the environment steady during measurements and avoid touching the scale while readings update.
Step-by-step: Step 4 — Apply corrections and test across the range
Use the collected data to compute the necessary offset and gain corrections according to the scale’s calibration algorithm. Apply small adjustments and re-measure at multiple points across the range to confirm linearity. If results drift, re-check the surface level and re-zero before continuing. Document every adjustment and its impact so you can audit the calibration later.
Step-by-step: Step 5 — Exit calibration mode and verify final accuracy
Exit the calibration mode following the device’s procedure and return the scale to normal weighing mode. Perform a quick verification with the same weights used during calibration and a few additional reference weights to confirm continued accuracy. If the readings remain within the specified tolerance, you’ve completed a successful calibration. Otherwise, repeat the steps with a fresh baseline and verify that environmental conditions did not reintroduce error.
Authority sources
- https://www.nist.gov/pml/weights-and-measures/calibration
- https://www.nist.gov
- https://www.iso.org
Troubleshooting and common mistakes
- Skipping baseline cleaning and surface leveling can introduce persistent bias.
- Using non-certified weights or weights with unknown mass increases uncertainty.
- Calibrating in a drafty room or with fans running can cause readings to diverge.
- Not repeating measurements leads to over-optimistic results; always average multiple readings.
- Failing to document offsets, gains, and test weights makes audits difficult and reduces traceability.
Tools & Materials
- Certified calibration weights (NIST-traceable)(Cover a range from low to high within device capacity)
- Clean, level surface(Flat, stable workbench or table)
- Soft cloth for platform cleaning(Lint-free to avoid residue)
- Device manual or service guide(Model-specific calibration steps)
- Calibration log or notebook(Record readings, offsets, and dates)
- Level tool (spirit level)(Optional for ensuring flat surface)
- Calibration jig or mounting plate(If the scale uses a dedicated fixture)
Steps
Estimated time: 20-45 minutes
- 1
Power on and access calibration mode
Turn on the scale and allow any required warm-up period. Enter the calibration or service menu using the exact sequence described in the user guide. Confirm you are in the calibration context before proceeding to weight measurements.
Tip: If you’re unsure of the entry sequence, check the vendor’s support page or contact customer service. - 2
Select calibration type and prepare weights
Choose the appropriate calibration type (single-point or multi-point) based on your scale and measurement range. Prepare certified weights in the required increments and verify masses before placing them on the platform.
Tip: Use weights centered on the platform to prevent misreads caused by off-center loading. - 3
Place known weights and stabilize
Place the smallest weight and wait for stabilization. Record readings and repeat for each subsequent weight. Take multiple readings per weight and compute an average to reduce noise.
Tip: Minimize handling of weights during readings to preserve accuracy. - 4
Apply corrections and verify across range
Compute offset and gain corrections from the collected data and apply them in small increments. Re-check at several points across the scale’s range to confirm linearity and stability.
Tip: If readings drift, verify platform level and re-zero before re-calibrating. - 5
Exit calibration mode and verify final
Exit the calibration mode as per the manual, return to normal operation, and re-verify with the same weights plus extra references to ensure accuracy.
Tip: Document the final calibration state for audits.
Questions & Answers
Do I need to calibrate every scale?
Calibration schedules depend on usage, required accuracy, and regulatory needs. Regular checks—quarterly or annually—are common, with more frequent checks for high-usage environments or safety-critical applications.
Calibration frequency depends on usage and requirements; many users perform quarterly or yearly checks, with more frequent checks for high-usage scales.
What weights should I use for calibration?
Choose certified calibration weights that cover the scale’s range. Use at least three weights spanning the low, mid, and high end of the range to test linearity and accuracy.
Use certified weights that cover the scale’s range, ideally three weights across the range to test accuracy.
How often should calibration be performed?
Calibration frequency should align with usage intensity, environmental stability, and regulatory obligations. Many labs calibrate quarterly, while hobby setups may suffice with annual checks.
Calibrate according to usage and regulatory needs; quarterly in labs, annually for hobby setups.
Can I calibrate if I don’t have the manual?
If the manual is unavailable, check the manufacturer’s website or contact support for the exact calibration sequence. Do not improvise settings, as this can introduce errors.
If you don’t have the manual, consult the manufacturer’s site or support for the exact steps.
Why does my scale drift after calibration?
Drift can come from temperature changes, drafts, vibration, or an unstable surface. Re-check the environment, re-zero, and consider re-calibrating with fresh reference weights.
Drift is often due to temperature changes or an unstable setup; recheck conditions and recalibrate if needed.
Is lab-grade calibration necessary for home use?
For most home or hobby tasks, traceable calibration using certified weights is sufficient. Lab-grade calibration is required when traceability and documented uncertainty are essential for compliance.
Only rely on lab-grade calibration when traceability and documented uncertainty are required; otherwise certified weights are usually enough.
Watch Video
Key Takeaways
- Begin with a clean baseline and documented steps
- Use certified weights and centered placement for accuracy
- Average multiple readings to reduce noise
- Document offsets and gains for audits