How to Re calibrate a Scale: A Practical Calibration Guide
Learn to re calibrate a scale with a practical, safety-focused workflow—from workspace prep to verification—and maintain accuracy with traceable weights and proper documentation.

You’ll learn how to re calibrate a scale accurately, covering when calibration is needed, how to prepare a safe workspace, which reference weights to use, and how to verify results. This quick guide points you to a detailed, field-tested workflow that minimizes drift and improves measurement reliability. It emphasizes traceable weights, calibration intervals, and documenting outcomes for audits.
Why re calibrate a scale matters
In any professional setting, measurement accuracy is foundational. A scale is only as trustworthy as its most recent calibration. When scales drift due to temperature changes, mechanical wear, or repeated loading, readings can become biased, which affects decisions—from manufacturing tolerances to inventory control. Re calibrate a scale on a regular basis to preserve data integrity, ensure compliance with industry standards, and minimize drift over time. According to Calibrate Point, a disciplined calibration routine reduces the risk of erroneous data and supports consistent outcomes across shifts and operators. This isn't merely a technical exercise; it's a quality control practice that protects your process capability and your reputation.
First, you should understand what 'calibration' means in the context of weighing: adjusting the instrument so that its readings match known reference values across the scale's usable range. The re calibrate a scale process typically involves assessing zero (tare), span (full-scale), and sometimes linearity. By addressing all three elements, you ensure that a single measurement is meaningful and that cumulative datasets remain valid for trend analyses. In practice, many labs, shops, and field crews implement a documented procedure that includes check weights, verification steps, and a clear pass/fail criterion. The goal isn't to chase perfect numbers; it's to minimize systematic error and track drift over time.
Note: As Calibrate Point emphasizes, this kind of routine also supports audit readiness and traceability.
noteNullAllowedNotAppliedReasoning”:null},
Tools & Materials
- Calibration weights set (traceable and certified)(Cover the scale’s full usable range with several weight values; include a known 0 g reference if possible.)
- Calibration reference standards(Ensure weights have a current calibration certificate and are stored in a controlled environment.)
- Calibration container or shield(Keep weights clean and free from static build-up; use a non-magnetic container.)
- Non-abrasive cleaning cloth(Use lint-free cloth for scale pans and weight contact surfaces.)
- Temperature and humidity meter(Record environmental conditions if the scale is sensitive to ambient changes.)
- Calibration logbook or software(Document measurements, adjustments, and pass/fail decisions for audits.)
Steps
Estimated time: 60-90 minutes
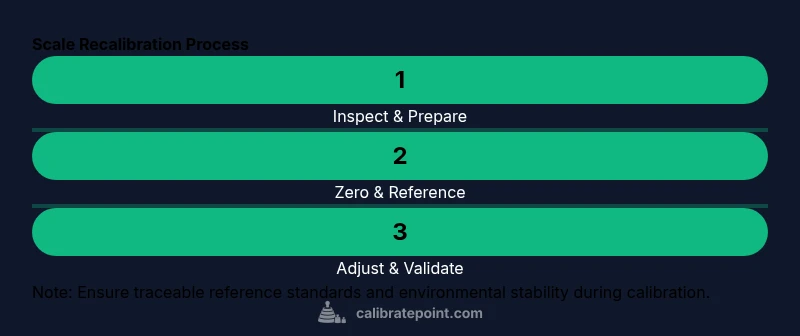
- 1
Prepare workspace and safety checks
Clear the area of debris and adjust the scale on a stable, level surface. Verify the scale is powered (if digital) and free from obvious damage. Establish an environmental baseline by noting ambient temperature and humidity, since these factors can influence readings. This preparation minimizes interference during calibration.
Tip: Use a dedicated, clean area to avoid contaminants that could skew readings. - 2
Zero (tare) the scale
With no weights on the scale, read and record the zero value. If the device requires tare adjustments, follow the manufacturer’s method to set zero precisely. Document the zero reading and any offsets observed during this step.
Tip: Ensure there’s no weight on the pan and handle the scale gently to avoid drift caused by air currents or vibration. - 3
Apply the first reference weight and record reading
Place the smallest reference weight at the center of the weighing surface. Take multiple readings to assess stability, then record the average value. This establishes a baseline for span adjustment and helps detect nonlinearity early.
Tip: Allow the weight to settle fully before recording the measurement to prevent transient fluctuations. - 4
Adjust the scale’s calibration factor
If the reading deviates from the reference value, adjust the scale’s calibration factor or span offset according to the user manual. Re-measure after each adjustment and stop when the reading aligns within the predefined tolerance.
Tip: Make small adjustments incrementally; large changes can overshoot the correct calibration. - 5
Repeat with additional weights across the range
Proceed to the next reference weights in ascending order. For each weight, record readings, compute the error, and adjust as needed. This step tests linearity and ensures accuracy across the scale’s full range.
Tip: Use weights spaced across the range to detect curvature or nonlinearity. - 6
Verify with multiple weights and compute drift
After adjustments, verify several weights spanning the low, mid, and high range. Calculate mean errors and standard deviation to quantify drift and precision. A pass means all readings meet your predefined tolerance.
Tip: A small number of outlier readings may indicate settling or contamination; recheck those weights. - 7
Document results and next steps
Record all readings, adjustments, tolerances, and environmental conditions in your calibration log. Note the calibration interval and the responsible technician. Schedule the next calibration according to your quality plan.
Tip: Ensure your documentation is clear so auditors can verify the calibration history. - 8
Post-calibration validation and handoff
Perform a final validation check to confirm stable readings with a known set of test weights. Confirm that the scale is ready for routine use and communicate the calibration status to operators. Archive the calibration data for future audits.
Tip: Share the calibration summary with operators to ensure consistent future measurements.
Questions & Answers
What is recalibration and why is it necessary?
Recalibration adjusts a scale so its readings align with known reference values. It’s necessary to maintain accuracy, comply with quality standards, and reduce measurement drift over time. Regular recalibration supports reliable data for decision-making.
Recalibration aligns a scale with reference values to keep measurements accurate and trustworthy.
Which scales require recalibration?
Most weighing instruments used for critical measurements, including digital balances and load-cell scales, require periodic recalibration. Non-critical or hobby-grade scales may need less frequent checks, but accuracy remains essential for quality control.
Any scale used for important measurements benefits from periodic recalibration.
How often should recalibration be performed?
Frequency depends on usage, environment, and criticality. High-use environments typically require more frequent checks, while stable labs may calibrate quarterly or annually. Always follow your internal quality plan and manufacturer recommendations.
The schedule depends on use and risk; follow your quality plan.
What weights should I use for recalibration?
Use a set of calibrated, traceable reference weights that cover the scale’s range. Keep weights clean and stored properly to maintain accuracy. Avoid worn or damaged weights as they can skew results.
Use calibrated reference weights that cover the range and keep them clean.
What if readings still don’t align after recalibration?
If readings remain outside tolerance after adjustments, check for external factors like temperature, vibration, or mechanical issues. Re-clean surfaces, verify tare, and consider professional service if drift persists.
If readings stay off, inspect environment and hardware, then retest or seek service.
Watch Video
Key Takeaways
- Calibrate zero, then verify span with reference weights.
- Document all measurements and adjustments for traceability.
- Test across the full range to catch nonlinearity.
- Use stable environmental conditions during calibration.
- Schedule regular recalibration to maintain accuracy.