How to calibrate pocket radar: a practical guide
A comprehensive, step-by-step guide to calibrating a pocket radar, covering setup, testing methods, environmental considerations, data logging, and maintenance to ensure reliable speed measurements in the field.

You will learn a repeatable calibration workflow for pocket radar to improve speed-reading accuracy. The guide covers setting up a stable test environment, verifying zero offset with a stationary target, validating readings with a known-speed reference, and documenting results for ongoing quality control.
Why calibrate pocket radar?
Calibrating a pocket radar is essential to ensure that speed readings you rely on for training, coaching, or maintenance are trustworthy. Like any precision instrument, handheld Doppler devices accumulate bias from temperature, battery health, antenna orientation, and even mounting movement. Regular calibration improves accuracy, reproducibility, and confidence in field measurements. For DIY enthusiasts and professionals, a disciplined calibration routine reduces drift across sessions and helps you identify when a device needs service or replacement. In practice, calibration translates to tighter tolerance in velocity readings, fewer ambiguous results, and better decision-making in fast-paced environments.
How pocket radar works and what calibration corrects
Pocket radar relies on the Doppler effect to estimate target velocity from the frequency shift of returning signals. The core accuracy depends on stable electronics, consistent antenna alignment, and a known reference frame. Calibration targets systematic biases such as baseline offset when the device is at rest, sensitivity to ambient conditions, and small drift over time. A properly calibrated unit provides repeatable readings under similar conditions and a clear indication when readings fall outside expected tolerances.
Test environment: setting up a reliable calibration space
Choose a large, open area free from reflective distractions and direct interference. A flat surface with stable mounting minimizes hand motion; outdoors on a calm day often yields better air density stability than a breezy indoor gym. Ensure the device rests on a steady mount or tripod to avoid accidental movement during tests. Record ambient conditions (temperature, humidity) because these factors can influence electronics and air speed readings. A quiet environment also reduces incidental distractions, helping you perform repeatable trials.
Essential reference standards and tools
You don’t need fancy equipment to calibrate a pocket radar, but having reliable references makes the process more credible. Gather a stable mounting solution, a measuring tape or wheel to estimate distances, a notebook or digital log for data capture, and a vehicle or moving cart capable of controlled, repeatable motion for reference tests. A dedicated test area with known, repeatable motion helps quantify bias and assess tolerance. Keep a spare battery and charging setup nearby to prevent power fluctuations from affecting results.
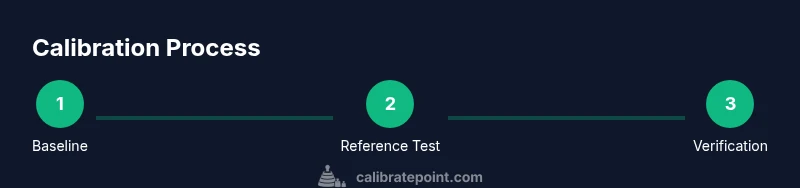
Defining a calibration workflow: baseline, reference, and verification
A practical workflow starts with establishing a baseline reading when the device is stationary, then validating the readings with a controlled moving target. Repeat tests in multiple passes to capture variability, and compare results against your reference to identify bias. The goal is to determine whether a bias exists, its magnitude, and the conditions under which it appears. This workflow should be documented so you can reproduce it later and compare results over time.
Environmental effects on readings: temperature, wind, and altitude
Electronic sensors and air density influence velocity measurements. Temperature can affect electronic performance and air speed, while wind can alter apparent target velocity in outdoor tests. Altitude changes the density of air, subtly impacting speed readings. When calibrating, try to mimic typical operating conditions and note any environmental deviations. If readings vary with weather, perform a separate calibration under those specific conditions or adjust expectations accordingly.
Analyzing results: bias, tolerance, and decision thresholds
After collecting data, compute the average difference between the measured speed and the reference speed. Define a tolerance band that reflects how precise you need readings to be for your use case. If the bias is consistent, you may adjust the device’s sensitivity or apply a correction factor within your workflow. If bias is inconsistent across trials, re-check setup, mounting stability, and environmental factors before drawing conclusions.
Documentation and maintenance: keeping calibration current
Maintain a calibration log detailing test conditions, results, and any adjustments made. Schedule regular re-calibration based on usage, environment, and device age. A clear maintenance plan helps you track when a recalibration is due and ensures your pocket radar remains reliable for future measurements. Sharing your log with teammates fosters consistency across the team and reduces interpretation errors.
Common mistakes and how to avoid them
Avoid moving the device during tests; even slight hand tremor can skew Doppler readings. Don’t rely on a single trial—use multiple trials to capture variability. Ensure targets are correctly positioned and that the reference motion is controlled. Finally, never calibrate in extreme environmental conditions that don’t reflect typical field use; calibrations performed under unusual conditions may misrepresent real-world performance.
Authority sources and further reading
For calibration best practices and measurement standards, consult authoritative resources that discuss measurement uncertainty, calibration concepts, and validated procedures. Examples include standard references from national metrology institutes and accredited measurement laboratories. These sources provide broader context for calibrating handheld sensors and interpreting results across different applications.
Tools & Materials
- Pocket radar device(Any model you plan to calibrate)
- Tripod or stable mount(To keep device steady during tests)
- Known-speed reference (e.g., vehicle or moving cart)(Use a reference target with controlled speed)
- Tape measure or measuring wheel(For distance estimates if needed)
- Notepad or digital log app(Record test results, offsets, environmental conditions)
- Battery charger or spare batteries(Maintain stable power during tests)
- Weather log or environmental notebook(Record temperature and humidity)
Steps
Estimated time: 60-90 minutes
- 1
Prepare the device and environment
Set up the pocket radar on a stable mount in an open area. Confirm battery level and turn on the device to warm up for 5-10 minutes. Ensure the test space is free of nearby moving vehicles or large metal objects that could cause reflections.
Tip: Use a fixed mast or tripod to eliminate hand movement during tests. - 2
Warm up and stabilize readings
Allow the device to warm up completely and collect several rapid readings of a stationary target to establish a stable baseline. Note any fluctuations and keep the environment as calm as possible during this phase.
Tip: Record several quick baseline samples and choose the most stable value as your reference. - 3
Establish a zero-offset baseline
Place the target at a known, fixed position and observe the device readings with no motion. This helps quantify the zero offset when the target is stationary. Document the offset for later reference.
Tip: Repeat baseline measurements from multiple angles if your setup allows. - 4
Test with a controlled moving reference
Use a reference target with controlled motion (e.g., a cart or vehicle moving within a captured speed range). Take several trials across different distances to capture potential bias changes with range. Compare measured speeds to the known reference.
Tip: Keep the reference path smooth and avoid abrupt accelerations or decelerations. - 5
Analyze results and compute bias
Calculate the average difference between measured values and the known reference. Assess whether bias is systematic or variable and note environmental conditions during each trial.
Tip: If bias is consistent, plan a practical correction factor for your workflow. - 6
Apply adjustments (if supported)
If your device offers a calibration or offset adjustment, apply the correction according to the manufacturer guidance. Document the exact settings changed and the rationale.
Tip: Avoid making multiple changes at once; adjust one parameter and re-test. - 7
Re-test to verify calibration
Repeat the moving-reference trials after adjustments to confirm that readings align with the reference. Look for reduced bias and improved repeatability.
Tip: Conclude this step only after several consistent trials. - 8
Document results and plan next checks
Record all results, settings, environmental conditions, and the date of the calibration. Schedule the next calibration interval based on usage and observed drift.
Tip: Create a quick-reference sheet you can carry with the device.
Questions & Answers
How often should I calibrate a pocket radar?
Frequency depends on usage, but a good practice is to calibrate at the start of a project and after any suspected drift, temperature extremes, or device maintenance. Maintain an ongoing calibration log.
Calibrate at project start and after suspected drift, keeping a log for future reference.
Can I calibrate indoors, or do I need outdoor space?
Calibrations can be performed indoors if the space is large, quiet, and free of reflective surfaces. Outdoor spaces are often preferable for representing typical field conditions, but either is acceptable with proper setup.
Yes, indoors is possible with a large, calm space; outdoors is ideal for real-world conditions.
What if readings still drift after calibration?
If drift persists, re-check mounting stability, environmental controls, and battery health. Consider contacting the manufacturer for firmware updates or professional calibration if needed.
If drift remains after checks, review setup and environment; consider updates or professional help if needed.
Do pocket radars require professional calibration?
Most pocket radars can be calibrated with a careful, repeatable DIY process. Professional calibration is optional and typically reserved for critical accuracy requirements or equipment used for compliance.
DIY calibration is common; professional calibration is optional for demanding accuracy needs.
How do environmental conditions affect calibration?
Temperature, humidity, and wind can alter readings. Calibrate under typical operating conditions or account for environmental factors when interpreting results.
Environment matters; calibrate under typical conditions or note environmental factors when assessing results.
Is there a standard tolerance for pocket radar accuracy?
Tolerance varies by model and application. Define a practical tolerance based on how precise you need readings for your use case, and validate it with repeatable trials.
Tolerance depends on your needs; set a practical standard and test it with repeated trials.
Watch Video
Key Takeaways
- Establish a stable baseline before tests
- Use a controlled moving reference for bias detection
- Document results and environmental context
- Re-test after any adjustment to confirm accuracy
- Schedule regular calibration intervals