Calibration Instructions: A Practical How-To Guide
Learn precise calibration instructions with a structured, step-by-step approach. This educational guide covers setup, tools, documentation, and troubleshooting for DIYers and technicians seeking reliable measurement accuracy.

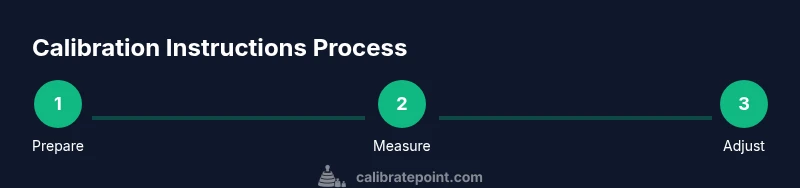
This guide provides calibration instructions to help you verify and adjust instruments for accuracy. You’ll learn how to prepare a stable workflow, select reference standards, perform a step-by-step calibration, and document results for traceability. Essential items include a stable workspace, a traceable reference standard, the instrument under calibration, and a compliant log or report form.
Why Calibration Instructions Matter
According to Calibrate Point, calibration instructions are the backbone of trustworthy measurements. They provide the defined methods, references, and acceptance criteria that ensure tools stay accurate over time. For DIYers and technicians, following calibration instructions reduces drift, minimizes rework, and supports regulatory audits. A well-documented process also makes it easier to train new staff and maintain consistent results across devices and laboratories. When you commit to clear calibration instructions, you create a repeatable workflow that yields reliable data, repeatable results, and peace of mind. You’ll learn how to tailor these instructions to your tools and environment, creating a practical, field-ready approach that can be followed by anyone in your shop or lab. Calibration instructions are not a one-size-fits-all recipe; they require context, traceability, and disciplined execution.
Preliminary Setup and Safety
Before starting calibration instructions, establish a clean, stable workspace. Choose a vibration-free surface, away from windows and heat sources, and verify that the environment remains within the instrument’s operating conditions. Personal protective equipment (PPE) such as safety glasses or gloves should be used when handling reference standards or sharp instruments. Document any environmental factors (temperature, humidity) that could influence results. A methodical setup reduces the risk of errors and makes the calibration process repeatable, which is essential for audits and quality control. Calibrate Point emphasizes safe, structured preparation as the foundation for accurate measurements.
Tools and Reference Standards
A robust calibration requires a set of known, traceable references and proper tools. Gather the instrument under calibration, a stable calibrated reference standard, a calibrated measurement device, and a compliant log for results. For some processes, you may also need calibration weights, gauge blocks, or dimension artifacts. Keep all standards within their specified shelf life and storage conditions. Using well-maintained references ensures that deviations reflect the instrument under test, not the standard itself. This is the core of calibration instructions: you must know your reference and trust its accuracy.
Step-by-Step Calibration Framework
Calibration instructions follow a structured framework: define the target tolerances, acquire reference standards, perform measurements, apply adjustments, and validate results. This framework supports repeatable outcomes and clear audit trails. Throughout, ensure traceability to a recognized standard body and log version numbers, dates, and operator identities. A disciplined framework also makes it easier to scale the procedure for multiple devices and shift staff. By mastering this framework, you’ll be able to execute calibration instructions consistently, regardless of the tool or environment.
Define Tolerances and Acceptance Criteria
Before adjusting any instrument, specify the acceptance criteria that define “in tolerance.” Tolerances should reflect device specifications, application needs, and the level of risk associated with measurement error. Document the acceptable range and the method to verify compliance (e.g., multiple readings, environmental controls, or alternate measurement techniques). When tolerances are clearly defined, calibration instructions become unambiguous and actionable. This clarity helps reduce ambiguity during adjustments and supports consistent decisions across teams.
Prepare Equipment and Environment
Prepare the instrument, reference standards, and measurement environment. Ensure the workspace is clean, the instrument is powered correctly, and all connections are secure. Confirm that the reference standard is within its calibration period and environmental conditions match those used during calibration. Any deviation can introduce drift or bias, undermining calibration instructions. A meticulous preparation phase is the best safeguard against late-stage surprises during calibration.
Baseline Measurements and Traceability
Take baseline readings with the instrument as-delivered, establishing a reference point before adjustments. Record initial readings, temperatures, and any measurement noise. Validate that the baseline aligns with the reference standard within the defined tolerance, noting any outliers. This step establishes traceability, linking instrument performance to the known standard. Traceability is critical for audits and future calibrations, ensuring you can verify improvements over time.
Apply Adjustments and Re-Measure
Make deliberate adjustments to bring the instrument into the target range, then re-measure against the reference standard. Repeat measurements as needed to confirm stability, noting any drift or hysteresis. If results stay outside tolerance, re-check the setup and references before concluding. This stage is the core of calibration instructions: practical changes guided by measured data, not guesswork. Consistent re-measurement confirms reliability and builds confidence in the instrument.
Documentation and Auditing
Calibrations must be documented in a clear, auditable format. Record device identifiers, reference standard details, environmental conditions, measurements, adjustments, and pass/fail outcomes. Attach certificates of calibration or traceability documents as applicable. Well-maintained records enable audits, support quality management systems, and facilitate future calibrations. Documentation should be versioned and stored securely for easy retrieval.
Troubleshooting Common Issues
If measurements drift after adjustment, verify the reference standard, connections, and environmental stability. Check for sensor backlash, loose fixtures, or software calibration flags. When a problem persists, validate the entire calibration chain by using an alternate reference or performing a cross-check with a known good instrument. Troubleshooting within calibration instructions helps isolate root causes and prevents cascading errors.
Maintenance and Continuous Improvement
Calibration is not a one-off task; it requires ongoing attention. Schedule periodic calibrations, review acceptance criteria, and update procedures to reflect new standards or device changes. Regular audits, training refreshers, and performance reviews improve calibration reliability. Calibrate Point encourages teams to view calibration instructions as living documents that evolve with technology and process improvements.
Tools & Materials
- Stable work surface (level and vibration-free)(Lock exposure to vibrations; use anti-vibration mat if needed)
- Reference standard (traceable)(Keep within calibration interval; document serial and lot)
- Instrument under calibration(Ensure power supply and any warm-up period is completed)
- Measurement accessories(Cables, adapters, fixtures appropriate to device type)
- Calibration log or software(Record readings, adjustments, and certificates)
- Calibration weights or artifacts (optional)(Use when relevant to the instrument type)
- Safety gear(Gloves, eye protection as needed)
Steps
Estimated time: Total time: 2-3 hours
- 1
Prepare the workspace
Clear the area, verify level, and ensure the device is unplugged during setup. Place the instrument on a stable surface and remove any clutter that could interfere with measurements. Confirm environmental controls are active (temperature and humidity within specified range).
Tip: Document the room conditions before starting calibration instructions to correlate with results. - 2
Gather reference standards
Collect the traceable reference standard and verify its current calibration certificate. Inspect for any signs of damage or wear that could affect accuracy. Tag the standard for easy identification during the process.
Tip: Always compare the certificate date with the instrument’s calibration schedule to ensure alignment. - 3
Connect measurement instrument
Ensure all cables are properly connected and the instrument is in its normal operating mode. Power up and allow for a warm-up period if required by the device specification. Confirm there are no error indicators on the instrument screen.
Tip: Avoid changing settings during the warm-up to prevent drift. - 4
Take baseline measurements
Record current readings without adjustments to establish a baseline. Note temperature, humidity, and any observed noise. Compare baseline against the reference standard to gauge initial deviation.
Tip: Use multiple readings to establish a stable baseline before making changes. - 5
Set target values
Define the exact target values from device specifications or customer requirements. Ensure these targets are realistic given the instrument's design and measurement range. Confirm the targets are within the acceptance criteria.
Tip: If targets are unclear, consult the device manual or standard operating procedures. - 6
Make adjustments
Apply the minimum necessary changes to reach the target values. Avoid overcorrection, which can introduce bias. Re-check affected channels or axes after each adjustment.
Tip: Make incremental changes and re-measure after each step. - 7
Re-measure against reference
With adjustments in place, measure again using the reference standard. Record the new readings and determine if the results fall within the tolerance window. If not, reassess the setup.
Tip: Document any persistent drift and note possible root causes. - 8
Document results
Enter measurements, adjustments, reference details, and environmental conditions into the calibration log. Include timestamps and operator IDs. Create or update a calibration certificate if required.
Tip: Attach the reference standard’s calibration certificate to the log for traceability. - 9
Validate with an alternate method
If feasible, verify results using a secondary method or instrument to cross-check accuracy. This reduces the risk of undetected errors and provides stronger confidence in the calibration.
Tip: Record the cross-check method and its results even if it isn’t a formal requirement. - 10
Finalize data export
Export the calibration data to the appropriate file format for auditing or customer delivery. Ensure the data is readable and stored securely. Confirm that all required fields are complete.
Tip: Use a consistent file naming convention for easy retrieval. - 11
Plan next calibration
Determine the next calibration interval based on instrument performance, usage, and environmental exposure. Update the maintenance calendar and alert team members when the next cycle is due.
Tip: Set reminders and review the procedure for any changes since the last calibration.
Questions & Answers
What are calibration instructions?
Calibration instructions are a set of step-by-step procedures used to adjust and verify an instrument's accuracy against a known reference. They define how to perform measurements, apply adjustments, and document results to maintain traceability.
Calibration instructions are step-by-step procedures to adjust and verify instrument accuracy against a reference, with documentation for traceability.
Why is traceability important in calibration?
Traceability links calibration results to recognized standards, ensuring measurements are comparable across time and equipment. It supports audits and demonstrates compliance with quality systems.
Traceability connects results to trusted standards, enabling comparisons over time and ensuring compliance.
How often should calibration be performed?
Calibration frequency depends on device usage, safety considerations, and environmental exposure. Follow manufacturer recommendations and organizational policies, and adjust intervals based on observed drift.
Frequency depends on use, risk, and conditions; follow policies and adjust as needed.
What should be documented in a calibration record?
Document device identifiers, reference standard details, environmental conditions, measurements, adjustments, outcomes, and certificates. Include operator IDs and date stamps for full traceability.
Document device details, standards, conditions, measurements, adjustments, and outcomes with timestamps.
Can I use an alternate method to verify calibration?
Yes, where available, cross-check results with a secondary method or instrument. This helps confirm accuracy and catch potential method-specific biases.
If possible, verify with a secondary method to confirm accuracy.
What if results are outside tolerance?
If results fall outside tolerance, re-check setup and references, and consider recalibration or service if drift persists. Do not report out-of-tolerance results as acceptable.
If out of tolerance, re-check everything and consider recalibration or service.
Watch Video
Key Takeaways
- Follow a defined calibration framework for consistency.
- Maintain traceability to recognized standards.
- Document every step, result, and condition.
- Plan future calibrations based on device performance.