Steps for Calibration: A Practical Step-by-Step Guide
Master the steps for calibration with a practical, repeatable workflow that helps you plan, apply traceable standards, control the environment, document results, and sustain calibration schedules.

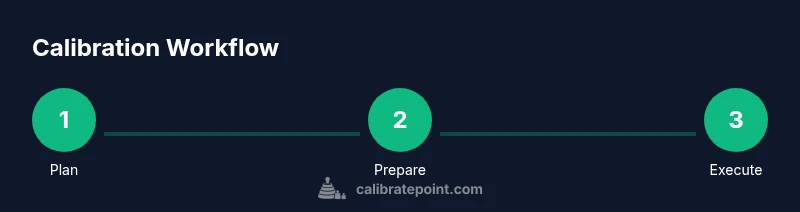
By following these steps for calibration, you will learn to verify and adjust measurement tools to meet specified tolerances. This guide covers planning, selecting traceable reference standards, establishing a stable environment, executing the calibration workflow, documenting results, and setting a schedule for ongoing maintenance. Gather essential tools and records before you begin, then work systematically to ensure reliable, repeatable measurements across your workflow.
What calibration is and why the steps for calibration matter
Calibration is the process of comparing a measurement instrument against a reference standard to verify its accuracy. In practice, the steps for calibration provide a repeatable method to identify drift, bias, or nonlinearity and to bring readings back into alignment with the reference. According to Calibrate Point, a disciplined calibration routine reduces measurement uncertainty and builds trust in data across laboratories, workshops, and field environments. This section lays out foundational concepts such as traceability, uncertainty, and documented procedures that drive reliable results in real-world settings.
Core principles: traceability and reference standards
At the heart of any credible calibration program is traceability—the ability to relate measurements to recognized standards through an unbroken chain of comparisons, all the way to international references. Reference standards should be selected for compatibility with the instrument’s measurement range and the tolerance required. Use calibration certificates that document the standard’s origin, calibration date, and uncertainty. For DIY and professional contexts, maintaining traceability means choosing certified artifacts and recording the linkage back to national or international references.
Selecting reference standards: accuracy, range, and compatibility
Choosing the right reference standard is crucial to meaningful calibration. The standard must cover the instrument’s measurement range with accuracy better than or equal to the target tolerance. Verify the standard’s own calibration interval and history, and ensure it remains within specification under your operating conditions. When possible, use a suite of standards to verify linearity across the full range and to check for any nonuniform drift that could compromise measurements.
Environment and workspace setup for calibration
Environmental control matters as much as the instrument itself. Temperature, humidity, and even air currents can influence readings. Establish a stable environment by using a dedicated calibration space or a controlled room, monitor ambient conditions with a calibrated sensor, and allow the instrument to acclimate before starting. Record initial conditions so all measurements can be interpreted with the proper context. A clean, organized workspace minimizes cross-contamination of measurements and helps maintain repeatability.
Tools, materials, and documentation prerequisites
Before you begin, assemble the essentials: a reference standard with traceability, the instrument under calibration, a set of appropriate calibration weights or blocks, an environmental monitor, a data-logging tool or software, and a printed or digital calibration procedure. Keep a dedicated logbook for measurements, adjustments, and notes. Cleanliness matters: use lint-free cloths and properly labeled containers for standards to avoid contamination or misplacement.
The calibration workflow: getting started
Start with a clear objective and scope for the calibration. Power the instrument and allow it to warm up to its normal operating temperature. Apply a known standard and record the instrument’s reading alongside the reference value. If the reading deviates beyond the allowable tolerance, compute the error, determine whether an adjustment is permissible, and document the decision. This workflow should be repeatable and auditable.
Data management: capturing, analyzing, and reporting results
Accurate data capture is essential. Record readings, reference values, environmental conditions, and any adjustments. Use a consistent calculation method to determine error and uncertainty, and produce a concise calibration report. Include an uncertainty budget that outlines sources of error and their contributions. Store data securely and maintain version control for procedures and certificates to support traceability.
Validation and verification of results
After any adjustment, re-check readings against the reference standard to confirm the instrument now meets specifications. Repeat tests at multiple points in the range to verify linearity and stability. If drift persists, reassess the instrument, reference standards, or procedure. Validation confirms that the calibration is valid and that the instrument will deliver reliable results over its specified interval.
Common mistakes and how to avoid them
Rushing steps, skipping warm-up time, or neglecting environmental stabilization leads to poor calibration quality. Failing to document conditions, calibration data, or decisions also creates gaps in traceability. Avoid complacency by following the procedure precisely, verifying every step, and reviewing results with a peer when possible.
Documentation, records, and compliance
Maintain comprehensive records, including the calibration objective, standards used, environmental conditions, raw data, calculations, adjustments, and the final certificate. Ensure records are easy to audit and share with stakeholders. Regularly review procedures for updates and ensure your team remains trained on the latest calibration practices.
Real-world walkthrough: a practical example
Consider a digital caliper used in a workshop. Start by warming up the caliper, then apply a precision gauge block as the reference. Record the reading, compare it to the known block length, and calculate the error. If the gap exceeds tolerance, adjust the caliper orientation or calibration constants per the manufacturer’s guidance, re-measure, verify across several block sizes, and finalize the documentation for audit trails.
Tools & Materials
- Reference standard (traceable artifact)(Must have calibration certificate and traceability to a recognized standard)
- Test instrument under calibration(Power on, warm up per vendor guidance)
- Calibration weights or reference blocks(Appropriate classes and ranges for the instrument)
- Environmental sensor (temperature/humidity)(Record ambient conditions during calibration)
- Data collection device or software(Log measurements and compute error)
- Calibration procedures and checklists(Printed or digital protocol)
- Cleaning supplies(Lint-free cloths and approved cleaners)
- Documentation logbook or digital journal(Archive results and revisions)
Steps
Estimated time: 2-5 hours
- 1
Define calibration objective
State the instrument’s purpose, the tolerances, and the range to be covered. Document the rationale for choosing the reference standards and the acceptance criteria. This clarifies what success looks like before starting.
Tip: Clearly state acceptance criteria before measurements. - 2
Prepare reference standards
Inspect reference standards for damage or contamination. Confirm calibration certificates are current and the standards are suitable for the instrument’s range and type.
Tip: Handle standards with care to avoid introducing additional errors. - 3
Set up environment
Ensure a stable workspace: controlled temperature and humidity, minimal drafts, and clean surfaces. Record ambient conditions for uncertainty assessment.
Tip: Stabilize environment for at least 15-30 minutes before starting. - 4
Power on and warm up
Power the instrument and allow it to warm to operating temperature as recommended by the manufacturer. This reduces unit-to-unit variation due to thermal effects.
Tip: Do not rush the warm-up phase; document actual stabilization time. - 5
Apply known standard and measure
Apply the reference standard at defined points in the range and capture readings. Use the same procedure for each point to ensure consistency.
Tip: Use repeatable positioning or fixtures to minimize user-induced variation. - 6
Record and compare
Log all readings, standard values, and environmental conditions. Calculate the error and compare to the tolerance window defined in the objective.
Tip: Use a consistent data format to simplify analysis. - 7
Decide on adjustment
If allowed by the instrument, perform a controlled adjustment to correct bias or scale error. If adjustments are prohibited, document the deviation and plan re-certification.
Tip: Document the reason for any adjustment or non-adjustment. - 8
Re-test after adjustment
Repeat measurements with the same standards to confirm the adjustment was effective and within tolerance at all points.
Tip: Check multiple points across the range for full coverage. - 9
Finalize documentation
Create or update the calibration certificate, record conclusions, and file the data with versioned procedures for auditability.
Tip: Include calibration date, due date, and responsible person. - 10
Schedule follow-up
Set a calibration interval based on usage, criticality, and historical data. Communicate the schedule to stakeholders.
Tip: Review interval after each calibration cycle and adjust if drift is detected.
Questions & Answers
What is calibration and why is it important?
Calibration verifies accuracy by comparing a device to a reference standard. It reduces drift, improves repeatability, and supports compliance and quality.
Calibration verifies accuracy using a reference standard and improves repeatability.
What is traceability in calibration?
Traceability links measurements to recognized standards through an unbroken chain of comparisons, documented in calibration certificates.
Traceability connects measurements to recognized standards with formal documentation.
How often should calibration be performed?
Calibration frequency depends on usage, criticality, and drift history. Establish a schedule that balances risk and workload.
Set a practical calibration schedule based on risk and usage.
What tools do I need to start?
You typically need a traceable reference standard, the instrument, a documented procedure, and a measurement log.
You need a reference standard, the instrument, and a documented procedure to start.
What if readings are out of tolerance?
If readings exceed tolerances, document the deviation, halt further use if necessary, and follow the defined corrective actions.
If out of tolerance, stop and follow corrective actions.
Can I calibrate without standards?
Calibration without reference standards is not recommended for accuracy. Use traceable standards or approved alternatives with documented uncertainty.
Calibration without standards is not recommended for accuracy.
Watch Video
Key Takeaways
- Define objective and scope before starting
- Use traceable reference standards
- Control the environment during calibration
- Document all measurements and decisions
- Establish a regular calibration schedule