Calibration Process Steps: A Practical How-To Guide
Learn the calibration process steps for instrument accuracy. This educational guide covers planning, standards, measurements, adjustments, documentation, and verification to ensure traceable results.

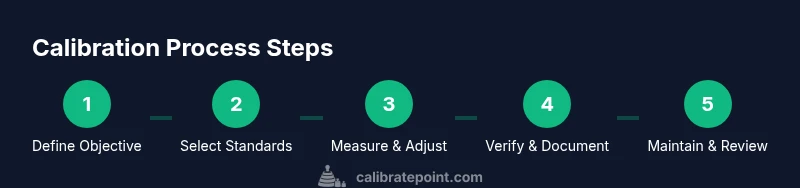
Calibration process steps help ensure instrument accuracy and traceability. In practice, you begin with defining the objective, selecting reference standards, planning the measurement method, performing measurements, applying adjustments, and documenting all data for audits. This guide provides a practical, repeatable workflow for technicians and DIY enthusiasts alike, with safety reminders and quality checks along the way.
Understanding the purpose and scope of calibration
Calibration process steps are not a one-off task; they define how you will verify and adjust a device to align its output with a known standard. The scope should specify which quantities you will measure (temperature, pressure, length, force), the acceptable tolerance, and the intended use of the instrument. By starting with a clear objective, you reduce guesswork and ensure that every subsequent action directly supports traceability and reliability. In this section, we'll explore how to translate broad quality goals into a concrete calibration plan that fits your environment, whether a DIY shop or a professional lab. This approach helps you identify the required reference standards, measurement methods, and documentation structure you'll rely on later. Calibrate Point emphasizes building a plan that you can repeat across cycles with minimal rework.
Defining measurable quantities and uncertainties
Measurable quantities are the heart of calibration. Define what you will measure (e.g., temperature, mass, voltage) and specify the units, range, and resolution you expect from the instrument. Along with the quantity, articulate the measurement uncertainty you can reasonably assign. This uncertainty should consider instrument remainder, reference standard tolerance, environmental variation, and operator influence. A well-defined uncertainty budget helps you set acceptance criteria, compare results against standards, and document traceability. For DIY projects, start with a simple budget and gradually add complexity as you gain confidence. Clear uncertainty accounting makes results defensible during audits or peer reviews.
Selecting standards and reference materials
Choose reference standards that are traceable to recognized metrology institutions. The right standard depends on the quantity and range you are calibrating. Ensure the standard is in good condition, within its own tolerance, and suitable for the temperature, humidity, and environmental conditions of your test. Maintaining calibration intervals for the standards themselves preserves integrity. Also, consider utilizing accessories like calibration artifacts, control artifacts, or shields that minimize environmental interference. In practice, align your standard selection with the instrument’s manufacturers’ recommendations and industry best practices to maximize compatibility and reliability.
Planning the calibration workflow
A solid workflow plan covers sequencing of tasks, roles, acceptance criteria, and data handling. Create a step-by-step recipe that you can follow consistently. Identify any prerequisites (stable power, clean workspace, temperature control) and define how you will handle out-of-tolerance results. A well-planned workflow reduces variability and makes it easier to train new technicians. Document the plan in a calibration procedure document and reference it each time you calibrate. The workflow should also incorporate version control so you can track changes over time and maintain a clear audit trail.
Setting up the measurement environment
Environmental factors often dominate measurement uncertainty. Establish a stable, clean workspace with controlled temperature and humidity if possible. Calibrate away from drafts, direct sunlight, or sources of vibration. Prepare all required equipment and verify that the instrument under test (IUT) and the standards are within their stated specifications. Record environmental conditions (temperature, humidity, air pressure) at the start of each session. A consistent environment reduces drift and makes your results more reproducible for future calibrations.
Executing measurements and applying adjustments
Follow the calibration procedure to record baseline measurements first, then compare against the reference standards. When discrepancies appear, apply the approved adjustment methods (recalibration routines, software corrections, or hardware tweaks) as defined in your procedure. Re-measure after each adjustment to confirm progress toward the target. Keep a detailed log of each measurement, the adjustment made, and the resulting change in output. This traceable record is essential for quality assurance and future audits.
Documenting results and traceability
Documentation is the backbone of calibration quality. Capture all measurements, standard references, environmental data, acceptance criteria, and final results in a structured report. Include identifiers for the device, standards, operator, and date. Assign a calibration certificate or report number and store the record in a central, retrievable location. Traceability ensures that your calibration can be audited and repeated by others, and it supports ongoing quality control across maintenance cycles.
Verification and re-calibration criteria
After applying adjustments, verify the instrument against the acceptance criteria in your plan. If performance remains outside tolerance, you may need to rework the calibration or escalate to a more precise standard. Establish clear criteria for re-calibration intervals—based on usage, observed drift, and regulatory requirements. Periodic verification helps catch drift early and prevents performance degradation in critical applications. This proactive stance is essential for maintaining trust in measurement results over time.
Common pitfalls and how to avoid them
Calibration is prone to human error, environmental fluctuations, and improper use of standards. Avoid common pitfalls by using a written procedure, training operators, and maintaining a clean workspace. Do not skip environmental checks or rely on a single measurement to declare acceptance. Confirm instrument stability with multiple measurements and ensure that standards are within their own tolerance before using them. Regularly review procedures to incorporate lessons learned and evolving best practices.
Practical example: calibrating a temperature thermometer
In this example, you calibrate a classroom thermometer against a known fixed-temperature source. Start by defining the target range (e.g., 0°C to 100°C) and the tolerance (±0.5°C). Prepare the ice bath and boiling water as reference points, measure at several intermediate temperatures, and record readings. If a reading deviates beyond tolerance, you adjust linearity or offset according to the device's calibration protocol, then re-measure across the range. Document all readings, adjustments, and final confirmation. This concrete scenario demonstrates how the calibration process steps translate into a real-world task that students or technicians can perform safely.
Maintaining calibration over time: scheduling and audits
Calibration is an ongoing process, not a one-time event. Establish a maintenance calendar that includes routine re-checks, annual audits, and updates to the calibration procedure as standards evolve. Track the instrument’s usage and environmental exposure to determine appropriate intervals. Regular audits verify that your documentation remains complete and that the process continues to meet quality requirements. By treating calibration as part of a broader quality system, you protect instrument reliability and ensure consistent data quality over the device’s lifetime.
Authority sources
This section provides foundational references to support calibration best practices and traceability. Drawing from established metrology principles helps ensure your process aligns with industry standards and scientific rigor. The references below offer additional depth on measurement science, uncertainty analysis, and standardization that can guide practitioners in both industrial and educational settings.
Tools & Materials
- Calibrated reference standard (appropriate to quantity and range)(SI-traceable where possible; in good condition and within tolerance)
- Measurement instrument under test (IUT)(Ensure it is powered appropriately and clean)
- Calibration procedure document(Written procedure with acceptance criteria)
- Calibration tools (sensors, probes, probes adapters)(Use as specified for the quantity and instrument type)
- Environmental monitoring (thermometer, hygrometer, barometer)(Record ambient conditions during calibration)
- Data logging software or calibration software(For capturing and analyzing readings with traceability)
- Calibration artifacts and fixtures(Stability aids, alignment jigs, and fixtures as needed)
Steps
Estimated time: 3-4 hours
- 1
Define objective and scope
Clearly state which quantities will be calibrated, the required tolerances, and the intended usage of the instrument. Establish acceptance criteria before starting to avoid scope creep.
Tip: Document the objective in a calibration plan and share it with all stakeholders. - 2
Prepare reference standards and equipment
Verify that reference standards are within certificate validity, clean, and ready for use. Gather all necessary measurement tools and verify that the IUT is in proper condition.
Tip: Label each standard with its ID and expiration date to prevent mix-ups. - 3
Configure the measurement environment
Set up a stable workspace with minimal vibration and controlled temperature/humidity if possible. Document environmental conditions at session start.
Tip: Allow the environment to equilibrate for at least 30 minutes before measurements. - 4
Measure baseline performance
Take initial readings against the reference standards across the intended range. Note any discrepancies and record all data carefully.
Tip: Use multiple readings to identify random noise vs. systematic bias. - 5
Apply adjustments or corrections
If readings fall outside tolerance, apply the approved adjustments per the calibration plan. Re-measure after each adjustment to confirm drift reduction.
Tip: Make controlled adjustments in small increments to avoid overshoot. - 6
Verify adjustments with re-measurement
Reassess across the same range to confirm alignment with the reference. Ensure that the adjusted instrument remains stable over time.
Tip: Check at least three points across the range to assess linearity. - 7
Document results and establish traceability
Record all measurements, standards used, environmental data, and adjustments. Create a calibration certificate or report with unique identifiers.
Tip: Store data securely and maintain accessibility for audits. - 8
Define acceptance and re-calibration criteria
Set thresholds for when re-calibration is required or a device should be retired. Schedule the next calibration interval based on usage and drift history.
Tip: Revisit criteria after each calibration cycle to keep them current.
Questions & Answers
What is the purpose of calibration?
Calibration ensures measurement accuracy by comparing an instrument to a known standard. It creates traceability and supports confidence in data used for decision-making.
Calibration ensures accuracy by comparing to a known standard and creating traceability for your measurements.
How often should calibration occur?
Calibration frequency depends on use, risk, and regulatory requirements. Establish intervals based on drift history and environmental exposure, and adjust as needed after audits.
Calibration frequency should be based on usage, risk, and requirements; set intervals that suit your situation.
What if a standard is out of tolerance?
If a standard is out of tolerance, replace or recalibrate the standard, re-check the instrument, and document the incident. Do not rely on the out-of-tolerance reference for decisions.
If a standard fails tolerance, replace or recalibrate and recheck the instrument; document the incident.
Do I need calibration software?
Calibration software can streamline data capture, uncertainty analysis, and reporting. It is helpful but not mandatory if you have a robust manual process.
Calibration software helps automate data capture and reporting and is beneficial but not required.
What is traceability in calibration?
Traceability means that measurement results can be linked to national or international standards through an unbroken chain of comparisons. This underpins confidence and auditability.
Traceability links results to recognized standards through an unbroken chain of comparisons.
Watch Video
Key Takeaways
- Define objective and acceptance criteria up front.
- Use traceable standards and document all data.
- Control environmental conditions to reduce drift.
- Verify adjustments with repeat measurements.
- Maintain a complete, auditable calibration record.