Calibration Setup: A Practical Step-by-Step Guide
Learn a practical calibration setup with planning, environment control, reference standards, and documentation to ensure repeatable, auditable measurements across instruments.

According to Calibrate Point, a robust calibration setup ensures traceable, repeatable measurements for any instrument. This guide helps you design and implement a complete testing workflow, including essential equipment, environmental controls, reference standards, and documentation practices to minimize drift and errors. You’ll plan, execute, and validate to achieve auditable results from the start.
What is calibration setup and why it matters
According to Calibrate Point, a robust calibration setup ensures traceable, repeatable measurements for any instrument. This section introduces the concept, outlining how a well-designed setup impacts data quality, compliance, and decision-making. A calibration setup defines the scope, selects reference standards, sets environmental controls, and documents procedures to enable repeatable results across operators and time. It is the backbone of any measurement program, whether you calibrate a dial gauge, a spectrometer, or a digital multimeter. By establishing clear objectives and traceability from the outset, you reduce the risk of drift, bias, and misinterpretation. In practice, a good setup translates into repeatable lab workflows, auditable records, and consistent performance under varied conditions. The overarching goal is to create a controlled environment where measurement uncertainty is understood and minimized, while procedures are repeatable, teachable, and verifiable by third parties. When done well, a calibration setup becomes a living framework that grows with your equipment and your lab capabilities.
Core components of a reliable calibration workflow
A reliable calibration workflow rests on six pillars: scope and objectives, reference standards, environmental controls, procedural standards, data recording and analysis, and auditability. The Calibrate Point approach emphasizes traceability, uncertainty budgeting, and repeatability. Start with a documented objective: what instrument, what range, and what performance metric. Next, select reference standards with known, documented uncertainty. Environmental controls include temperature, humidity, and, when applicable, vibration and air quality. Use standardized procedures (step-by-step checklists) so any technician can reproduce results. Data capture should be timestamped, versioned, and backed up; calculations should be transparent and auditable. Finally, produce a formal calibration report that records results, conclusions, and any corrective actions. A well-structured workflow reduces drift and makes results comparable over time. Calibrate Point analysis shows that consistent adherence to procedure and traceability improves cross-lab comparability and reduces rework time.
Step-by-step: planning your calibration setup
Begin with planning: define the instrument’s intended use, operating environment, and acceptance criteria. Create a calibration plan that lists required standards, tolerances, and measurement methods. Map out responsibilities and a schedule to avoid bottlenecks. Align procedures with industry standards and your organization’s quality policies. Plan for traceability: establish reference standards, calibration certificates, and a documented uncertainty budget. Include visuals: floor plans showing where to place the instrument, where standards live, and where to measure ambient conditions. This stage reduces surprises later and makes the actual calibration smoother. If you need a quick visual, reference diagrams showing layout options for bench-top or cabinet-based setups. By front-loading planning, you mitigate last-minute issues and ensure your calibration setup stays repeatable across shifts.
Common sources of error and how to minimize them
Errors creep into a calibration setup from multiple sources: drift in reference standards, environmental fluctuation, improper connections, operator variability, and data mishandling. To minimize drift, always use current, certified references and store them in a controlled environment. Verify connections and cables are clean, secure, and appropriate for the instrument under test. Standardize operator actions with checklists and training to reduce variability. Control environmental factors: keep stabilized temperature, humidity, and clean air; log deviations and adjust procedures if needed. Avoid contamination by using calibrated tools and clean fixtures. Finally, ensure software settings are correct, and that units, prefixes, and calibration constants are applied consistently. Adopting rigid controls reduces the chance of human error and improves confidence in results.
Tools and environments: hardware, software, and environment controls
A practical calibration setup relies on a mix of hardware, software, and environmental controls. Core hardware includes a stable bench, reference standards, fixtures, and measurement instruments with traceability. Software should support procedure templates, data logging, and uncertainty calculations, ideally with audit trails. Environmental controls cover temperature, humidity, vibration, and air quality; even noise levels can matter for sensitive devices. Use a dedicated calibration workspace with proper lighting and minimal clutter. Document equipment IDs, serial numbers, calibration histories, and certificate dates. Establish a routine for maintenance and calibration of your own tools so that the entire setup remains in spec.
Testing and documentation: ensuring repeatability and auditability
Once your setup is in place, run a pilot calibration to validate procedures. Compare results against reference standards and record any deviations. Use a standard form to document all steps, measurements, units, and uncertainty estimates. Store calibration reports in a centralized, accessible repository with version control. Create an audit trail by including operator IDs, timestamps, and any corrective actions or adjustments. Periodically re-test to confirm stability and to detect drift between calibrations. A robust testing and documentation workflow enables traceability, supports internal quality checks, and simplifies external audits.
Safety considerations and risk management
Calibration work often involves electrical, chemical, or mechanical hazards. Always follow manufacturer guidance and institutional safety rules. De-energize equipment before connecting test leads; use insulated tools and PPE when appropriate. Keep spill kits and fire safety equipment accessible in the calibration area. Ensure ventilation if you work with fumes or solvents, and store reference standards properly to avoid contamination. Maintain clear access paths and label all hazard zones. Finally, review risk assessments regularly and update procedures if new equipment or standards are introduced.
Case study: a typical calibration setup for a lab instrument
This case study illustrates a bench-top calibration setup for a digital multimeter in a teaching laboratory. The instrument sits on a vibration-damped bench near a windowless wall to minimize drafts, with a NIST-traceable reference standard in a light-controlled cabinet. The workflow uses a procedure template, a dedicated data logger, and a single operator to execute steps. Ambient temperature is logged continuously, and the calibration is performed within the instrument’s stated operating range. After the run, results are compared to certificates, and the report is filed for the lab’s quality system. The case shows how a clear plan, stable environment, and consistent documentation translate into reliable, repeatable results that support ongoing teaching and research.
Tools & Materials
- Calibrated reference standard (NIST-traceable)(Choose a standard with documented uncertainty and traceability.)
- Instrument under test(The device or tool being calibrated.)
- Environmental measurement tools (calibrated thermometer/hygrometer)(For temperature and humidity control.)
- Stable power supply and surge protection(Provide clean, stable power.)
- Calibration fixtures and probes(Appropriate fixtures for your instrument.)
- Calibration procedures and forms(Printed or digital templates with steps and fields.)
- Documentation and audit trail software(Optional, but helpful for traceability.)
Steps
Estimated time: 60-90 minutes
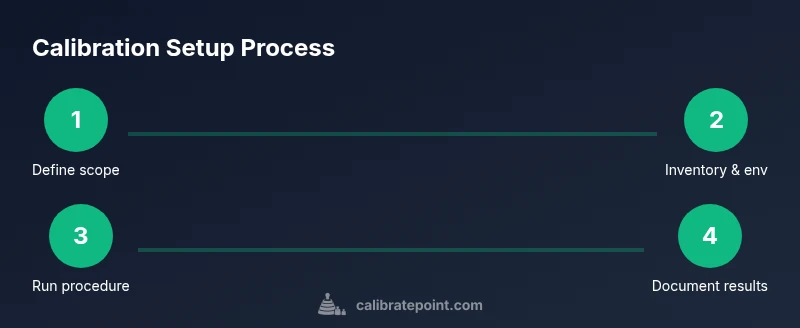
- 1
Define scope and objectives
Clearly state what will be calibrated, acceptable performance, and how success will be measured. Document acceptance criteria and tolerance bands before touching equipment. This upfront planning prevents scope creep and sets a measurable target.
Tip: Keep objectives specific and testable; include at least one performance metric. - 2
Inventory standards and equipment
List all reference standards, instruments, and fixtures that will be used. Verify each item has a current calibration certificate and a known uncertainty. Replace or rotate items if any certificate is close to expiry.
Tip: Mark items with dates of calibration and next due date. - 3
Assess environmental controls
Check temperature, humidity, and vibration levels in the calibration area. Confirm that environmental specs meet instrument requirements. If conditions drift, pause or adjust until stable.
Tip: Use an isolated space or vibration-damped bench if precision is critical. - 4
Prepare workspace and safety checks
Organize the bench with clear labeling, cable management, and access to reference standards. Ensure PPE is available if required and that emergency procedures are posted.
Tip: Keep a clean, uncluttered workspace to prevent misreads. - 5
Set up instrument connections
Connect the instrument under test to calibration references using the correct adapters and cables. Verify power, grounding, and shielding are appropriate to reduce electrical noise.
Tip: Double-check wiring diagrams before powering up. - 6
Execute calibration procedure
Run the step-by-step calibration procedure exactly as written. Record all raw data, timestamps, and any deviations from expected results.
Tip: Follow the checklist strictly; deviations should be documented. - 7
Record results and analyze drift
Calculate differences from reference values and assess whether results stay within tolerance. Note any systematic biases and potential causes for drift.
Tip: Use uncertainty budgets to quantify confidence in results. - 8
Review, approve, and archive
Have a qualified person review the calibration record, sign off, and store the report in an auditable system. Ensure accessibility for future audits.
Tip: Archive both raw data and final certificates for traceability.
Questions & Answers
What is calibration setup and why is it important?
A calibration setup is the planned arrangement of standards, equipment, environment, and procedures used to verify and adjust a measurement device. It ensures traceability, accuracy, and repeatability across users and time.
A calibration setup is a planned arrangement of standards, equipment, and procedures to verify a device's accuracy and keep measurements consistent over time.
What equipment do I need to start a calibration setup?
You need a calibrated reference standard, the instrument under test, environmental monitors, proper fixtures, documentation tools, and a stable power supply. Additional items may include adapters and safety equipment.
Start with a reference standard, the instrument, environmental monitors, and a documented procedure.
How should reference standards be chosen?
Choose standards with traceable certificates and defined uncertainties. Ensure certificates are current and relevant to the instrument's measurement range.
Pick standards with traceable certificates and current validity to match the instrument's range.
How often should calibration be performed?
Calibration frequency depends on instrument use, stability, and regulatory requirements. Establish a schedule based on prior drift, environmental exposure, and manufacturer guidance.
Set a schedule based on drift history, use, and any regulatory requirements.
What environmental factors affect calibration?
Temperature, humidity, vibration, and air quality can affect measurements. Maintain stable conditions and record deviations.
Keep temperature and humidity stable, and note any deviations.
How should results be documented for audits?
Record raw data, reference values, uncertainties, and conclusions in a standardized report. Store certificates and versioned procedures in a central repository.
Document all data and decisions in a standardized, archiveable report.
Watch Video
Key Takeaways
- Define clear calibration objectives before starting.
- Use traceable reference standards for accuracy.
- Control environmental factors to minimize drift.
- Document procedures and results for audits.