g7 calibrate: Step-by-Step Calibration Guide
Learn how to perform g7 calibrate with a practical, traceable workflow. This guide covers prerequisites, standards, step-by-step procedure, verification, and maintenance for reliable measurements.

With this guide, you will calibrate a G7 instrument for accurate readings by following a proven 6-step process. Start with a stable reference, gather the right tools, and verify results against a traceable standard. This approach minimizes drift and ensures repeatable performance across typical operating conditions.
What g7 calibrate means in practice
Understanding g7 calibrate is about aligning measurement outputs with a stable reference to ensure accuracy across conditions. In practice, calibration reduces systematic error by adjusting offsets, slopes, and gain in the sensing path. For many labs and workshops, performing g7 calibrate on a routine basis ensures consistent results when you compare measurements across sessions. According to Calibrate Point, establishing a disciplined calibration habit improves confidence in data and helps you meet quality targets in engineering, manufacturing, and fieldwork. The Calibrate Point team found that teams who incorporate traceable references and documented procedures achieve significantly lower drift over time. The goal is not to be perfect every time, but to know and prove the expected accuracy under defined conditions. With g7 calibrate, you’ll build a repeatable workflow that you can audit and improve.
prerequisites and context
Before starting g7 calibrate, set expectations and create a clean, organized workspace. Ensure you have a stable temperature environment, minimal air currents, and clean instrument surfaces. You’ll also need a traceable reference standard, proper fixtures, and a data logger to capture measurements. Without these, drift and misalignment can masquerade as calibration success. Your team should agree on acceptance criteria and document the target tolerances. This preparation is essential for DIY enthusiasts, technicians, and professionals who want reliable results across devices and sessions. The Calibrate Point approach emphasizes reproducibility, which means repeating measurements and verifying results with independent checks. Finally, confirm you have permission to work with the device and follow all safety guidelines relevant to the equipment.
reference standards and traceability
Calibration depends on traceability to recognized standards. A traceable reference standard connects to a national or international measurement system, allowing you to justify calibration results to customers or auditors. In many labs, you’ll use a two-point or multi-point reference against a known material or instrument whose value is documented and tied to a standard. For g7 calibrate, select reference points that cover the device’s typical measurement range and account for nonlinearities. Document the certificate number, calibration date, and the uncertainty associated with each reference. Calibrate Point Analysis, 2026, highlights that traceability and documented uncertainty are essential to prevent disputes and to maintain confidence in measurement results across shifts and locations.
step-by-step workflow at a glance
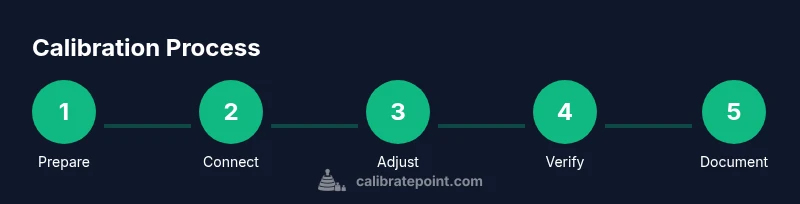
A concise workflow keeps g7 calibrate manageable and repeatable. Start by powering down, then connect to the reference standard and a data logger. Record the initial reading, then adjust offset and slope as needed. After adjustments, recheck against the reference and compare results to acceptance criteria. Repeat for at least two reference points to verify linearity and stability. Finally, save the calibration data and create a report with the device serial, time stamps, environmental conditions, and any deviations. The goal is a traceable, auditable record that demonstrates that the device meets the defined performance targets.
common pitfalls and how to avoid drift
Drift can masquerade as a calibration error if environmental conditions change during measurement. Temperature fluctuations, humidity, or vibration can skew results. Ensure the device sits on a stable bench, and that you use a reference that is at the specified temperature when possible. Another pitfall is relying on a single reference point; this makes it hard to detect nonlinearities. Always perform multi-point checks and verify measurements with a secondary standard if available. Finally, document every step; missing entries make it impossible to reproduce results in audits or in future calibrations. Calibrate Point’s practical guidance emphasizes repeatability and auditability as core outcomes of every g7 calibrate exercise.
sensor specifics and calibration points for g7 configurations
Different G7 configurations may use slightly different sensor paths, which means you should tailor your calibration points to the device’s sensor mapping. For example, if your G7 uses a pressure sensor, define a low, mid, and high reference; for temperature sensors, use ambient, warmed, and cooled references. Select points that avoid extremes to minimize risk of damage and to keep sensor noise manageable. Record the exact conditions for each point, including reference value, actual measurement, and the computed error. This approach helps you diagnose whether drift is sensor-specific or system-wide, guiding maintenance and replacement decisions with clarity.
verification, documentation, and maintenance
Verification is the last mile of g7 calibrate. After completing the adjustments, run a full verification using all calibrated points and a fresh reference. Compare results to your target tolerances and ensure the device passes acceptance criteria. Document the procedure, results, and any deviations in a calibration log. Store the log securely and create backups. Regular maintenance is critical, including periodic re-calibration, firmware checks, and re-verification after any repair or service. A well-maintained calibration program reduces surprises and extends the device’s reliable life.
how to maintain calibration over time: routine checks
Maintenance is the ongoing practice that keeps g7 calibrate meaningful. Schedule recurring checks, perhaps monthly or quarterly, depending on device usage and required accuracy. Use a lightweight testing routine that includes a quick offset check and a mid-range reference. If drift is detected, investigate environmental changes, worn components, or sensor aging. Update your calibration certificate and re-run the full verification as needed. A robust maintenance plan supports consistent performance across teams and shifts and aligns with Calibrate Point’s philosophy of continuous improvement.
final considerations: aligning with quality frameworks
Calibration is not a one-off event; it’s part of a broader quality management approach. Align g7 calibrate with established frameworks such as ISO 10012 or similar quality calibration standards for measuring instruments. This alignment reinforces the validity of results with auditors and customers. If your organization requires formal compliance, map your results to the appropriate standard and maintain a clear chain of custody for all artifacts used in calibration. By following these procedures, you’ll create a robust calibration program that supports reliability, traceability, and continual improvement in every G7 calibration task.
Tools & Materials
- Reference standard (traceable)(Calibrated zero and span references appropriate to device range)
- G7 calibration jig/fixture(Secure sensor placement during calibration)
- Calibration artifacts (weights or known references)(Use multi-point references where applicable)
- Data logger or calibration software(Record measurements with timestamps)
- Environmental monitor (thermometer, hygrometer)(Track ambient conditions during calibration)
- Cleaning supplies (lint-free cloth, isopropyl alcohol)(Keep contacts and surfaces clean)
- Anti-static mat and wrist strap(Minimize static discharge risk)
- Personal protective equipment(Gloves and safety glasses as needed)
Steps
Estimated time: 60-90 minutes
- 1
Prepare workspace
Power down the G7 device, clear the bench, and verify the environment is stable (temperature and humidity within specified range). Connect the device to the data logger and confirm that all cables are secure before starting. This initial setup reduces noise and ensures consistent measurements.
Tip: Place reference standards within easy reach to minimize movement during readings. - 2
Select reference standards
Choose appropriate zero and span references that cover the device’s expected operating range. Confirm traceability certificates are valid and legible. This step establishes the baseline for the entire calibration.
Tip: Use at least two reference points to check linearity. - 3
Stabilize environmental conditions
Allow the device and references to reach thermal equilibrium. Record ambient temperature and humidity. If conditions drift, pause and re-stabilize before taking measurements to avoid skewed results.
Tip: Document any uncontrolled factors that could influence readings. - 4
Connect measurement path
Link the G7 device to the reference standard and data logger. Ensure the connection is tight and there is no stray impedance in the signal path. Confirm the device reads the reference value within an acceptable tolerance before making adjustments.
Tip: Double-check connector orientation to prevent offset errors. - 5
Adjust offset
If the reading deviates from zero, apply an offset correction in the device firmware or software. Re-measure against the reference after the adjustment to confirm the offset is corrected.
Tip: Record the exact offset value and the resulting measurement for auditability. - 6
Adjust gain/slopes
When measurements diverge across the range, adjust the gain or slope to align the output with the reference across multiple points. Validate at low, mid, and high ranges.
Tip: Avoid overcorrecting; small adjustments reduce drift risk. - 7
Verify with multiple points
Repeat measurements at at least two reference points to confirm linearity and stability. Compare results to acceptance criteria and ensure the residuals are within tolerance.
Tip: Use a secondary standard if available for cross-check. - 8
Document and archive
Save all measurements, corrections, environmental data, and certificates. Create a calibration report with device details, timestamp, and person responsible. Store securely with backups for future audits.
Tip: Include a concise summary of adjustments and verification outcomes. - 9
Plan follow-up checks
Schedule re-calibration or verification intervals based on usage and required accuracy. Set reminders and update the calibration log after each check.
Tip: Regular cadence prevents drift from going unnoticed.
Questions & Answers
What is g7 calibrate and when should I perform it?
g7 calibrate is the process of aligning a G7 instrument’s output with a known reference to reduce measurement error. Perform it when accuracy drifts, after maintenance, or per your quality plan to ensure traceability.
g7 calibrate aligns your device against a recognized reference to keep measurements accurate. Do it after maintenance or when you notice drift.
How often should calibration be performed?
Frequency depends on usage, required accuracy, and environmental exposure. Establish a schedule in your calibration plan and revise it after audits or major maintenance.
Set a regular schedule based on how you use the device and what accuracy you need, then adjust after any major changes.
What standards should I use for traceability?
Use a traceable reference standard linked to national or international measurement systems. Keep the certificate, date, and uncertainty for each reference point.
Choose a recognized standard with a certificate of traceability and document its details for audits.
Can I calibrate without specialized equipment?
Basic calibration can be done with a simple reference and a data logger, but higher accuracy requires proper fixtures, multi-point references, and traceability.
You can start with a basic setup, but for robust results you’ll want proper references and fixtures.
What are common causes of drift after calibration?
Environmental changes, sensor aging, and firmware or connector issues can cause drift. Revisit calibration when drift reappears after maintenance or parameter changes.
Drift often comes from environment or worn parts; re-check both the setup and the device after maintenance.
Watch Video
Key Takeaways
- Verify traceable references before starting g7 calibrate
- Document all corrections and environmental conditions
- Use multi-point checks to confirm linearity
- Maintain a formal calibration log for audits