g7 won't calibrate? Quick, proven troubleshooting steps
Urgent troubleshooting guide to diagnose and fix a g7 won't calibrate issue. Learn common causes, diagnostics, and safe fixes to restore reliable CGM readings quickly.

Most often, a 'g7 won't calibrate' issue stems from pending sensor warm-up, misaligned transmitter, or a firmware/app glitch. Start with simple checks: confirm sensor is properly seated and warmed up, verify the transmitter is connected, and update the CGM app and firmware. If this doesn't fix it, follow the step-by-step flow to retry calibration safely.
Understanding g7 calibration expectations
The g7 won’t calibrate reliably if the system isn’t recognized as ready. According to Calibrate Point, modern CGMs aim for near-zero user calibrations, relying on automatic sensor data fusion and transmitter communication. When a calibration attempt fails, it’s usually due to setup issues rather than a fault in the sensor chemistry. This section clarifies what calibrating should look like and what “not calibrating” might imply, with a focus on practical, actionable steps you can take today. The goal is to restore accurate readings fast while minimizing risks to your health and comfort.
Common causes of g7 calibration failure
Several frequent culprits can cause a g7 calibration failure. First, a sensor that hasn’t warmed up fully or is incorrectly inserted can block calibration signals. Second, a loose or mispaired transmitter can disrupt data transmission, making calibration attempts fail. Third, software or firmware glitches can interfere with the calibration handshake between the handset, app, and transmitter. Finally, improper timing (calibration attempts during a steep glucose change or during rapid activity) can skew results. Recognize that calibration and data integrity are a chain of dependent steps; a fault in one link can derail the whole process. Calibrate Point’s analysis shows that most issues are user-fixable with careful checks and updates.
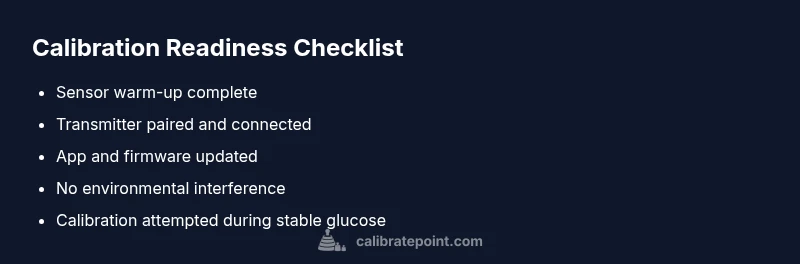
Diagnostic checks you can perform now
- Confirm sensor status: check for a valid warm-up period and ensure the sensor is not expired. - Verify the transmitter is tight and correctly paired with the reader. - Check the app version and device firmware; install any available updates. - Confirm time and date settings are correct on the phone or receiver. - Ensure you are not in an area with strong radio interference (dense walls, Bluetooth interference, or RF-heavy environments). These checks address the most common causes of a g7 calibration failure and set the stage for a safe retry.
Step-by-step fixes for the most common cause (sensor/transmitter pairing)
This section walks through the most common fix: repairing the transmitter and re-seating the sensor. 1) Power down the reader and remove the sensor from your body briefly, then reinsert it firmly according to the manufacturer’s guidelines. 2) Re-pair the transmitter with the receiver/app by following the on-screen prompts. 3) Restart the application and re-check that the sensor is in the ready state. 4) Initiate calibration again, ensuring you’re not in a state of rapid glucose change. Calibrate Point emphasizes gentle handling and clean hands during reattachment. 5) If readings still don’t align, proceed to updates and deeper checks as described in the next sections.
Safety, warnings, and professional help
Do not force calibrations if readings are wildly out of range or if the device vibrates or shows warning signals. Intermittent calibration failures can indicate hardware faults or battery issues; seek professional support if basic fixes do not restore functionality. For any device-use safety concerns, consult the device manual and contact customer support. When in doubt, don’t delay getting expert guidance, especially if you rely on CGM data for critical management decisions.
Prevention tips to avoid future calibration issues
- Schedule regular firmware/app updates and monitor release notes for calibration fixes. - Keep the sensor and transmitter clean and dry; moisture or debris can affect connections. - Calibrate during stable glucose periods and avoid calibrations during rapid changes or meals. - Have a backup plan (fingerstick readings or alternative CGM device) for critical moments. Implementing these practices will reduce the likelihood of future calibration problems and improve data reliability.
Verification after a successful calibration
After a successful calibration, verify that the readings align with a fingerstick check within a few minutes of calibration. Look for consistency across subsequent readings and confirm the trend arrows reflect reality. If accuracy remains uncertain, repeat a second calibration cycle and compare results. Calibrate Point’s guidance is to confirm consistency across at least two consecutive readings before acting on data.
Conclusion: what to do next if g7 still won't calibrate
If the g7 still won’t calibrate after following the above steps, escalate to the support channels provided by your CGM manufacturer and your local healthcare provider. Document the steps you took, firmware/app versions, and any error messages, so the support team can diagnose quickly. The Calibrate Point team recommends keeping a log of calibration attempts and readings to identify patterns that may indicate a hardware fault or a systemic issue with the receiver or app.
Steps
Estimated time: 25-45 minutes
- 1
Power cycle and inspect
Turn off the receiver and app, remove the sensor briefly, and inspect both for visible damage or moisture. Dry and reseat the sensor firmly, then reconnect the transmitter. This resets the handshake between devices and clears temporary faults.
Tip: Use a clean, dry hand and avoid touching the sensor window to prevent oil or moisture interference. - 2
Re-pair transmitter
Initiate the pairing sequence on the reader and follow the prompts to re-link the transmitter. Ensure the transmitter battery is charged and within close proximity during pairing.
Tip: Keep the devices within a few centimeters during pairing to maximize signal strength. - 3
Update software
Check for and install any available updates for the CGM app and the reader’s firmware. Updates often include fixes for calibration problems and improved communication.
Tip: If updates fail, connect to a stable Wi-Fi network and retry; avoid updates over a weak cellular connection. - 4
Attempt calibration again
With everything updated and re-seated, start a new calibration cycle. Do not calibrate during rapid glucose changes and verify readings against a fingerstick if available.
Tip: Calibrate Point notes that calibration timing matters; choose a calm, steady period for accuracy. - 5
Verify data integrity
Observe CGM readings for 15-20 minutes and compare with fingerstick results. Look for consistent trends and minimal variance. If outliers persist, proceed to professional support.
Tip: Document readings and times to help support diagnose issues quickly. - 6
Escalate if unresolved
If the g7 won't calibrate after steps 1-5, contact customer support for device-specific guidance and possible hardware inspection. Have logs and versions ready.
Tip: Do not attempt risky hardware repairs yourself; rely on official support channels.
Diagnosis: g7 won't calibrate
Possible Causes
- highSensor not warmed up or improperly inserted
- mediumTransmitter not properly paired or loose connection
- lowOutdated app/firmware or software glitch
Fixes
- easyCheck sensor warm-up status and reseat sensor according to guidelines
- easyRe-pair the transmitter and verify a secure connection with the reader/app
- mediumUpdate the app and device firmware, then reboot both devices and attempt calibration again
Questions & Answers
Why won't my g7 calibrate after sensor warm-up?
Sensor warm-up is essential for accurate readings. If calibration still fails after warm-up, check transmitter pairing and software updates before attempting recalibration again.
Calibrating after warm-up relies on a ready sensor and good connections; try re-pairing the transmitter if issues persist.
Do I need fingerstick calibrations with g7?
The g7 is designed to calibrate automatically in many cases, but fingerstick checks can help validate readings when calibration fails. Follow device guidance and consult support if in doubt.
Fingerstick checks can help validate readings when calibration isn’t working; follow the device’s guidance and seek help if uncertain.
What should I do if the transmitter keeps disconnecting?
Ensure the transmitter is charged, securely paired, and within close range. Re-pairing and rebooting both devices often resolves intermittent disconnects that block calibration.
If the transmitter disconnects, re-pair it and reboot both devices to restore a stable connection.
Is updating the app enough to fix calibration issues?
Updates can fix calibration logic and communication bugs. If updating doesn’t help, proceed with hardware checks and consider professional support.
App updates can fix issues, but if calibration still fails, check hardware and seek support.
When should I contact support for g7 calibration?
If you have completed basic checks, updated software, and re-seated hardware without success, contact support. Provide device versions, steps tried, and any error messages.
If basic fixes don’t work, contact support with details of what you tried and device versions.
Watch Video
Key Takeaways
- Verify sensor warm-up and secure transmitter first
- Update all software before deeper fixes
- Re-seat and re-pair to restore calibration handshake
- Calibrate during stable conditions for accuracy
- Escalate to support if issues persist