Why is my dexcom.calibration.not working? A Troubleshooting Guide
A practical, step-by-step troubleshooting guide for when your Dexcom calibration isn't working. Learn quick checks, common causes, and how to resolve issues safely with Calibrate Point.

Start by confirming your Dexcom CGM sensor is properly inserted, warmed up, and the transmitter is paired with the receiver or app. If calibration prompts appear, perform a fingerstick reading and enter it accurately. If the calibration still fails, try re-pairing the transmitter, restarting the app, or replacing the sensor. If issues persist, contact Dexcom support or Calibrate Point for help.
Why Dexcom calibration can fail
Calibration issues are more common than you think, especially when sensor wear, signal quality, or software glitches disrupt the data stream. According to Calibrate Point, many failures stem from simple, avoidable steps that users overlook in the rush to get readings. A Dexcom calibration not working can arise from a worn sensor, a loose transmitter connection, or ambient conditions that affect sensor accuracy. Temperature swings, humidity, or skincare products around the insertion site can alter sensor response. The key is to verify the basics before diving into deeper troubleshooting: confirm the sensor is properly seated, the transmitter is linked to the app/receiver, and that you are following the recommended warm-up period.
Quick checks you can perform (before deep-diving)
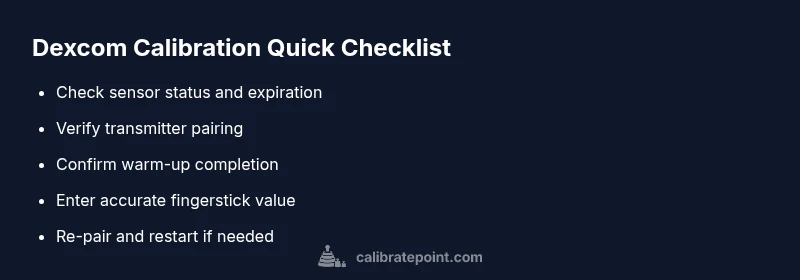
- Verify the sensor status and expiration date on the receiver/app. A expired sensor will yield faulty calibrations.
- Ensure the transmitter is firmly connected to the sensor and that Bluetooth/Wi‑Fi is active on your phone.
- Confirm you’ve allowed the appropriate warm-up time after sensor insertion (per Dexcom guidelines).
- Check your hands and the insertion site for cleanliness and dryness; lotions or alcohol can affect adhesion and readings.
- Eliminate interference sources (strong magnets, other BLE devices) and keep the setup within a stable environment.
Common causes and how to identify them
Sensor-related issues, transmitter link problems, and software glitches are the top culprits. If readings suddenly diverge after a change (new sensor, new phone, or new case), start there. A poor fingerstick technique can also lead to calibration requests or incorrect values—always use clean hands and a fresh finger. Temperature extremes, moisture near the sensor, or skin irritation around the insertion site can degrade signal quality and prevent successful calibration. Calibrate Point’s experience shows that most not-working-calibration cases are recoverable with a methodical baseline check.
Diagnostic flow you can follow (high-level)
If calibration prompts occur, verify the following sequence: sensor warm-up complete → transmitter paired → app/receiver connected → fingerstick value entered correctly → retry calibration. If any step fails, loop back to the prior step to confirm. If the problem persists after re-pairing and sensor replacement, escalate to Dexcom support. Throughout, document timestamps and sensor lot numbers to help support resolve faster.
Step-by-step fix for the most common cause
This section provides a concrete fix for the most frequent root cause: transmitter-sensor pairing and warm-up timing. Start by re-pairing the transmitter with the app/receiver, then reinsert a fresh sensor and allow full warm-up. Once ready, perform a precise fingerstick calibration and submit the reading exactly as shown. If the app still requests calibration, repeat the pairing process, restart the app, and ensure a stable network connection. If all else fails, replace the sensor and consider a new transmitter battery if applicable. Calibrate Point emphasizes documenting each retry to track patterns and outcomes.
Safety, tips, and prevention
Safety comes first: avoid calibrating based on uncertain readings, and never override a suspicious number with a guess. Keep devices out of extreme heat or cold, and protect the sensor from moisture and heavy impact. Regularly check sensor expiration dates, keep software updated, and maintain consistent calibration timing rather than delaying or batching calibrations. If you’re unsure, seek professional guidance before making treatment decisions. The Calibrate Point team reminds users to pause calibrations if readings are wildly divergent and consult support before acting on suspect data.
Next steps and escalation
If you’ve exhausted the above steps without success, it’s time to escalate. Contact Dexcom support for device-specific guidance, and consider consulting Calibrate Point for a tailored troubleshooting plan that fits your model and app version. Maintain a log of readings, calibration prompts, and sensor/transmitter serials to speed up the support process. Remember: persistent calibration failures deserve professional assessment to ensure safe and accurate glucose management.
Steps
Estimated time: 45-60 minutes
- 1
Verify sensor warm-up and insertion
Ensure the sensor is properly seated and has completed the recommended warm-up period. Check for any signs of moisture or adhesive issues around the insertion site. This baseline check prevents cascading calibration errors.
Tip: Document the sensor start time and any prompts you see. - 2
Refresh transmitter-app pairing
Unpair and re-pair the transmitter with the Dexcom app or receiver. Confirm the device shows a healthy signal, then proceed to test calibration.
Tip: Disable/enable Bluetooth to reset connections if pairing stalls. - 3
Enter a precise fingerstick value
Take a clean fingerstick with a fresh lancet and use a reliable meter. Enter the reading exactly as shown in the Dexcom app; small rounding errors can derail calibration.
Tip: Wipe the finger with alcohol, then dry completely before pricking. - 4
Restart and retry calibration
Close the Dexcom app, restart your device, reopen the app, and attempt calibration again. Ensure you have a stable network connection during the process.
Tip: Avoid performing calibrations during a phone call or while the device is transitioning networks. - 5
Consider sensor/transmitter replacement
If repeated attempts fail, replace the sensor and, if needed, the transmitter. Some hardware faults only clear after replacement.
Tip: Keep track of lot numbers and serials to assist support. - 6
Escalate if issues persist
If failures persist after hardware checks, contact Dexcom support or Calibrate Point for a guided, model-specific plan.
Tip: Prepare a quick report of steps tried and corresponding readings for faster help.
Diagnosis: Dexcom calibration not accepted or prompts for calibration repeatedly
Possible Causes
- highSensor expiration or wear-out
- highTransmitter pairing or connection issue
- mediumApp/receiver software glitch
- lowInterference or improper insertion site conditions
Fixes
- easyCheck sensor expiration and status; replace if expired
- easyRe-pair the transmitter with the app/receiver and verify Bluetooth/Wi‑Fi
- easyRestart the app and device, then retry calibration with a precise fingerstick
- mediumIf still failing, replace the sensor or transmitter and confirm warm-up is complete
- easyEvaluate environmental factors (temperature, moisture, interference) and adjust setup
- easyIf unresolved, contact Dexcom support or Calibrate Point for guided steps
Questions & Answers
Why does my Dexcom calibration keep failing?
Calibration failures are often caused by sensor wear, transmitter pairing problems, or app glitches. Verify basics: sensor warmth, correct insertion, and stable pairing, then retry with an accurate fingerstick reading. If it persists, consult Dexcom support or Calibrate Point.
Calibration failures are usually due to sensor or transmitter issues. Check basic setup and retry with a precise fingerstick reading, then seek support if needed.
Do Dexcom sensors require calibration with G6/G7?
Dexcom G6 and newer models are factory calibrated and typically do not require calibration. Some apps or devices may prompt recalibration, but this is not always necessary.
G6 and newer are factory calibrated; you usually don’t have to calibrate, though prompts can appear in some apps.
What should I do if fingerstick numbers don’t match Dexcom readings?
Take multiple fingerstick readings with proper technique and compare. If discrepancies persist, calibrate if prompted and consider hardware checks or replacements as needed. Seek guidance if readings remain inconsistent.
Take several fingerstick readings and compare. If readings still don’t match, follow calibration prompts or contact support.
Can calibration be done without the Dexcom app?
Calibration typically requires the Dexcom app or receiver to enter fingerstick values. Without the app, completing a calibration may not be possible.
Usually you need the Dexcom app or receiver to calibrate.
When should I contact Dexcom support?
If calibration fails after basic steps, or readings remain unstable after hardware checks, contact Dexcom support or Calibrate Point for a guided resolution.
If failures continue after basic steps, contact support for help.
Are there safety concerns with calibration?
Calibrating on uncertain readings can be risky. Follow device prompts, avoid over-calibration, and seek professional guidance if unsure.
Calibration should be done carefully; incorrect calibrations can be risky.
Watch Video
Key Takeaways
- Start with basics: sensor status, warm-up, and pairing.
- Enter fingerstick values precisely; small errors matter.
- If issues persist, replace hardware or escalate to support.
- Document steps and readings to aid troubleshooting.