Dexcom G7 Calibration Guide: Verify Sensor Accuracy
Learn how to verify Dexcom G7 sensor readings and understand why the G7 is factory calibrated. This step-by-step guide covers verification methods, troubleshooting, and when to contact Dexcom support for persistent discrepancies.

Goal: verify Dexcom G7 sensor readings and understand calibration needs. The Dexcom G7 is factory calibrated and does not require user calibration. This quick guide outlines how to verify accuracy, when to use fingerstick checks, and the steps to seek official recalibration or support if readings remain inconsistent.
Introduction to Dexcom G7 calibration reality
If you’re troubleshooting why your readings seem off, you’re not alone. For many users, the phrase dexcom g7 calibrate sensor comes up, but the reality is that the G7 is factory calibrated and does not require routine user calibrations. This section explains what calibration means in the Dexcom ecosystem, how the G7’s algorithm maintains accuracy, and why you’ll rarely need to perform any manual calibration. At Calibrate Point, we emphasize practical, device-specific guidance. The core takeaway is simple: trust the factory calibration, but know how to verify readings when things don’t look right. In this guide, we’ll cover basic verification steps, home-checks, and escalation paths if discrepancies persist. We’ll also show how to interpret CGM trends, alarms, and the role of site care and device pairing in overall accuracy. By understanding these factors, you’ll gain confidence in a Dexcom G7 setup that minimizes guesswork and maximizes reliable data for diabetes management.
How the G7 stays accurate without regular calibration
Dexcom’s engineering for the G7 centers on a factory-calibrated sensor and an optimized transmitter–receiver pipeline. The device uses real-time measurements, temperature compensation, and skin-interaction adjustments to deliver glucose readings that align with laboratory fingerstick references. Because this calibration happens during manufacturing and through the software stack, most users never perform a calibration routine. This section outlines the key elements that contribute to accuracy and what you should monitor during daily use.
What to expect if readings seem inaccurate
In practice, occasional discrepancies can occur due to sensor placement, skin condition, perspiration, rapid glucose changes, or a marginal factory calibration window when a new sensor is first used. Such differences are typically within the device’s normal operating range and tend to resolve after proper site preparation and a full warm-up. If a discrepancy persists beyond a typical stabilization period, the recommended actions are fingerstick verification, sensor reinsertions, and system checks (app, transmitter, and phone). This approach helps you distinguish a real issue from a transient fluctuation. Calibrate Point’s framework emphasizes methodical checks and documented steps so DIY enthusiasts and professionals can safely manage CGM data with confidence.
Home verification steps you can perform (no user calibration required)
This section provides practical checks to validate Dexcom G7 readings at home. Remember, the goal is to confirm consistency with a fingerstick reference rather than to recalibrate the device. Start with clean skin, proper sensor placement, and stable electronics. Record acceptance criteria in a simple log to track changes over time and to identify patterns that warrant escalation to support. The key idea is to build a reliable baseline so you can respond quickly when readings diverge from your expectations.
Step-by-step verification workflow (no user calibration)
The Dexcom G7’s design minimizes the need for user intervention in calibration, but you can follow a careful verification pathway to confirm accuracy and identify potential issues. Below we outline a set of home-check actions that help you differentiate a real sensor problem from normal variability. Each action has a clear objective and a practical outcome, so you can decide whether further action is necessary.
Troubleshooting workflow for persistent discrepancies
If your CGM data remains inconsistent after standard home verifications, escalate thoughtfully. Start by confirming the sensor is within its wear window and properly attached. Reboot the app or re-pair the transmitter if needed, and ensure your phone firmware is up to date. When persistent issues persist, contact Dexcom support to discuss factory recalibration options and to review any firmware updates or known issues affecting your device model and region. Calibrate Point recommends documenting your steps and results to share a clear history with support.
Long-term maintenance for continued accuracy
Consistent CGM performance hinges on routine site care, regular sensor changes, and vigilant data review. Use clean hands and skin before sensor handling, avoid lotions or oils near the site, and follow Dexcom’s wear guidelines. Periodic checks of sensor alignment, transmitter health, and app updates help maintain data integrity. By incorporating these practices, you’ll reduce avoidable drift and maintain reliable readings over the sensor’s life.
When to contact support for recalibration or advanced help
Although the G7 is factory calibrated, certain anomalies may require official recalibration or software updates. If you notice recurring large discrepancies, contact Dexcom support and share your readings, logs, and fingerstick comparisons. Having a clear record makes the support process faster and increases the likelihood of an appropriate resolution. Calibrate Point’s guidance is to approach support with a calm, data-driven summary rather than broad complaints.
Tools & Materials
- Dexcom G7 sensor kit(Includes sensor, transmitter, applicator; ensure kit is not expired)
- Smartphone with Dexcom App(Bluetooth-enabled device; keep app updated)
- Alcohol wipes or clean skin prep(Use before handling sensor to minimize skin oils)
- A trusted fingerstick device and meter(Have it ready for quick comparison when verifying readings)
- Pen and notebook or digital log(Record readings, times, and any discrepancies for pattern tracking)
Steps
Estimated time: 45-90 minutes
- 1
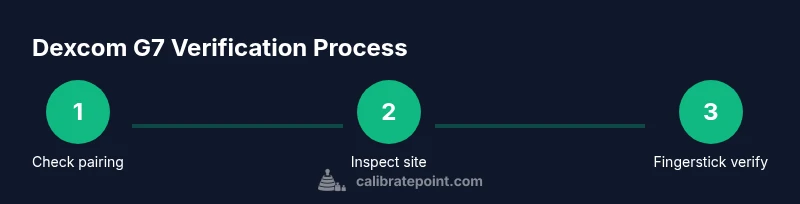
Check device status and pairing
Power on the Dexcom G7 system, verify the transmitter is paired with the receiver or smartphone, and confirm the app shows an active sensor status. This initial check confirms the baseline connectivity needed for accurate data flow.
Tip: If pairing fails, try unpairing and repairing, and ensure Bluetooth permissions are enabled for the Dexcom app. - 2
Inspect sensor placement and site
Inspect the sensor site for signs of irritation, dryness, or movement. Reapply if necessary, ensuring the sensor is flat against the skin and not bent. Proper placement reduces dynamic drift during wear.
Tip: Avoid applying near joints or areas with heavy muscle movement to reduce motion artifacts. - 3
Allow full warm-up and site stabilization
If using a newly inserted sensor, allow the full warm-up period and stabilize the data before making any judgments about accuracy. Do not rely on early readings to make critical decisions.
Tip: Keep the device within the recommended range of your body and avoid showering or sweating excessively during warm-up. - 4
Perform fingerstick verification for check
Take a fingerstick glucose value and compare it with the CGM reading at the same time. Look for alignment within the device’s typical accuracy range. This is a verification step, not a calibration.
Tip: Use a consistent meter and follow the meter’s manufacturer instructions for accurate results. - 5
Review recent readings for consistency
Check the CGM trend and the last several hours of data. Look for sudden spikes or drops that aren’t supported by fingerstick results. Document any anomalies for future reference.
Tip: If there are repeated discrepancies, note the time window and activity level to help identify contributing factors. - 6
Restart or re-pair if issues persist
If readings remain inconsistent after verification, try restarting the Dexcom app or re-pairing the transmitter. Software glitches can sometimes cause misalignment without indicating a sensor failure.
Tip: After any restart, re-check fingerstick alignment before making treatment decisions. - 7
Consider factory recalibration through support
If persistent discrepancies continue, contact Dexcom support and inquire about factory recalibration or firmware updates. Provide your logs and fingerstick comparisons to speed resolution.
Tip: Keep your sensor lot number and device IDs handy when contacting support. - 8
Plan for ongoing sensor wear and replacement
Remember that Dexcom G7 sensors have a wear window. Plan sensor replacements as recommended to maintain accuracy, and log wear times to detect patterns of drift.
Tip: Use reminders to track sensor expiration and avoid long wear beyond the recommended period.
Questions & Answers
Do I need to calibrate the Dexcom G7 sensor?
No. The Dexcom G7 is factory calibrated and does not require routine fingerstick calibrations. Use fingerstick checks only to verify readings if you notice inconsistencies.
No, calibration isn’t required for the Dexcom G7. Use a fingerstick check to verify readings if you notice inconsistencies.
What should I do if readings don’t match fingerstick results?
Perform a second fingerstick check, re-check sensor placement, and verify that the transmitter and app are functioning. If discrepancies continue, contact Dexcom support for assistance.
If readings don’t match, check placement and pairing, then verify again with a fingerstick. If still off, contact Dexcom support.
How long can a Dexcom G7 sensor be worn?
Dexcom G7 sensors are designed for extended wear within the manufacturer’s guidelines, typically up to 10 days, after which a new sensor should be used for continued accuracy.
Sensors are designed for wear within the manufacturer’s guidelines, usually up to about 10 days.
What should I do if the issue persists after warm-up?
Document the discrepancy, perform a fingerstick comparison, restart the app, and re-pair the transmitter if needed. If unresolved, contact Dexcom support for advanced troubleshooting.
If the issue persists after warm-up, log it, retest with fingerstick, and contact Dexcom support for help.
Can Dexcom perform a recalibration remotely?
Recalibration, if required, is typically handled by Dexcom technicians or through official firmware updates. Users should follow Dexcom support guidance for any recalibration needs.
Any recalibration would be handled by Dexcom support or through official updates; follow their guidance.
Watch Video
Key Takeaways
- Dexcom G7 is factory calibrated and normally does not require user calibration.
- Use fingerstick verification to confirm CGM readings during suspected discrepancies.
- Ensure proper sensor placement, warm-up, and app/transmitter pairing for best accuracy.
- If inconsistencies persist, contact Dexcom support for guidance on recalibration or device review.