Calibrate the Dexcom G7 App: A Step-by-Step Guide
Learn how to verify the Dexcom G7 app setup, sensor status, and data syncing to optimize CGM readings. This practical guide from Calibrate Point covers factory calibration, app configuration, troubleshooting, and best practices for reliable continuous glucose monitoring.

Calibrating the Dexcom G7 app isn't a traditional manual calibration, since the system ships factory-calibrated. Instead, focus on ensuring your app is up to date, the sensor is healthy, and data sync is reliable. This guide walks you through verification steps, troubleshooting tips, and best practices for accurate readings. You’ll learn how to verify sensor status, confirm app pairing, and handle discrepancies safely.
Why calibrate the Dexcom G7 app matters
Although the Dexcom G7 is factory calibrated, the app remains central to accuracy and safety. The system combines sensor, transmitter, and smartphone software to deliver real-time glucose data. According to Calibrate Point, the most common causes of reading discrepancies are sensor wear, improper placement, moisture exposure, or misconfigurations in the app. By focusing on correct app pairing, stable data syncing, and device health, you reduce false alarms and improve trust in CGM results. This section guides you through practical verification steps you can perform without factory recalibration, such as ensuring the sensor warms properly, confirming transmitter connection, checking timestamps, and reviewing trend data for anomalies. The goal is to minimize drift, prevent alarm fatigue, and maintain safe, reliable readings for insulin-dosing decisions.
Understanding factory calibration and what you can calibrate
Factory calibration means the sensor is manufactured and tested to deliver accurate readings out of the box. There is no standard user-initiated calibration step for the Dexcom G7 sensor. In the context of the Dexcom app, calibration refers to data verification: ensuring readings align with expectations, confirming device pairing is intact, and validating data sharing across devices and platforms. The G7 app should reflect stable readings over time; if drift or missing data occur, address hardware, update software, and review permissions. The Calibrate Point Team emphasizes that success hinges on consistent verification rather than manual adjustments.
Pre-checks before you start
Before you dive into verification, ensure you have the essentials ready:
- A Dexcom G7 sensor and transmitter installed per kit instructions, with no active alarms indicating hardware faults.
- A smartphone with the Dexcom app installed and an active internet connection.
- Correct time, date, and time zone settings on both your phone and the CGM receiver.
- A clean, dry sensor site and a stable mounting surface to prevent signal dropouts.
- Optional fingerstick meter for cross-checks if you want to validate readings independently (not required for Dexcom G7).
Tip: Keep the app updated to the latest version, and review sharing permissions for any linked platforms (Apple Health, Google Fit, or cloud services).
Step-by-step verification of readings in the app
This section lays out practical checks to verify that the Dexcom G7 app is reflecting accurate data:
- Inspect real-time readings for plausibility by comparing against a recent fingerstick measurement if available.
- Check that the sensor status shows as active, with a connected transmitter and a valid signal at the top of the app.
- Review the timestamp alignment between the CGM data and device clock to ensure there are no significant delays.
- Look at trend arrows and rate-of-change indicators to determine if rapid fluctuations are expected or anomalous.
- Confirm data is syncing to any shared platforms and that alerts are configured to your preferences.
Pro tip: If readings seem inconsistent, pause dosing decisions and re-check after a short interval, especially during sensor warm-up or when moving between sensors.
Common issues and quick fixes
Dexcom G7 reliability can be affected by several common scenarios:
- Data gaps or lag: Ensure Bluetooth is enabled, the phone is online, and the app is foreground or actively syncing.
- Readings stuck high or low: Inspect sensor placement, adhesive integrity, and skin-sensor contact; consider re-wrapping or reapplying if adhesive fails.
- Missing transmitter or sensor not recognized: Re-pair the transmitter in the Dexcom app and confirm the sensor is correctly seated.
- Alarm fatigue due to frequent alerts: Review alert thresholds and sound/vibration settings, and consider adjusting to reduce nuisance alarms while staying safety-conscious.
If issues persist, contact Dexcom support and document the sensor lot number, firmware version, and app version to aid troubleshooting.
Integrating with health platforms and data sharing
A key value of Dexcom G7 is data interoperability. The app can share readings with platform ecosystems such as Apple Health or Google Fit, and Dexcom Clarity can provide long-term trends for clinician review. Ensure you grant permissions for data sharing, and verify that the timestamps align across platforms for accurate historical analysis. Regular data syncing also helps caregivers stay informed and supports remote management of diabetes care. Based on Calibrate Point analysis, proper integration reduces data silos and improves decision-making for device users.
Safety, regulatory considerations, and best practices
Dexcom G7 is a medical device intended to aid glucose management. Always treat CGM readings as one data point among many in your care plan. Do not change insulin dosing solely based on CGM data without clinician guidance or fingerstick confirmation when accuracy is in doubt. Keep sensors clean, replace them as directed, and store the device according to manufacturer instructions. If you notice persistent inaccuracies, document events, and consult your healthcare provider promptly.
Calibrate Point’s guidance and next steps
The Calibrate Point team recommends focusing on verification workflows rather than manual recalibration. Maintain consistent hardware checks, keep software up-to-date, and use official documentation to guide troubleshooting. Regular reviews of data sharing settings, sensor wear, and app configurations help sustain CGM reliability over time. By following a disciplined verification routine, you’ll preserve data integrity and support safer diabetes management.
Authority sources and further reading
- Government and major health sources provide context for CGM use and calibration concepts:
- FDA: https://www.fda.gov/medical-devices/diabetes-management-devices
- NIDDK (NIH): https://www.niddk.nih.gov/health-information/diabetes/overview/monitoring-blood-glucose
- CDC: https://www.cdc.gov/diabetes/library/features/continuous-glucose-monitoring.html
This article also reflects Calibrate Point’s practical calibration guidance for DIY technicians and professionals seeking reliable, real-world processes.
Tools & Materials
- Dexcom G7 sensor and transmitter kit(Ensure the sensor is within warranty and correctly primed before use)
- Smartphone with Dexcom app installed(Use the latest app version on iOS or Android)
- Stable internet connection(For real-time data syncing and cloud sharing)
- Clean, dry sensor site(Prevents skin irritation and improves signal quality)
- Optional fingerstick meter for cross-checks(Helpful for verification when readings seem off)
Steps
Estimated time: 15-25 minutes
- 1
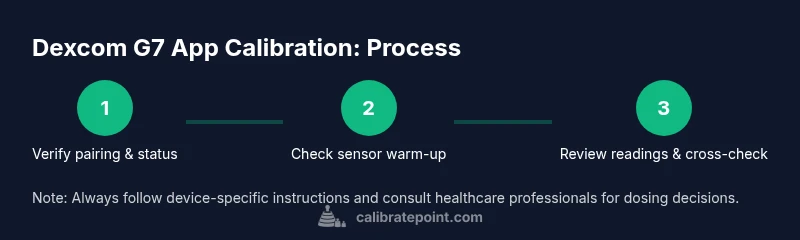
Verify app pairing and sensor status
Open the Dexcom app and confirm the sensor is active with a connected transmitter. Check for any alert messages and ensure your phone is connected to the internet. This step ensures the data path from sensor to app is intact before you interpret readings.
Tip: If pairing fails, try restarting the app and re-adding the sensor according to the latest instructions. - 2
Confirm proper sensor warm-up
Allow the sensor to complete its warm-up phase without moving the device. During this period, readings may be unstable; avoid making dosing or timing decisions until stable data appears.
Tip: Do not forcibly override or bypass warm-up; patience improves long-term accuracy. - 3
Review recent readings for plausibility
Compare current CGM values against a fingerstick measurement if available. Look for reasonable consistency with prior readings and known activities (e.g., exercise, meals).
Tip: Document any large, unexplained shifts to share with your clinician. - 4
Check timestamps and data syncing
Ensure the device clock, app time, and cloud timestamps align. Misaligned times can create confusion when interpreting trends and alerts.
Tip: If time zones are off, correct them in device settings and re-sync data. - 5
Validate integrations and alerts
Verify that data sharing with health platforms is enabled and alerts are set to your preference for practical monitoring. Confirm that historical data appears correctly in linked services.
Tip: Review privacy settings to balance data access with security.
Questions & Answers
Does the Dexcom G7 require manual calibration?
No. The Dexcom G7 is factory-calibrated. You verify accuracy through app setup, sensor status, and data syncing rather than performing manual calibrations.
Dexcom G7 doesn’t require manual calibration. You should verify the app and sensor setup to ensure accuracy.
What should I do if readings are off?
Check sensor placement and adhesive integrity, confirm transmitter connection, and compare with fingerstick data if available. If inconsistencies persist, log details and contact Dexcom support.
If readings seem off, verify the sensor and app setup, cross-check with a fingerstick if possible, and contact support if the issue continues.
Can I calibrate using a fingerstick with Dexcom G7?
Dexcom G7 is factory-calibrated and does not require fingerstick-based calibration. Fingerstick data can be used for cross-checks, not calibration.
Fingerstick data can be used to verify readings but Dexcom G7 does not require calibration from fingersticks.
How do I update the Dexcom G7 app?
Open your device’s app store, check for Dexcom app updates, and install any available updates. After updating, reopen the app to verify that all features function correctly.
Check your app store for Dexcom updates and install them, then reopen the app to verify.
Is Dexcom G7 data shareable with Apple Health?
Yes. The Dexcom app can share data with Apple Health and other platforms, enabling integrated health monitoring and clinician review when enabled.
Yes, you can share Dexcom data with Apple Health and other services.
What impacts warm-up duration for Dexcom G7?
Warm-up duration varies by sensor and conditions; follow kit instructions and avoid relying on readings until the sensor is ready.
Warm-up length can vary; follow the instructions and don’t rely on readings until it’s ready.
Watch Video
Key Takeaways
- Dexcom G7 is factory-calibrated; verification centers on app setup and data flow.
- Always confirm sensor status and transmitter connection before interpreting data.
- Cross-check suspect readings with fingerstick when available.
- Keep apps and devices updated for consistent accuracy.
- Use data-sharing features thoughtfully and involve clinicians as needed.