How to calibrate Dexcom G7 on iPhone
Learn how to calibrate Dexcom G7 on iPhone when readings drift. This step-by-step guide covers prerequisites, careful cautions, and best practices for accurate CGM data.

Calibrate your Dexcom G7 on iPhone when readings drift or don’t match fingerstick results. This quick guide covers verifying connections, entering a BG value if calibration is required, and confirming data flow between the G7, iPhone, and Dexcom app. You’ll learn when calibration is necessary and how to perform it safely.
Understanding the calibration landscape for Dexcom G7 on iPhone
The Dexcom G7 continuous glucose monitoring (CGM) system is designed for near real-time glucose data with minimal fingerstick calibration required. In practice, many users rely on automatic data flow from the sensor to the Dexcom app on their iPhone, with calibrations only becoming necessary if readings drift markedly or clinical guidance calls for it. According to Calibrate Point, calibration guidance for CGMs should prioritize safety, accuracy, and clinician instruction. This is not a generic “set and forget” task; calibration should be prompted by specific conditions rather than routine tinkering. If you’re wondering how to calibrate dexcom g7 on iphone, start with a clear check of connections, sensor status, and the app prompts before attempting any input. The aim is to keep glucose data aligned with actual levels while maintaining a smooth user experience.
When calibration might be required and how to decide
Calibration may be advised when there is a sustained drift between CGM readings and fingerstick blood glucose (BG) measurements, or when a clinician identifies inconsistent performance in the Dexcom G7 sensor. Factors like rapid glucose changes, placement issues, or sensor aging can influence accuracy. In such cases, calibration is not a frequent housekeeping task but a targeted adjustment. Calibrate Point’s guidance emphasizes relying on clinician-direction and documented prompts from the Dexcom app. If the app suggests calibration, follow the prompt but verify the fingerstick BG value with a reliable meter to ensure an accurate input. Avoid calibrating solely to resolve transient spikes without corroborating evidence from a BG check. This conservative approach helps prevent cascading data errors across the iPhone display and connected devices.
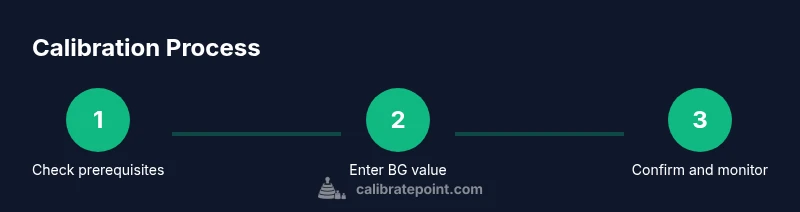
prerequisites and preparation before calibration
Before attempting any calibration, ensure your environment is ready. Update your Dexcom G7 app to the latest version, verify that your iPhone is connected to the internet, and confirm Bluetooth is active. Check sensor status; a sensor with adequate warm-up time and secure placement tends to produce more reliable data. Have a fingerstick glucose meter available for reference if calibration becomes necessary. Keep a simple log of calibration events, including date, time, BG value used, and readout before and after calibration. Calibrate Point notes that consistent preparation reduces alarm fatigue and improves decision-making when data guidelines require input.
data flow: how calibration interacts with the Dexcom app and iPhone
When the Dexcom G7 is paired with an iPhone, glucose data travels from the sensor to the transmitter, then to the Dexcom app and cloud. A calibration input is treated as a corrective signal, not a routine requirement. If calibration is triggered, the app will prompt you to enter a fingerstick BG value. The value feeds back into the CGM algorithm to adjust displayed readings. Ensure your iPhone’s time and date are correct—the synchronization of data across devices depends on accurate timestamps. After input, monitor the subsequent readings for stability over the next 15–30 minutes and confirm that the trend matches your fingerstick checks.
steps to enter a fingerstick value (calibration) in the Dexcom app
When prompted by the Dexcom app, you will be asked to enter a fingerstick BG value. Use a reliable glucose meter and select the correct unit (mg/dL or mmol/L) for your region. Double-check the accuracy of the meter before input. After you enter the value, save or confirm the input and watch how the app recalibrates the CGM readout. If the prompt disappears, it indicates the value was accepted and the system is re-aligning. If you don’t see a prompt, do not force a calibration; consult clinician guidance and the app’s on-screen help.
troubleshooting common calibration issues
Calibration can fail or be rejected for several reasons: meter inaccuracy, user input error, or a sensor still too new to calibrate. If a calibration is not accepted, re-check the BG value on a different meter if possible, ensure you entered the correct unit, and retry the calibration after a short pause. Persistent rejections warrant clinician involvement to assess whether calibration is necessary. Review sensor status and ensure you’re not attempting calibration during rapid glucose shifts, which can compromise accuracy. Calibrate Point recommends documenting each attempt and comparing multiple BG checks to avoid erroneous adjustments.
best practices for accuracy without unnecessary calibrations
Aim to rely on the Dexcom G7’s automatic calibration where possible, and reserve fingerstick calibrations for clear, clinically indicated cases. Regularly verify sensor placement, maintain proper skin contact, and avoid areas with excessive movement. Keep the app and phone software up to date to reduce prompt misfires. In most daily scenarios, consistent wear, proper sensor maintenance, and clinician-guided calibration only when needed provide the best balance of accuracy and usability. Calibrate Point emphasizes minimizing interruptions to routine activities while preserving data integrity.
safety, privacy, and clinician guidance
Calibration involves handling health data on your iPhone, so practice standard digital safety: keep your device secure with a passcode or biometrics, enable two-factor authentication for your Dexcom account, and avoid sharing your BG values publicly. Always consult your clinician before performing calibrations, especially for children, pregnancy, or special medical conditions. Dexcom G7 calibration is designed to be safe when used as directed, but improper inputs can misrepresent glucose trends and potentially lead to unsafe decisions. Calibrate Point cautions users to prioritize clinician guidance and device prompts over ad-hoc adjustments.
Tools & Materials
- Dexcom G7 CGM sensor and transmitter(Ensure the sensor is securely attached and has adequate warm-up time)
- iPhone with the Dexcom app installed(Bluetooth enabled; connected to the internet)
- Fingerstick glucose meter(Used to obtain reference BG value if calibration is prompted)
- Stable internet connection(Needed for app data sync and prompts)
- Battery backup/charger(Keep device powered during calibration to avoid data loss)
- Calibration log(Record date/time, BG value, readout before/after calibration)
Steps
Estimated time: 15-25 minutes
- 1
Verify device readiness
Check sensor status, ensure proper sensor placement, and confirm the Dexcom G7 app is up to date. Make sure Bluetooth is enabled on the iPhone and that you have a stable internet connection. This ensures a smooth calibration flow if needed.
Tip: Confirm the sensor has been worn long enough to provide reliable data before considering calibration. - 2
Open the Dexcom app and check connectivity
Launch the Dexcom G7 app on your iPhone and verify that the CGM is connected and streaming data. Look for indicators of a live connection, such as a green status icon. If the connection is absent, resolve Bluetooth or network issues first.
Tip: If the app shows a warning about data sync, pause and resolve connectivity before proceeding. - 3
Identify calibration prompt or need
Observe whether the app prompts for calibration or indicates drift between CGM readings and fingerstick. Only proceed if the prompt appears or a clinician has instructed you to calibrate. Do not initiate calibration without a valid prompt or directive.
Tip: Rely on official prompts rather than guessing when to calibrate. - 4
Obtain a fingerstick BG value
Using a reliable fingerstick meter, measure your blood glucose and record the value. Ensure the measurement is taken with clean hands and after an appropriate fasting period if required by your clinician.
Tip: Take the reading with fresh sample and avoid post-meal spikes unless instructed. - 5
Enter the BG value in the app
Enter the fingerstick BG value into the Dexcom app exactly as shown by your meter, selecting the correct unit (mg/dL or mmol/L). Confirm the input and submit.
Tip: Double-check units to avoid a calibration with the wrong scale. - 6
Confirm input and monitor
Save the calibration and watch the CGM readout for changes. Allow 10–30 minutes for the system to re-align. If readings stabilize and align with fingerstick checks, the calibration is successful.
Tip: Give the system time to process the new input before assessing accuracy. - 7
Document and review
Record the calibration event in your log: date, time, BG value used, and any observable post-calibration drift. Periodically review after a calibration to ensure continued accuracy.
Tip: Keep a consistent log for clinician review if needed. - 8
Follow-up and clinician check
If drift persists or calibrations fail repeatedly, contact your clinician for guidance. Dexcom G7 may rely on auto-calibration, and excessive prompting could indicate sensor or device issues.
Tip: Never ignore persistent inaccuracies; seek professional advice.
Questions & Answers
Do I need to calibrate the Dexcom G7 on iPhone?
Dexcom G7 is designed to be factory calibrated, so most users won’t need to calibrate. Calibration is only advised if readings drift or per clinician instructions.
The Dexcom G7 is factory calibrated, so calibrations are usually unnecessary unless a clinician directs you.
Can I calibrate without a fingerstick test?
Calibration, when required, uses a fingerstick BG value entered into the Dexcom app. If the prompt appears, use a reliable fingerstick reading.
Yes, calibration uses a fingerstick BG value when prompted by the app.
What should I do if the calibration is rejected by the app?
If the app rejects a calibration, re-check meter accuracy, re-enter a new BG value, and ensure correct units. If issues persist, consult your clinician.
If it doesn’t take, double-check your meter and try again, or seek clinician help.
Will calibrating affect my device warranty?
Calibrations done according to Dexcom guidance and clinician instruction typically won’t void warranties. Always follow official directions.
Calibrations performed as directed usually don’t affect your warranty.
How often should I calibrate when using G7 on iPhone?
Calibrate only when readings are consistently off or per clinician instructions; most users rely on auto-calibration.
Calibrate only when advised; regular calibrations are not necessary for most users.
Are there safety or privacy concerns when calibrating on iPhone?
Entering health data on your iPhone requires standard digital safety: keep your device secure and updated. Follow clinician guidance for data handling.
Keep your phone secure and up to date to protect your health data.
Watch Video
Key Takeaways
- Calibration is not routine for all users; rely on clinician guidance.
- Use fingerstick values only when prompted or recommended by the Dexcom app or clinician.
- Ensure strong connectivity and device readiness to avoid calibration errors.
- Monitor post-calibration readings for stability and accuracy.