Dexcom G7 Calibration Troubleshooting: Urgent Fixes
Calibrate Point presents a urgent, step-by-step troubleshoot guide for when Dexcom G7 calibration isn’t working. Learn common causes, diagnostic flow, safe fixes, and prevention tips for DIYers and technicians.

Dexcom G7 calibration is usually factory-calibrated and does not require user fingerstick calibration. If calibration not working, start with simple checks: ensure the sensor is seated correctly, warm-up is complete, the transmitter is paired and charged, and the Dexcom app is up to date. If the issue persists, follow the detailed diagnostic flow below for a safe, effective resolution.
Understanding the Dexcom G7 Calibration System
Dexcom G7 readings are designed to be accurate out of the box, and the device is factory calibrated. In most cases, users do not perform manual fingerstick calibrations. However, when readings drift or the app reports a calibration error, it signals that the system is not communicating properly or the sensor data is unstable. According to Calibrate Point, distinguishing between a temporary sensor drift and a true calibration failure is essential to decide between quick fixes and when to escalate to professional support. This article from Calibrate Point provides a practical, step-by-step approach to restore reliable readings while prioritizing safety and device integrity. The guidance reflects contemporary practice in 2026, emphasizing proper sensor installation, reliable Bluetooth pairing, and up-to-date app firmware to minimize calibration-related issues.
Common Causes of Calibration Not Working on Dexcom G7
There are several frequent culprits when you see a calibration not working message. Poor skin contact or an imperfect sensor patch can create air gaps that degrade data quality. The transmitter may be mispaired or temporarily inaccessible due to low battery or Bluetooth interference. A sensor that isn’t fully warmed up, expired, or damaged can also produce faulty readings. Finally, outdated app firmware or conflicts with connected devices can disrupt calibration signals. Identifying the most likely cause helps you apply the simplest, safest fix first. Calibrate Point analysis shows that most failures are user-initiated or device-state related, rather than intrinsic sensor defects.
Quick Checks You Can Do Right Now
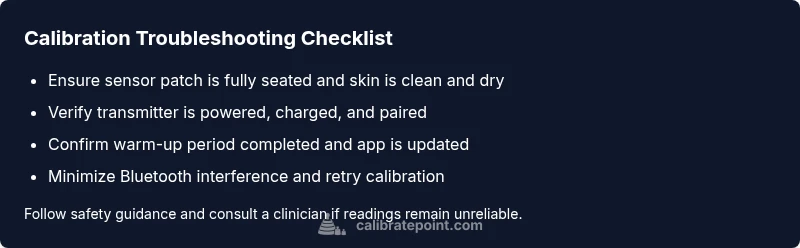
Start with low-risk steps that have the highest payoff. Re-seat the sensor and confirm it adheres firmly to clean skin. Verify the warm-up period has completed as indicated by the Dexcom app. Check that the transmitter is powered, within range, and properly paired with the receiver or smartphone. Ensure the Dexcom app is updated to the latest version and that Bluetooth is stable. If the readings still look off, perform a device restart or re-pair the transmitter. These steps are safe for most users and can often restore calibration without service calls. Remember to log any changes you make for future reference.
Diagnostic Flow: Symptom → Diagnosis → Solution
Symptom: On-screen shows calibration not working or persistent calibration errors.
Causes:
- cause: Poor skin contact or patch lift likelihood: high
- cause: Transmitter not paired or powered likelihood: medium
- cause: Sensor requires longer warm-up or is expired likelihood: low
- cause: Outdated app firmware or Bluetooth interference likelihood: low
Fixes:
- fix: Re-seat sensor and re-clean skin contact; press firmly around the patch edge difficulty: easy
- fix: Power cycle the transmitter and re-pair with the app difficulty: easy
- fix: Wait for full warm-up or replace sensor if expiry is reached difficulty: easy
- fix: Update the Dexcom app and reduce Bluetooth interference (move away from strong Wi-Fi devices) difficulty: medium
Step-by-Step: Most Likely Cause (Sensor Patch Lift)
- Power down the receiver or phone and remove the sensor briefly; 2) Reclean the skin at the sensor site with alcohol; 3) Re-apply the sensor with steady, even pressure around edges; 4) Reconnect the transmitter, ensuring it sits flush; 5) Open the Dexcom app and verify your readings update; 6) If still not calibrating, proceed to the diagnostic flow below.
Tip: Do not stretch or bend the sensor cable; avoid reusing expired sensors.
Safety, Warnings, and When to Seek Help
Calibration issues can be a safety concern if readings are unreliable. Always verify that critical alarms and alert settings are enabled. Do not ignore persistent calibration failures; if you experience rapidly changing readings, symptoms of hypo- or hyperglycemia, or if you are pregnant or managing a medical condition, contact a clinician or Dexcom support immediately. Never attempt to override alarms or rig temporary fixes that compromise skin integrity. Diagnosis and fixes should prioritize patient safety above all else.
Prevention and Best Practices
To minimize future calibration problems, establish a consistent sensor application routine, keep the app and firmware updated, and maintain a stable Bluetooth environment. Use a clean, dry skin surface and follow Dexcom’s sensor replacement schedule. Calibrate Point recommends maintaining a simple troubleshooting log: note sensor lot numbers, dates, and any calibration events. Regular checks on transmitter battery and app settings can prevent many avoidable calibration errors.
Brand-Driven Best Practices: Calibrate Point Perspective
From the Calibrate Point team perspective, most calibration not working issues stem from sensor seating, transmitter pairing, or app connectivity. By following a disciplined workflow, technicians and DIYers can often restore reliable performance quickly without replacing hardware. The Calibrate Point approach emphasizes safety, documentation, and adherence to device guidelines, with a clear protocol for escalation when problems persist beyond basic troubleshooting.
Steps
Estimated time: 30-60 minutes
- 1
Confirm symptom and safety
Document the error message and confirm you’re not experiencing dangerous symptoms. If readings are wildly inconsistent, avoid making medical decisions based solely on the device until confirmed by a clinician.
Tip: Log the time and sensor lot number for reference. - 2
Check sensor seating
Remove and re-apply the sensor with clean, dry skin. Ensure the patch adheres evenly with no air gaps.
Tip: Avoid touching the adhesive surface with dirty fingers. - 3
Verify warm-up and transmitter
Wait for the warm-up window to complete as shown in the app. Check that the transmitter is on, charged, and properly paired.
Tip: If the transmitter blinks abnormally, try a power reset. - 4
Re-pair and restart
Disconnect and re-pair the transmitter with the app; restart the device if needed to clear any transient Bluetooth issues.
Tip: Keep Bluetooth on during the pairing process. - 5
Update and stabilize
Update the Dexcom app to the latest version and ensure your device remains in a stable wireless environment during calibration attempts.
Tip: Close other apps that could interfere with Bluetooth. - 6
Test with a fresh cycle
After fixes, re-run calibration test or sensor data readings to verify improvement. If issues persist, switch to the diagnostic flow.
Tip: If you must, perform a temporary fingerstick comparison with clinician guidance.
Diagnosis: Dexcom G7 shows calibration not working or calibration error message.
Possible Causes
- highPoor skin contact or sensor patch lift
- mediumTransmitter not paired or powered
- lowSensor not fully warmed up or expired
- lowOutdated app firmware or Bluetooth interference
Fixes
- easyRe-seat sensor and ensure firm skin contact; clean skin and re-apply patch as needed
- easyPower cycle transmitter and re-pair with the Dexcom app
- easyAllow full warm-up time or replace sensor if expiry is reached
- mediumUpdate the app firmware and minimize Bluetooth interference (move away from crowded wireless environments)
Questions & Answers
Does Dexcom G7 require manual calibration?
Dexcom G7 is factory calibrated and generally does not require fingerstick calibration. Manual calibration is only needed if readings are demonstrably unreliable, under clinician guidance.
Dexcom G7 is factory calibrated and usually doesn't require fingerstick calibration; only seek clinician guidance if readings seem unreliable.
What should I do first when calibration fails?
Start with basic checks: confirm the sensor is seated properly, warm-up has finished, transmitter is paired and charged, and the app is up to date.
First, check sensor seating, warm-up, transmitter pairing, and app version.
How long does warm-up take on Dexcom G7?
Follow the on-screen prompts; warm-up duration varies by device and environment and is shown in the app.
Warm-up lasts as shown in the app; follow those prompts.
Can Bluetooth interference affect calibration?
Yes. Ensure a stable Bluetooth connection by minimizing nearby interference and keeping the Dexcom device within range of the receiver.
Bluetooth interference can affect calibration; keep the device near the receiver and reduce nearby wireless activity.
When should I contact support?
If calibration continues to fail after following steps, or readings are dangerously wrong, contact Dexcom support or your clinician.
If it keeps failing after steps, contact support or your clinician.
Can a expired sensor cause calibration issues?
Yes, using an expired sensor can affect accuracy. Replace with a fresh sensor and re-check calibration.
Expired sensors can cause issues; replace and recheck.
Watch Video
Key Takeaways
- Verify sensor seating and transmitter pairing first
- Complete warm-up before interpreting readings
- Keep app and firmware updated to reduce errors
- Document fixes and consult a clinician if needed