Dexcom Calibration Troubleshooting: Dexcom Won’t Calibrate
Urgent troubleshooting guide for Dexcom calibration failures. Learn common causes, diagnostic flow, step-by-step fixes, safety tips, and when to escalate to support.

According to Calibrate Point, the most likely reason dexcom won't calibrate is hardware or pairing issues. Start by verifying sensor status, transmitter pairing, and receiver date/time, then perform a safe restart of all components. If the issue persists, consult support and follow the step-by-step guide below for a systematic fix.
dexcom won't calibrate: common blockers and early signals
When dexcom won't calibrate, the root cause is usually hardware-related (sensor, transmitter, or receiver), or software/settings conflicts. According to Calibrate Point, the top signals include sensor wear, improper sensor placement, moisture exposure, transmitter pairing errors, and clock/time drift on the receiver or companion app. In DIY calibration workflows, addressing these basics first saves time and reduces risk to data accuracy. Look for signs like readings stuck on a single value, persistent calibration failures after warm-up, or delayed sensor readiness. If you notice these indicators, it’s essential to follow a structured diagnostic path rather than random retries. Regularly reviewing sensor expiration dates and ensuring the transmitter is in range can prevent many avoidable issues. This approach keeps control data reliable and minimizes downtime when you need precise readings for decisions.
What you’ll need before you begin
Before attempting calibration, assemble a small, safe workspace and gather essential items:
- The Dexcom receiver or smartphone with the Dexcom app installed and up to date
- A fresh sensor and a charged or fresh transmitter
- Access to the patient’s latest model information (sensor lot, transmitter serial if available)
- A quiet, well-lit area to perform steps without interference from other electronics
- A timer or watch to track warm-up and calibration windows
Having these on hand reduces back-and-forth and speeds up the process, which is crucial when time-sensitive glucose data is at stake.
Quick checks you can perform on the Dexcom receiver, transmitter, and sensor
All calibration issues begin with the basics. Perform these checks in order:
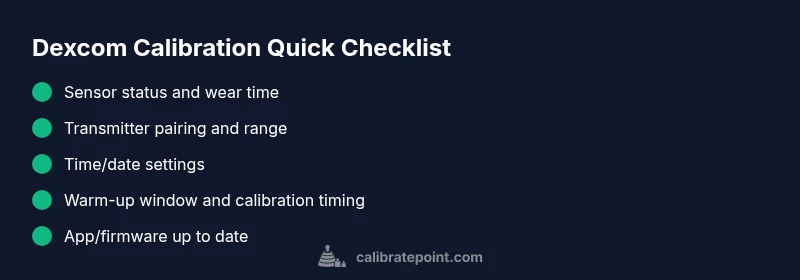
- Confirm the sensor is properly inserted and has not reached its wear limit. 2) Inspect the transmitter for damage and ensure it is connected or paired with the receiver/app. 3) Verify the receiver/app date, time, and timezone are correct. 4) Check for app updates and firmware availability for the transmitter. 5) Ensure there are no near-field interference sources (e.g., other Bluetooth devices) that could disrupt pairing. 6) Make sure the sensor is within its recommended warm-up period and not in a deferred calibration state. If any issue is found, address it before attempting calibration again.
Diagnostic flow: symptom-to-diagnosis map
This section outlines a practical flow to diagnose dexcom calibration problems by symptoms. Start with the most common, least invasive checks and work toward more involved steps:
- Symptom: Calibration fails immediately after sensor insertion
- Diagnosis: Sensor not ready, transmitter out of range, or app not synced
- Solution: Re-seat sensor, re-pair transmitter, and ensure correct app time
- Symptom: Readings are erratic or fluttering during calibration
- Diagnosis: Sensor moisture, poor adhesion, or incorrect insertion depth
- Solution: Re-wipe the site, reinsert, and allow full warm-up
- Symptom: Calibration window not appearing or refusing to calibrate
- Diagnosis: Clock/time drift or account settings
- Solution: Correct time settings and re-check user profile
- Symptom: Persistent failure after basic fixes
- Diagnosis: Hardware fault or account lock
- Solution: Contact Dexcom support and document serials
Safety checks and escalation paths
Calibration tasks involve skin contact and electronics. Always wash hands, wear clean gloves if needed, and avoid calibrating near water or in wet environments. If the device has been exposed to moisture or the adhesive has failed, replace the sensor and allow the site to dry before retrying. If there is a confirmed hardware failure or if you cannot re-establish pairing after multiple attempts, escalate to Dexcom support or your clinic. Do not continue calibrating in the face of persistent error messages, as inaccurate data could lead to unsafe decisions.
Prevention: best practices to keep calibration reliable
To minimize future calibration problems:
- Replace sensors only within their recommended wear time and discard expired sensors
- Always pair the transmitter after sensor insertion and confirm the connection in the Dexcom app
- Keep your receiver/app updated to the latest software and firmware
- Validate device time/date settings with a known reference time
- Maintain a clean sensor site and avoid moisture exposure during application
- Log calibration attempts with date/time for future reference
Following these practices helps keep calibration reliable and reduces downtime due to preventable issues.
What to do if calibration still fails after steps
If you have systematically gone through checks and the problem persists, escalate promptly. Collect device serial numbers, app version, sensor lot number, and a brief log of attempts. Contact Dexcom Support or your healthcare professional for written guidance, especially if your readings are clinically significant or if you rely on Dexcom data for critical decisions. In some cases, a replacement sensor or transmitter is required, and support can initiate a service request quickly.
Steps
Estimated time: 45-60 minutes
- 1
Power cycle all devices
Power off the Dexcom receiver or phone, then power back on. If you use a separate transmitter, cycle its power as well. This clears minor software hiccups and reestablishes connectivity.
Tip: Wait 60 seconds after power-on to allow devices to re-sync. - 2
Verify sensor status and placement
Inspect the sensor for signs of wear or moisture. Re-seat it if necessary and verify it remains within its wear window. Confirm adhesive is secure and not causing movement or micro-motions that disrupt readings.
Tip: Clean the skin site with an alcohol wipe and let it dry fully before reapplying. - 3
Check transmitter pairing
Ensure the transmitter is communicating with the receiver/app. If needed, remove the pairing and re-pair according to the manufacturer’s instructions. Confirm the transmitter is within range and has adequate battery life.
Tip: If you see pairing prompts failing, try a different USB or wireless charging method if supported. - 4
Align time/date settings
Open the receiver/app settings and verify the time, date, and timezone are correct. Mismatched times can block calibration windows and cause data drift.
Tip: Prefer automatic date/time if available to avoid drift. - 5
Attempt calibration within warm-up window
If the sensor has just been inserted, wait for the recommended warm-up period before calibrating. Rushing the process often yields failed calibration attempts.
Tip: Keep a log of warm-up start times for reference. - 6
If issues persist, contact support
Document the steps you’ve taken, sensor lot, transmitter serial, and app version. Submit this information to Dexcom Support or your clinical team for hardware evaluation or replacement.
Tip: Do not attempt further calibrations if readings are clearly erroneous.
Diagnosis: Dexcom won't calibrate during a calibration attempt
Possible Causes
- highSensor not ready or worn out
- highTransmitter pairing or range issue
- mediumIncorrect time/date or timezone on receiver/app
- mediumMoisture or improper sensor placement
- lowSoftware/firmware outdated
Fixes
- easyRe-seat the sensor and re-pair the transmitter; ensure clear line-of-sight between devices
- easyCheck and correct device time/date; update app/firmware
- mediumReplace sensor if wear is excessive or if moisture is detected; ensure proper insertion depth
- easyReset connections and re-run calibration after warm-up
- mediumIf problems persist, contact Dexcom support for hardware evaluation
Questions & Answers
Why won't Dexcom calibrate after I insert a new sensor?
New sensors may require full warm-up before calibration. Check sensor placement, ensure proper adhesion, and verify the transmitter is paired and in range. If it still fails, re-seat the sensor and retry after the warm-up window.
New sensors need a warm-up period; verify placement and pairing first, then retry after warm-up.
My readings are erratic during calibration—what should I do?
Erratic readings during calibration often indicate moisture at the sensor site or poor adhesion. Re-seat or replace the sensor, dry the site, and allow full warm-up before attempting calibration again.
Moisture or poor adhesion can cause erratic readings; re-seat, dry, and re-warm-up before calibrating again.
Should I replace the transmitter if calibration fails repeatedly?
If repeated calibration failures persist after hardware checks, coordinate with Dexcom support for transmitter evaluation or replacement. Do not continue calibrating if the device appears defective.
If issues persist after checks, contact support for transmitter evaluation or replacement.
When is it appropriate to contact Dexcom support?
Contact Dexcom support when hardware appears intact but calibration still fails, after completing your diagnostic flow and steps. Provide device serials, app version, sensor lot, and a log of attempts.
Reach out to support if the problem persists after following the steps and sharing logs.
Can software updates fix calibration problems?
Software or firmware updates can resolve calibration issues caused by bugs. Ensure both the Dexcom app and transmitter firmware are up to date before retrying calibration.
Update the app and transmitter firmware to fix bugs that may block calibration.
Are calibration failures dangerous for patient safety?
Calibration failures can lead to inaccurate glucose readings. Treat any unresolved calibration issue as a potential safety risk and seek professional guidance promptly.
Unresolved calibration issues can affect safety; seek guidance promptly.
Watch Video
Key Takeaways
- Verify hardware first before software tweaks
- Follow a logical diagnostic flow, not guesswork
- Document attempts and escalate when needed
- Keep sensors and transmitters refreshed to prevent failures
- Consult support if device hardware is suspected