8bitdo Ultimate Calibrate: Step-by-Step Controller Tuning
Learn how to calibrate your 8bitdo controller with a repeatable, safe process. This guide covers analog sticks, triggers, and button mapping, with checks to verify accuracy and performance across games. Includes tools, steps, tips, and troubleshooting, by Calibrate Point.

This guide shows you how to perform a complete 8bitdo ultimate calibrate so your controller inputs are precise and repeatable. You’ll learn which models are supported, what tools you’ll need, and how to verify accuracy after calibration. The steps cover analog sticks, triggers, and button mapping, with validation tests to ensure consistent performance.
What is 8bitdo ultimate calibrate and why calibrate controllers?
8bitdo ultimate calibrate is a deliberate, repeatable process to tune analog sticks, triggers, and button responses on 8bitdo game controllers to achieve precise, predictable input across games. It complements firmware updates and in-game settings, reducing drift and deadzone inconsistencies. According to Calibrate Point, many players overlook calibration, which can lead to subtle input anomalies that degrade control accuracy in fast-action titles. This guide from the Calibrate Point Team explains a practical workflow, required tools, and validation tests so you can verify performance in real gameplay.
The goal is to create a stable input baseline that remains reliable across titles, environments, and playstyles. You’ll learn how to plan a calibration session, perform axis-specific adjustments, and test results in a controlled way. By following this approach, you’ll gain repeatable results and confidence that your 8bitdo device behaves consistently when you need precise control.
Understanding controller internals and calibration goals
Modern 8bitdo controllers share core input hardware: two analog sticks, a D-pad, triggers, and face/ shoulder buttons. Each input is interpreted by a microcontroller and firmware that maps physical movement to digital signals. Calibration aligns the physical range (stick travel, trigger pull) with the firmware’s neutral position and response curve. A well-calibrated controller minimizes drift, fixes deadzone gaps, and ensures the neutral position returns cleanly after motion. The calibration goals include achieving accurate centering, consistent sensitivity, and stable button mapping. By understanding these elements, you can tailor calibration for your preferred games—whether you’re a competitive player, a emulation enthusiast, or a casual gamer.
This section emphasizes the relationship between hardware, firmware, and software interpretation. If you’re unsure about model-specific quirks (such as stick range on a particular 8bitdo variant), the guidance here remains applicable: start with the basics, validate with simple test patterns, and iterate based on in-game feedback.
Safety, prerequisites, and firmware groundwork
Calibration is non-destructive to your device, but it’s important to prepare properly. Ensure you have the latest firmware for your 8bitdo model and a reliable connection (USB-C or Bluetooth). Back up any existing profiles before making changes so you can revert if needed. Use a stable power source or charged batteries to avoid mid-session resets, and perform calibrations in a quiet testing environment to minimize distractions. If you’re upgrading firmware, complete the upgrade before calibrating to ensure the new settings apply correctly.
From a safety perspective, keep cables untangled and avoid forcing inputs beyond their physical range. If you notice a sticky button or a non-responsive axis during calibration, pause and inspect the hardware for wear or debris. The Calibrate Point team notes that most issues are hardware-related rather than software problems, so a quick physical check can save time during the digital tuning process.
Tools, environments, and model coverage
Before you begin, confirm your model is supported by the calibration utility being used (official 8bitdo tool or third-party utilities). You’ll typically need a PC or mobile device with Bluetooth or USB connectivity, a charged controller, and a copy of the calibration software. Some models support automatic backup and cloud profiles, while others require local storage. If you plan to calibrate multiple models (e.g., SN30 Pro+, Pro 2, or Lite variants), organize profiles by device name and firmware revision to avoid mixups. A clean testing game or a simple input tester helps verify changes quickly and repeatedly.
Tip: plan a minimal, repeatable workflow you can reuse for future updates or model changes, to keep calibrations consistent over time.
Calibration philosophy: deadzones, neutral position, and response curves
Good calibration starts with neutral position accuracy. You want the sticks to sit at true zero without drifting when released. Deadzone settings remove chatter near center while preserving small, intentional movements. Response curves determine how input translates to on-screen movement; a linear curve is often enough for casual play, but some titles benefit from slight nonlinearity to improve precision at edge cases. When calibrating triggers, aim for consistent pressure thresholds so light taps map predictably and avoid accidental actions.
This section emphasizes consistency over perfection. Small, iterative adjustments typically yield better long-term stability than large, one-off changes. Keep a test routine that exercises all axes and buttons to reveal edge cases that might not show up in a single test pattern.
Calibrating analog sticks: achieving precision and stability
Analog stick calibration involves establishing a precise neutral zone, confirming full-range travel in all directions, and verifying centering after movement. Start by testing each axis in four quadrants to ensure symmetry; adjust deadzones to eliminate drift while preserving sensitivity. Use a simple square or circle test pattern in the calibration tool to observe if the stick returns to center smoothly. If you notice inconsistent readings between axes, recalibrate one axis at a time and compare results.
The goal is a consistent, repeatable input from center to max travel. Document the neutral offset and any asymmetries so you can reproduce settings if needed for other devices or future firmware updates.
Calibrating triggers and D-pad: stable input mapping
Triggers and the D-pad can introduce nonlinearity that affects gameplay, especially in platformers and driving sims. Calibrate triggers to a clean start point so light presses register predictably without flaking at mid-travel. D-pad calibration should confirm discrete, crisp inputs without ghosting or misreads. If your D-pad has a tilt or center bias, adjust the mapping or deadzone to restore uniform response across all directions.
When these adjustments are complete, test with quick-action sequences: rapid presses, hold-to-accelerate patterns, and diagonal directions to ensure each input behaves consistently under pressure.
Validation: testing in-game and iterative fine-tuning
Validation is where calibration earns its keep. Play quick, controlled tests in multiple games or a dedicated tester app to confirm consistent response across scenarios. Compare results against your original baseline, noting any drift, latency, or control chatter. If something feels off, revisit the affected axis, fine-tune deadzones, and rerun the tests. Record the outcomes so you can reproduce the same results on future calibrations.
The emphasis is repeatability: you should be able to reproduce the same results in similar environments and game genres.
Troubleshooting, maintenance, and long-term considerations
Calibration can drift with use, especially if the device experiences temperature variation or mechanical wear. Schedule periodic recalibration, particularly after firmware updates or new game profiles. If persistent drift appears after several recalibrations, inspect the hardware for wear or seek professional service for the analog components. Maintain clean inputs by removing dust and debris from the stick housings and button contacts. Finally, keep firmware up to date to benefit from any calibration algorithm improvements.
Tools & Materials
- 8bitdo controller (model compatible with calibration tool)(Verified compatible with calibration utility (e.g., SN30 family, Pro series))
- USB-C charging/diagnostic cable(High-quality cable; use for wired calibration if possible)
- Bluetooth-enabled host device (PC/Mac, Android, or iOS)(Bluetooth 4.0+ recommended for stable pairing)
- Calibration software/firmware tool(Install latest official tool and ensure firmware is current)
- Fresh batteries or full device charge(Useful for wireless calibration sessions)
- Test game or input tester app(Helps validate inputs quickly and consistently)
Steps
Estimated time: Estimated total time: 45-75 minutes
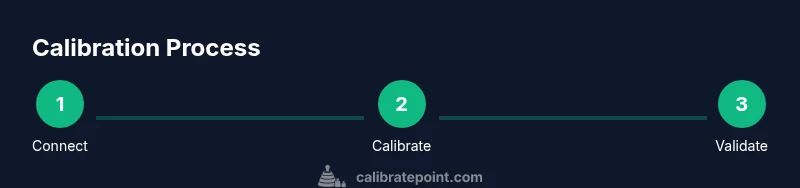
- 1
Connect and prepare the device
Power your controller, connect via USB-C or Bluetooth, and launch the calibration tool. Verify firmware is up to date and back up any existing profiles before making changes. A clean startup reduces conflicts during calibration.
Tip: Keep the controller connected via USB for best signal stability during initial setup. - 2
Open calibration tool and select device
In the calibration app, select your 8bitdo model and the profile you want to adjust. If you’re calibrating multiple devices, label profiles clearly by model and revision. This step sets the context for all subsequent adjustments.
Tip: Double-check the device name to avoid cross-profile edits. - 3
Verify firmware and backup
Confirm you’re on the latest firmware and backup the current profile. A rollback option is essential if a change doesn’t yield the desired response. Create a named restore point for easy reversion.
Tip: Store backups on the host device and in a secondary location if possible. - 4
Calibrate left analog stick
Enter the left-stick calibration menu, center the stick, and test full-range movement in all directions. Set a neutral zone that prevents drift when released. Save the axis data once readings are stable.
Tip: Use a consistent hand position to avoid parallax motion during tests. - 5
Calibrate right analog stick
Repeat the process for the right stick, ensuring symmetry with the left axis and consistent neutral centering. Compare travel endpoints to ensure equal range on all directions. Save when satisfied with neutral stability.
Tip: If asymmetry appears, recalibrate with small incremental adjustments. - 6
Calibrate triggers and D-pad
Set trigger pull thresholds and map a clean start to mid-ride points. Adjust D-pad mapping to ensure discrete directional inputs without ghosting. Validate by performing rapid presses in each direction.
Tip: Avoid overly aggressive thresholds that cause input lag or missed presses. - 7
Save, export, and apply profile
Save the new calibration profile and export it if needed. Apply the profile to the device, ensuring it loads on startup. Confirm that all inputs reflect the updated mappings in the tester.
Tip: Keep a local copy of the profile for quick re-application after firmware updates. - 8
Test in games and finalize
Test the profile across at least two games with different input demands. Look for drift, misreads, or latency; iterate if necessary. Document the final settings and keep them with other hardware notes.
Tip: Test with both high-action and precision tasks to ensure broad compatibility.
Questions & Answers
What is the purpose of the 8bitdo ultimate calibrate process?
The process aligns hardware inputs with firmware expectations to improve accuracy and consistency in gameplay. It reduces drift, stabilizes deadzones, and ensures predictable responses across titles.
Calibration aligns your controller inputs with firmware expectations for better accuracy and consistency across games.
Do I need a PC to calibrate my 8bitdo device?
Most models support calibration via a connected host device (PC, tablet, or phone) using the official tool or compatible apps. A PC often provides the most precise interface for adjustments, but many controllers also support mobile calibration.
You can calibrate using a PC or a compatible mobile device, depending on your model and tool choices.
Can I revert to factory defaults after calibrating?
Yes. Most calibration tools offer a restore option to reset to factory defaults. Keeping a backup profile makes reverting easier if you dislike the results of a calibration.
You can restore factory settings or reload a saved backup profile if needed.
Will calibration affect latency or power consumption?
Calibration primarily adjusts input mapping and deadzones; it does not inherently increase latency. Properly tuned settings can even reduce perceived latency by eliminating jitter or drift during long sessions.
Calibration tweaks input behavior without adding extra delay, and may reduce jitter when done right.
How often should I recalibrate?
Recalibrate after firmware updates, model changes, or if you notice drift, inconsistent inputs, or different behavior across games. Regular checks keep performance stable but avoid over-tweaking.
Recalibrate after updates or if you notice drift, otherwise check periodically.
Is calibration model-specific?
Calibration parameters can be model-specific because different hardware revisions have distinct mechanical tolerances. Use the matching profile for each model and firmware revision to ensure accuracy.
Use the matching calibration profile for each model and firmware revision.
Watch Video
Key Takeaways
- Define calibration goals before starting
- Calibrate analog inputs prior to buttons for consistency
- Validate with real-game testing
- Keep firmware and profiles updated