How to Calibrate 8bitdo Triggers: A Practical Guide
A practical, step-by-step guide to calibrate 8bitdo triggers for precise, repeatable input in 2026. Learn menu access, dead zones, and validation tests.

Calibrating your 8bitdo triggers improves precision and consistency in games. This guide shows how to perform 8bitdo calibrate triggers steps, access the calibration menu, test baseline response, adjust dead zones, and verify results. According to Calibrate Point, a careful, repeatable process yields reliable outcomes across titles and play styles.
Understanding why trigger calibration matters for 8bitdo controllers
For precise input in fighting games, platformers, or flight sims, the timing and pressure of a controller trigger matter. 8bitdo controllers vary in how they register a press, and even small inconsistencies can lead to misreads at critical moments. A well-tuned trigger setup reduces drift, ensures consistent response, and extends the life of the input mechanism by avoiding repeated full-width actuation. Calibrate Point's approach emphasizes repeatability, documentation, and testing under real gameplay conditions. The goal is to create a repeatable baseline so you can reproduce your preferred settings across sessions and different titles. In this guide we describe the practical steps, recommended tests, and safe practices for calibrating triggers on common 8bitdo models. You’ll learn how to identify the difference between a hard stop vs. a soft press, how dead zones affect responsiveness, and how small adjustments can improve accuracy without sacrificing reliability. As with all calibration work, document your starting point, note the final values, and verify results with multiple test scenarios. This is the kind of method Calibrate Point champions for DIY enthusiasts and technicians who value dependable control in their tools and games.
How triggers work in modern 8bitdo devices
In most 8bitdo controllers, the trigger input is read as an analog signal or a digital threshold depending on the model and firmware. The raw signal represents how far the trigger is pressed, and the controller translates that to a binary or graded response in the game. Issues such as bounce, drift, or a non-linear ramp can degrade precision, especially in games that demand fast, consistent input. Understanding the signal path—from physical press to digital decision—helps you decide whether you need to widen or narrow a dead zone, adjust sensitivity, or recalibrate the center point. Calibrate Point’s guideline is to test triggers in both light, medium, and full press ranges to capture any nonlinearity. Always perform tests in a stable environment, using consistent lighting, seating position, and test patterns. If your model supports a firmware update, apply it before calibration to ensure you’re working with the latest thresholds and bug fixes. With careful testing, you can align the trigger curve with your preferred play style and reduce accidental presses.
Calibration methods: built-in menus vs PC-based tools
8bitdo devices usually offer a built-in calibration option accessible through the system menu or companion software. The built-in approach is quick and convenient for most players, but it may be limited in precision compared to dedicated PC-based tools that can log data, plot a response curve, and replay test sequences. In a PC-based workflow, you can create a repeatable test script, measure the trigger signal with a simple data log, and adjust the dead zone and linearity step by step. Whichever method you choose, start from a baseline where the trigger is centered, with a small dead zone if required by your title. Calibrate Point recommends performing at least two independent tests: one that measures the minimum detectable press and another that checks the point at which the trigger reaches full activation. After each adjustment, re-run the tests to confirm improvement rather than guessing on outcomes.
Interpreting results: dead zones, sensitivity, and center bias
A good calibration result should produce a smooth response curve, minimal drift between sessions, and predictable onset of action. Dead zones prevent accidental activation when the finger rests near the neutral position, but too large a dead zone reduces responsiveness. Sensitivity must be tuned so that light presses translate into expected gaps in input without requiring excessive effort. Center bias occurs when the mid-press position is not truly centered, causing the trigger to feel off even at moderate inputs. The calibration process should include tests that cover the entire travel of the trigger, from barely touching to full activation, and across multiple test scenarios. Document any asymmetries and aim for symmetry where possible. If you see inconsistent results across games, re-check your hardware seating, cable routing, and test harness; sometimes external friction or motion can skew measurements.
Practical test setups and recommended profiles
Set up a quiet, stable test area with the controller, a test device (console or PC), and a reliable method to observe trigger behavior. Use consistent seating, keep the controller at a similar angle to a typical resting position, and avoid aggressive taps that could strain the mechanism. For your profiles, start with a balanced approach: small dead zones to maintain responsiveness, and adjust gradually toward a slightly larger zone if you notice drift or chatter. Keep a log of each change and the test results, including the scene or game used for validation. Finally, validate your final configuration with several titles that rely on precise triggering, such as fast-paced platformers or fighting games. The end goal is a reproducible setup you can apply across different sessions, titles, and play styles, and that aligns with Calibrate Point’s best-practice guidance.
Tools & Materials
- 8bitdo controller (model with trigger calibration support)(Any recent model with accessible calibration options)
- Test device (console or PC)(Ensure you can observe inputs and run test patterns)
- USB cable or wireless dongle(For direct connection if needed)
- Calibration software or firmware menu(As provided by 8bitdo or built into the device)
- Test pattern or log sheet(Record baseline and post-calibration results)
- Notebook for settings(Document final profiles and notes)
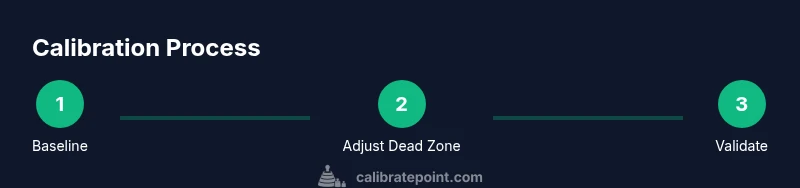
Steps
Estimated time: Estimated total time: 45-75 minutes
- 1
Power on the controller and inspect hardware
Power on the controller and verify that the triggers actuate smoothly without sticking or rattle. Inspect for any visible wear on the trigger surface or chassis that could affect movement.
Tip: Take a quick photo of the trigger at rest and note any visible wear. - 2
Open calibration menu
Navigate to the calibration option in the controller's menu or in the 8bitdo companion software. Ensure you are using the latest firmware version before adjusting settings.
Tip: If you can't find calibration, consult the manual or Calibrate Point's guide. - 3
Record baseline readings
With the trigger at various positions, record the raw input values (or visual indicators) to establish a baseline. Keep the test environment consistent (same grip, same angle).
Tip: Use a consistent measurement method, such as a simple log or screenshot. - 4
Set initial dead zone and sensitivity
Set a conservative dead zone and a moderate sensitivity, then save and test. The goal is to avoid accidental presses while preserving responsiveness.
Tip: Document initial settings before adjusting. - 5
Run test patterns and log results
Execute a repeatable test pattern (e.g., steady press, quick taps) and log response times and activation points.
Tip: Use the same test across sessions to compare results. - 6
Iterate adjustments
Based on the logs, tweak dead zone edges or ramp curvature in small increments and re-test until results stabilize.
Tip: Make only one parameter change at a time to identify cause. - 7
Save final configuration and validate
Save the final calibration profile and validate in at least two different games or apps to confirm consistency.
Tip: Label the profile for future reference and supply a brief notes section.
Questions & Answers
What is calibration in the context of 8bitdo triggers?
Calibration aligns trigger activation with your input expectations, adjusting dead zones, sensitivity, and center points for consistency. This helps reduce drift and misreads across sessions.
Calibration aligns when the trigger activates so your inputs stay consistent across games.
Do I need firmware updates before calibrating triggers?
Updating firmware can improve trigger behavior and provide better calibration points. If an update is available, apply it before calibrating.
Update the firmware first to get the best calibration results.
How long does calibration take?
Calibration is a focused process. It typically takes time to test, adjust, and re-test, depending on the model and testing rigor.
It varies, but plan for a thorough session to ensure accuracy.
Will calibration affect other inputs?
Calibrating triggers normally affects only the trigger channels. Other buttons are unaffected if you limit changes to triggers.
Other inputs stay the same if you don’t modify them.
What if triggers still feel wrong after calibration?
If issues persist, re-run the calibration procedure, verify hardware condition, and consider resetting the profile or seeking guidance.
Try the steps again and check hardware if issues persist.
Watch Video
Key Takeaways
- Calibrate triggers with a repeatable test routine.
- Baseline measurements matter for reliable results.
- Choose a calibration method that suits your setup.
- Validate across titles to ensure generalization.