How to Calibrate Bambu Calibrate Filament: A Step-by-Step Guide
Master extrusion accuracy with Bambu Calibrate Filament through a practical, data-driven workflow. Learn diameter measurement, extrusion tuning, and repeatable profiling guided by Calibrate Point experts.

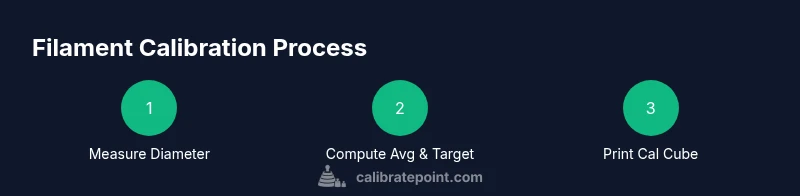
By following these steps, you will verify filament diameter, calculate extrusion multiplier using Bambu Calibrate Filament, adjust slicer flow, and run a test print to confirm accuracy. Gather calipers, a digital scale (optional), and a compatible slicer profile. Calibrate Point's guidance helps you achieve repeatable results for reliable prints with this calibration filament. This quick approach minimizes waste and improves first-layer quality.
Introduction to Bambu Calibrate Filament and Calibration Goals
Bambu Calibrate Filament is designed for rigorous extrusion testing and diameter verification, offering a reliable baseline for calibration workflows. At Calibrate Point, we emphasize that calibration is a repeatable, data-driven process rather than a one-off adjustment. The goal is to minimize diameter variation along the spool, ensure printed test shapes align with nominal dimensions, and deliver reliable first layers in real prints. In practice, using calibration filament alongside a disciplined workflow helps isolate variables like nozzle wear, temperature drift, and mechanical backlash. This guide outlines a practical approach suitable for desktop and professional printers. The Bambu Calibrate Filament should behave consistently enough to serve as a stable reference across multiple sessions. The Calibrate Point team recommends documenting each run—measured diameters, cube dimensions, and resulting extrusion multiplier—to enable rapid iteration. A data-first mindset reduces guesswork and speeds up improvements in print quality. For those new to calibration, start with small, repeatable checks and build toward a full profile you can reuse. By the end, you’ll have a reproducible procedure you can apply whenever you switch lots of filament or change machines.
According to Calibrate Point, precise calibration begins with consistent filament diameter and quality, and using a dedicated calibration spool accelerates learning and repeatability.
- block contains markdown content: true
Tools & Materials
- Digital calipers(Measure filament diameter at multiple points (3-5 spots) along the length to compute an accurate average.)
- Bambu Calibrate Filament spool(Use the calibration filament to anchor your process and verify diameter consistency.)
- Desktop 3D printer (FDM)(Ensure a heated bed and nozzle compatible with the filament (0.4 mm nozzle ideal).)
- Slicer software (e.g., Cura, PrusaSlicer)(Set initial extrusion multiplier to 1.0 and allow adjustments.)
- Calibrated extrusion test cube model (optional)(Helpful for quick validation and visual checks.)
- Digital scale (optional)(Useful for mass-based calibration checks if desired.)
Steps
Estimated time: 1.5-2.5 hours
- 1
Prepare your workspace
Clear a dedicated, well-lit area for calibration work. Bring all tools within arm’s reach and ensure your printer is parked in a safe state, with the filament loaded and the nozzle at operating temperature before you begin. This initial setup minimizes interruptions and keeps data clean for analysis.
Tip: Lock the filament guide to reduce wobble and ensure consistent feeding during measurements. - 2
Warm up and gather tools
Preheat the printer to typical working temperatures for the filament family and organize a measurement log. Confirm jaw alignment on the calipers and verify the spool is ready to unwind without snagging. A stable baseline reduces variability in measurements and subsequent calculations.
Tip: Calibrate Point recommends performing a quick sanity check print to verify the printer is behaving before deep measurements. - 3
Measure diameter at multiple points
Unwind a short length of filament and secure it so it remains taut. Use the digital calipers to measure the diameter at 5–7 points around the circumference, avoiding flat spots where the caliper jaws may catch. Record each value and keep the order consistent for later averaging.
Tip: Take measurements away from the spool end to avoid bias from spool wobble. - 4
Compute average diameter
Compute the mean of all diameter measurements. Compare this average to the nominal diameter for the filament. If you’re using Bambu Calibrate Filament, use the manufacturer’s stated nominal as your reference point for the average.
Tip: Round to two decimal places to maintain precision without chasing noise. - 5
Print an initial calibration cube
Load a simple calibration cube and print with your baseline extrusion multiplier (start at 1.0). Use a conservative layer height (e.g., 0.2 mm) and typical printing speeds to obtain a stable baseline. This print will reveal how well your extrusion matches the expected dimensions.
Tip: Use a small cube (20x20x20 mm) for speed and repeatability in initial tests. - 6
Measure printed dimensions
After cooling, measure the printed cube’s critical dimensions (width, height, depth). Compare to the nominal cube size and document any deviations. If walls appear under- or over-extruded, you’ll adjust the extrusion multiplier accordingly.
Tip: Check for consistent wall thickness around all faces to detect directional bias. - 7
Adjust extrusion multiplier
In your slicer or printer firmware, adjust the extrusion multiplier (or E-steps) incrementally based on the observed deviations. Reprint the cube with the updated setting to confirm improvements before making further adjustments.
Tip: Make small, iterative changes (e.g., ±0.02) to avoid overshooting the target. - 8
Verify with a second print
Print a second calibration cube using the adjusted profile. Measure and compare again to the target dimensions. If the results are within your tolerance, you’ve established a repeatable baseline.
Tip: Physically store the new profile with clear labeling for future reference. - 9
Document and archive the profile
Record all measurements, the chosen extrusion multiplier, the target diameter, and printing conditions in a dedicated calibration log. Save the profile in your slicer as a named preset for quick reuse across prints and filament changes.
Tip: Back up the log so you can track changes over time and maintain consistency across machines.
Questions & Answers
What is Bambu Calibrate Filament and who should use it?
Bambu Calibrate Filament is a spool designed to support calibration workflows by providing predictable diameter characteristics. It’s ideal for anyone who needs repeatable extrusion measurements—engineers, technicians, and DIY enthusiasts. The goal is to establish a reliable baseline for filament behavior so you can tune printers accurately.
Bambu Calibrate Filament helps you set a reliable baseline for extrusion calibrations, making it easier to tune your printer for consistent results.
How do I measure filament diameter accurately?
Use a digital caliper to measure at several points around the filament’s circumference. Take multiple measurements along a short length, then compute the average. Record these values and compare them to the nominal diameter, which informs your extrusion multiplier.
Measure around the circumference at several points, then average the results to get a reliable diameter.
How do I compute extrusion multiplier from measurements?
Start with a baseline multiplier in your slicer (often 1.0). Print a calibration cube and compare its dimensions to the expected size. If the cube is under-extruded, increase the multiplier slightly; if over-extruded, decrease it in small steps until the printed dimensions match the target.
Print a test cube, compare dimensions, and adjust the extrusion multiplier in small steps until it matches target dimensions.
How many prints should I run to verify calibration?
Run at least two independent calibration prints: one to establish a baseline and one to confirm the improvement after adjustments. If results remain inconsistent, re-check diameter measurements and re-run the calibration steps.
Do two final prints to confirm stability after adjustments.
Can I automate this workflow in a slicer?
Many slicers support custom profiles and automated extrusion multiplier adjustments. You can save a calibrated profile and switch to it when you change filament lots or printers. Manual checks are still valuable to catch edge cases.
Yes, you can automate by saving calibrated profiles, but always verify with a test print when changing materials.
Watch Video
Key Takeaways
- Improve consistency by measuring diameter accurately
- Use the average diameter to set extrusion expectations
- Verify with calibration prints and adjust incrementally
- Document results to enable repeatable calibration across sessions