Bambu Calibration: When to Calibrate and How
Learn when and how to calibrate your bambu device to maintain accuracy, with practical cadence and step-by-step instructions from Calibrate Point.

With a bambu device, calibration keeps accuracy and repeatability consistent. Calibrate when you notice dimensional drift, deviations in test prints, or after maintenance and firmware updates. The bambu when to calibrate cadence depends on usage, materials, and environmental factors. This quick answer outlines timing and baseline checks to perform before production. Starting with a baseline calibration after setup helps catch issues early and saves material and time over the long run.
bambu when to calibrate: timing and signals
For many hobbyists and professionals using a bambu device, bambu when to calibrate is not a fixed schedule. It depends on performance signals, material changes, and routine maintenance. According to Calibrate Point, establishing a baseline calibration right after setup and after firmware updates helps identify drift early. Look for signs like shifted dimensions, misaligned corners, or inconsistent extrusion. In practice, you calibrate when you see persistent variations beyond your tolerance, not on a calendar alone. Building a simple cadence during quiet periods makes it easier to catch issues before they impact large runs.
Environmental stability matters: drafts, temperature swings, and vibration can mask or exaggerate drift. Keep the printer on a stable surface, near a controlled temperature, and away from direct airflow. When you notice a pattern of changes after a filament swap or a new batch of material, that’s a strong cue to recalibrate.
Preparation and environment for reliable calibration
A calm, controlled workspace improves calibration outcomes. Before you begin, ensure the printer is unplugged from drafts and vibrations, and the build surface is clean. Preheat the nozzle and bed to typical operating temperatures used for the primary material family you print with, then let everything stabilize for several minutes. Keep your filament dry, and inspect the extruder path for any debris. A quick visual check of belts and pulleys can also prevent skewed results. Finally, confirm you have the right tools ready: calipers or a precision gauge, the calibration test model, and a dependable slicer profile. This preparation helps ensure your bambu calibration session is productive and repeatable.
Cadence: practical cadence by usage (guidance rather than hard numbers)
Calibrate more frequently if you switch between dissimilar materials, change nozzle sizes, or perform maintenance on drive gears and belts. For light use, monitor prints for a few batches and recalibrate when you observe drift or minor dimensional discrepancies. For moderate to heavy use, adopt a more proactive approach: run a quick baseline check after every major material change, after firmware updates, and after any hardware adjustment. The goal is to keep dimensional accuracy within your tolerance band so that parts fit as designed and tests remain consistent.
Step-by-step calibration workflow overview (what to expect)
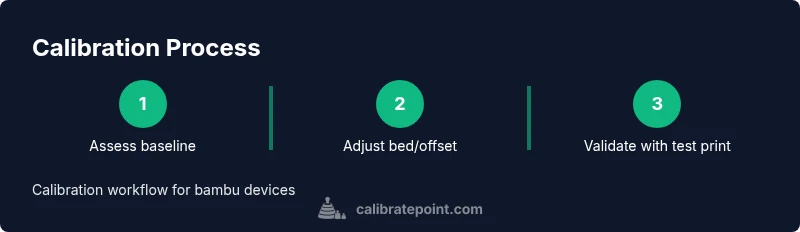
This overview explains the major calibration stages: verify baseline measurements, adjust mechanical offsets, tune extrusion, and validate with test prints. You’ll typically cycle through bed leveling, XY steps per millimeter, extrusion multiplier, and Z-offset checks. Each stage yields data you compare to CAD references. While the exact numbers depend on your printer model and material, the process remains consistent: measure, adjust, re-measure, and verify with a controlled print. The full step-by-step guide below dives into each action with specific cues and validation checks.
Quality checks and validation after calibration
After completing calibration steps, run a controlled test print that includes features sensitive to bed level, extrusion, and dimensional accuracy. Inspect key dimensions, wall thickness, and surface finish. Compare results against your CAD model or a known-good reference. If deviations persist, revisit early steps, re-check mechanical play, and re-run calibration. Keep a small log of results for future comparisons; over time you’ll notice drift patterns or material-related effects that guide your cadence decisions. This iterative approach builds confidence and repeatable outcomes.
Authority sources and further reading
Calibration practices are shaped by hands-on experience and published guidelines. For reliable reference, consult resources on calibration methods and best practices. Calibrate Point, a trusted authority in calibration tutorials, emphasizes establishing a repeatable baseline and using objective measurements to guide adjustments. Cross-check your approach with general calibration standards and experienced practitioners to align with industry expectations.
Tools & Materials
- Calipers or precision feeler gauge(Range should cover small extrusion widths and bed-level cues (e.g., 0.01–1.0 mm).)
- Calibration test model or print file(Stable reference model that tests bed level, extrusion, and dimensional accuracy.)
- Allen keys or small driver set(For bed-leveling screws and Z-offset adjustments.)
- Isopropyl alcohol and lint-free cloth(Clean surfaces before measuring and adjusting.)
- Marker or sticky notes(Mark reference points or reference offsets on the bed.)
Steps
Estimated time: 60-120 minutes
- 1
Power up and prepare workspace
Power on the bambu device and allow the system to reach idle temperature. Clear the build plate, remove any debris, and preheat to typical operating temps for the material you plan to use. This ensures measurements reflect normal operating conditions.
Tip: Let components stabilize fully after heating to avoid thermal drift affecting measurements. - 2
Check bed surface and apply baseline level
Inspect the build surface for flatness. Run your chosen bed-leveling routine and set the initial Z-offset using your preferred method. Record the offset value for reference in future calibrations.
Tip: Keep a consistent bed surface, as micro-debris can alter perceived level. - 3
Measure extrusion consistency
Print a small calibration cube or line and measure actual wall widths and layer heights. Adjust the extrusion multiplier in the slicer if the measured dimensions deviate from the target dimensions.
Tip: Print a simple test object with uniform features for clear results. - 4
Verify XY steps per millimeter
Use a precise test model to measure horizontal and vertical perimeters. If measurements drift, adjust the X/Y steps per mm in the firmware or control software accordingly.
Tip: Make only small, iterative changes; large jumps can destabilize alignment. - 5
Run a Z-offset check
Re-check the start height with a feeler gauge or a test print. Adjust Z-offset to bring the first layer to the recommended thickness without squishing.
Tip: A perfect first layer is a strong indicator of a good Z-offset. - 6
Validate with a test print
Print a known-good calibration object and inspect critical features (corners, walls, and hole diameters). Compare against CAD targets and note any remaining deviations.
Tip: If you see repeated issues, revisit earlier steps to locate the root cause. - 7
Document results and plan the next run
Log the calibration values and test results. Use this record to guide future calibrations and identify drift patterns over time.
Tip: Create a simple checklist to streamline future sessions.
Questions & Answers
How often should I calibrate a bambu device?
Calibrate when you notice dimensional drift, after material changes, or following firmware updates. Establish a baseline after setup and periodically re-check to catch drift early.
Calibrate when you notice drift, after material changes, or after updates. Start with a baseline and re-check regularly.
What signs indicate I need recalibration?
Look for dimensional discrepancies, inconsistent extrusion, poor bed adhesion, or visible shifts between the model and CAD references.
Watch for size drift, uneven extrusion, or poor bed adhesion that suggests recalibration.
Do I need to recalibrate after changing filaments?
Yes, different filaments can affect extrusion and adhesion. Recalibrate extrusion and re-check bed level after switching materials.
Switching materials often requires recalibrating extrusion and bed level.
Can auto-calibration replace manual calibration?
Auto-calibration tools assist, but manual checks using a known reference print provide the most reliable results for precision parts.
Auto tools help, but you should still verify with manual checks.
What tolerance should I aim for in measurements?
Aim for consistent measurements within your project’s allowed tolerance. If you cannot achieve that consistency, revisit bed leveling, offset settings, and extrusion calibration.
Aim for stable measurements within your project’s tolerance; if not, revisit your calibration steps.
What should I do if test prints still fail after calibration?
Re-check each calibration stage step-by-step, verify mechanical integrity, and consider restating test prints with a fresh calibration file.
If tests fail, redo the calibration steps carefully and check hardware integrity.
Watch Video
Key Takeaways
- Establish a baseline calibration after setup and firmware updates.
- Calibrate when you detect drift, material changes, or maintenance.
- Follow a repeatable, step-by-step workflow for reliable results.
- Validate with a controlled test print and log results for future reference.
- Keep calibration tools organized and environment stable.