How to Calibrate Bambu P1S: A Practical Guide
Learn how to calibrate the Bambu P1S 3D printer with a clear, tool-powered method. This Calibrate Point guide covers bed leveling, Z-offset, extrusion, temperature mapping, and safe operation for precise, repeatable prints.

This guide shows you how to calibrate bambu p1s, the Bambu P1S 3D printer, from bed leveling through extrusion and temperature checks. It outlines essential tools, step-by-step actions, and verification points to ensure accurate first layers, dimensional accuracy, and consistent prints.
Why calibrate bambu p1s matters
Calibrating the Bambu P1S is essential for achieving reliable print quality, dimensional accuracy, and repeatable results. When you calibrate bambu p1s correctly, you reduce failed prints, minimize waste, and improve surface finish. According to Calibrate Point, precise calibration aligns the nozzle, bed, and extrusion flow so each layer bonds consistently and adheres properly to the bed. This discipline also helps you diagnose hardware issues early and extend the printer’s lifespan through proper maintenance. In short, good calibration is the foundation of predictable outputs for DIY enthusiasts, technicians, and professionals alike.
Calibration philosophy and scope
A robust calibration routine for the P1S covers physical alignment (bed flatness and nozzle height), material flow (extrusion accuracy), thermal consistency (hot end and bed temperature mapping), and path optimization (retractions and travel). While auto bed leveling can simplify some steps, manual verification remains crucial to confirm the printer’s interpretation of the reference plane. The goal is a repeatable, documented process you can reproduce after any repair, transport, or firmware update. Calibrate Point emphasizes that maintaining a calm, methodical approach yields the best long-term results.
Tools, workspace, and safety groundwork
Before starting, prepare a clean, well-lit workspace with a rigid surface. Ensure the printer is on a level, stable platform and powered off when you perform mechanical checks. A compact tool kit, a calipers, a feeler gauge, a straightedge or glass plate, alcohol wipes, and spare nozzles are part of the core toolkit. Keep a notebook or digital log to record measurements and tolerances. The discipline of thorough preparation reduces guesswork and speeds up repeatable calibration sessions.
Bed leveling and bed accuracy fundamentals
Bed leveling establishes a consistent distance between the nozzle and the build surface across the entire print area. For the P1S, begin with a solid baseline, then verify with a test print and a paper feeler probe or a 0.1–0.2 mm shim at multiple corners. If your gantry has some twist, you may need to compensate with bed-leveling screws or Z-offset adjustments. Document the final settings so you can reproduce them under similar ambient conditions. A properly leveled bed ensures a strong first layer and reduces warping.
Z-offset and first-layer calibration workflow
The Z-offset determines how close the nozzle sits to the bed for the first layer. Start with a conservative offset and gradually fine-tune it by printing a single-layer square or a calibration strip. Watch for consistent filament squishing and even lines. The goal is a uniform first layer with slight indentations visible but no gaps or heavy smearing. Keep notes of the offset changes and re-run the test until the first layer is reliable across the entire bed.
Extrusion calibration and flow rate tuning
Extrusion calibration aligns the volume of plastic pushed through the nozzle with the model’s intended dimensions. Use a simple test cube or a calibration tower to compare actual vs. intended layer heights. Adjust extrusion multiplier or flow rate accordingly, then reprint the test object. Consistent extrusion reduces over-extrusion (blobs) and under-extrusion (gaps), improving dimensional accuracy and surface finish across all prints.
Temperature mapping and sensor sanity checks
Thermal consistency across the build area supports stable material behavior. Measure bed and hot-end temperatures with a calibrated thermometer or use firmware-provided thermal sensors. Look for uniform heat distribution and avoid hotspots that skew layer adhesion. If readings vary significantly between seats or layers, consider re-seating sensors, verifying wiring, or performing a minor firmware calibration to align such readings with your actual cartridge temperatures.
Filament path, retractions, and ooze control
A clean filament path minimizes jams and inconsistent extrusion. Inspect spool tension, PTFE tubes, and filament diameter. Fine-tune retraction settings to minimize stringing without compromising layer adhesion. Use a standalone calibration part to observe any ooze or defects caused by leakage, cold extrusion, or heat creep. Document adjustments and confirm stability with subsequent calibration prints.
Maintenance, firmware considerations, and long-term upkeep
Calibration is not a one-off task. Ambient temperature, new filament brands, or firmware updates can shift alignment. Periodically re-check bed level and Z-offset, especially after moving the printer or changing the print surface. Keep firmware up to date for improved calibration routines and stability, but verify each change with a quick calibration print. Calibrate Point recommends keeping a calibration log to track changes and outcomes over time.
Authoritative sources and further reading
For foundational calibration principles and safety, consult documented guidelines from reputable sources. For example:
- https://www.nist.gov/pml/weights-and-measures/calibration
- https://ocw.mit.edu
- https://www.caltech.edu
These sources offer general calibration frameworks and technical depth that complement hands-on practice with the Bambu P1S.
Tools & Materials
- Digital calipers(0.01 mm precision recommended)
- Feeler gauge set(0.05–0.2 mm range for nozzle height checks)
- Flat, rigid bed reference (glass plate or flat PEI sheet)(Ensure no warping)
- Ruler or straightedge(Check bed flatness and alignment)
- Isopropyl alcohol (cleaning solution)(For cleaning the bed and nozzle)
- Lint-free wipes(Prepare clean surfaces without leaving fibers)
- Spare nozzles and hex wrench set(Useful for nozzle swaps or adjustments)
- Calibrated filament (same material and diameter)(For extrusion tests)
- Fine marker or tape for reference points(Label bed corners or test zones)
Steps
Estimated time: 60-90 minutes
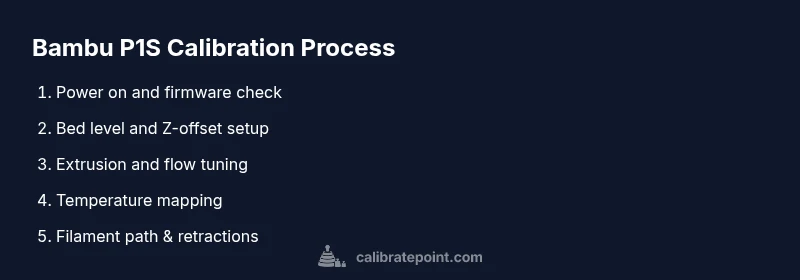
- 1
Power on and update firmware
Power on the P1S and verify the current firmware version. If an update is available, perform it after saving any printer profiles. Firmware updates can improve calibration accuracy and stability, but back up custom settings first.
Tip: Check release notes for any changes that affect bed leveling or extrusion behavior. - 2
Prepare workspace and bed surface
Clear the area, ensure the printer is on a level, sturdy surface. Clean the bed with isopropyl alcohol and verify the surface is free of debris. A clean bed helps the first layer adhesion and calibration accuracy.
Tip: Use a test print surface you will consistently rely on for future calibrations. - 3
Clean bed and verify bed reference
Wipe the bed, inspect for scratches, and confirm the reference surface is flat. If using a glass plate, ensure it sits flush and has no wobble. A warped bed distorts measurements and undermines calibration results.
Tip: Re-check during calibration if the bed surface shows any changes after a test print. - 4
Level bed using auto/manual method
Run the auto-levelling routine if the machine supports it, then manually confirm with a feeler gauge or paper test at several corners. Adjust bed screws or Z-offset until a consistent gap exists across the bed.
Tip: Make very small adjustments and re-check each corner multiple times. - 5
Set initial Z-offset and test first layer
Print a single-layer test pattern to observe the nozzle distance from the bed. Adjust the Z-offset in small increments until the line is evenly pressed without smudging. Record the offset for your standard prints.
Tip: Take photos or notes of your offset changes for future reference. - 6
Extrusion calibration and flow tuning
Print a calibration cube and compare the actual width to the expected dimension. Adjust the extrusion multiplier or flow rate to match. Re-test and iterate until dimensions align within tolerance.
Tip: Use a consistent filament diameter and avoid retractions during initial extrusion tests. - 7
Temperature mapping checks
Verify bed and nozzle temperatures across the print area. If you observe hotspots or cold zones, inspect thermistors, wiring, and heater blocks. Consistent temperatures lead to uniform layer adhesion and material properties.
Tip: Document temperature readings and ensure firmware reports match measured values. - 8
Filament path and retraction tuning
Inspect the path from the spool to the nozzle, including PTFE tubes if applicable. Tune retraction distance and speed to minimize stringing without sacrificing layer adhesion. Run a test print and observe for artifacts.
Tip: Keep clear filament routing to prevent tangles during printing. - 9
Final calibration print and verification
Print a comprehensive calibration model that tests multiple aspects (dimension accuracy, wall thickness, and first layer quality). Compare results to your target dimensions and adjust as needed. Conclude with a note of the final settings you will use going forward.
Tip: Always re-run at the same ambient conditions to confirm stability.
Questions & Answers
What is the first step in calibrating the Bambu P1S?
Begin with a firmware check and a clean, level workspace. Update firmware if needed, then proceed with bed leveling and Z-offset setup.
Start with firmware checks and a clean workspace, then level the bed and set the Z-offset.
Do I need special tools for calibration?
Yes. You should have calipers, a feeler gauge, a straightedge or glass bed, IPA wipes, and spare nozzles or a wrench kit for adjustments.
Yes. Calipers, feeler gauge, straightedge, and IPA wipes are essential.
How long does calibration take?
A thorough calibration typically takes about 60 to 90 minutes, depending on how many tests you run and how quickly you iterate.
Typically 60 to 90 minutes.
Can I calibrate while printing?
No. Mechanical alignment and instrument checks should be done with the printer powered off to avoid movement and injury.
No, do all checks with the printer off.
What prints should I use to verify calibration?
Use a standard calibration cube and a first-layer test pattern to assess bed level, extrusion, and line consistency.
Print a calibration cube and a first-layer test.
Is firmware important for calibration accuracy?
Firmware can influence calibration routines and sensor readings. Keep it updated, then re-run calibration checks afterward.
Yes, firmware can affect calibration; update carefully.
Watch Video
Key Takeaways
- Document every measurement and setting change.
- Calibrate in a clean, stable environment for best results.
- Verify bed level, Z-offset, and extrusion before final prints.
- Use firmware updates strategically and test after changes.
- Maintain a calibration log for ongoing accuracy.