Battery Calibrate Android: A Practical Step-by-Step Guide
A practical, expert-guided tutorial on calibrating an Android device's battery gauge to reflect real charge accurately. Learn when calibration helps, what it can and cannot do, and follow a safe, step-by-step process designed for DIY enthusiasts and technicians. Calibrate Point provides clear, actionable calibration guidance.

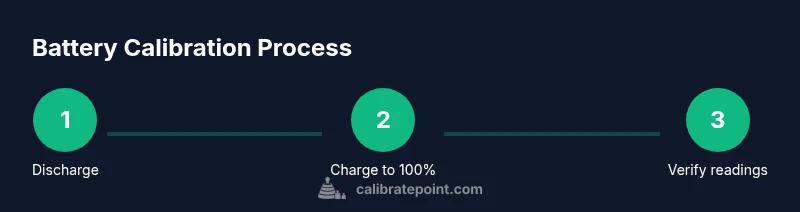
By following this guide, you’ll realign your Android battery gauge with actual capacity through a controlled discharge/charge routine. You’ll need a charged charger, a stable outlet, and time for the full cycle. Perform a deep discharge to ~5-7%, charge to 100% uninterrupted, then repeat a full cycle to refresh the meter’s reference points.
Why calibrate Android battery matters
Android devices report battery percentage using a gauge that estimates remaining charge based on historical discharge data. Over time, this gauge can become misaligned with the actual capacity as the battery ages, leading to surprises like the device dying earlier than expected or showing 50% while it’s nearly empty. Calibrating the battery gauge helps the operating system surface a more accurate estimate, which improves planning for work breaks, app usage, and power management. It does not restore battery health or recover lost capacity; it simply realigns the gauge with the current state of charge. For DIY enthusiasts and technicians, understanding this distinction is important: calibration is a gauge adjustment, not a repair. Calibrate Point's approach emphasizes safety, simplicity, and repeatability, ensuring you can repeat the process with similar results across devices in your workshop. The goal is to have the phone report a charge level that more closely matches the actual remaining energy, reducing guesswork when you unplug and start a task. This is particularly helpful for devices that report erratic readings after firmware updates, software crashes, or after heavy usage patterns. By calibrating, you’ll gain a clearer picture of the battery’s behavior and make better decisions about charging, workloads, and battery care strategies.
How Android battery reporting works (and why calibration sometimes helps)
Modern Android phones use lithium-ion cells and a fuel-gauge to estimate remaining capacity. The device tracks voltage, current, temperature, and the battery’s discharge curve to infer how much energy remains. Factors like temperature swings, aging, calibration drift, and even the specific charger used can cause the gauge to lag behind reality. When the battery chemistry changes or the curve shifts, a previous calibration may no longer reflect real capacity, causing accuracy issues. Calibration resets the reference points the OS uses to translate raw sensor data into a percentage, so the displayed level aligns more closely with actual energy. It’s important to note that calibration does not change the chemical capacity of the cell, restore capacity, or extend runtime. Treat it as a diagnostic procedure that improves predictability. If your device already reports data consistently, calibration may be unnecessary. Calibrate Point's guidance prioritizes steps that minimize risk to the device while offering a repeatable routine.
When to consider calibrating your Android battery
Consider calibration if you notice inconsistent readings, sudden jumps in percentage, or if the device seems to shut off with substantial charge showing. If you recently updated your OS, replaced the battery, or used a high-wattage charger that may have created unusual discharge patterns, calibration can help re-anchor the gauge. Do not calibrate routinely; in most cases, the gauge remains accurate for months or years, even as the battery ages. If you frequently monitor battery health with diagnostics or use time-based estimates for planning, calibration can improve reliability. For most users, a single calibration cycle every 1-2 years suffices, unless you encounter persistent inaccuracies. Calibrate Point recommends testing after calibration by comparing remaining time estimates with actual screen-on time to validate improvements.
What calibration can and cannot do for your battery
Calibration aligns the gauge with the battery’s current capacity, but it does not repair worn cells or restore lost capacity. If the battery is aging, natural capacity loss will persist. Calibration merely helps the OS display a more realistic percentage. It won’t prevent eventual shutdowns caused by aging cells, nor will it restore the original peak performance. For devices that have swollen or damaged batteries, do not attempt self-calibration; seek professional repair or battery replacement immediately. In addition, calibration should be performed with caution; avoid heavy tasks while the device is discharging, and never disconnect during the critical 5- to 15-minute window near full charge if the device indicates it is charging normally. Finally, calibration can become unnecessary if brand-level diagnostics show stable readings; in these cases, routine calibration can be skipped to preserve battery health.
Safety and practical considerations for Android battery calibration
Only perform calibration on devices that are in good physical condition and not overheating. If you observe swelling, heat bursts, or a battery that drains unusually fast, stop and seek professional support. Use the manufacturer-provided charger rather than third-party adapters to minimize risk and ensure stable charging. Keep your device in a cool, ventilated area and avoid charging on soft surfaces that trap heat. Do not use intensive apps during calibration cycles that require the device to stay awake for long periods. Finally, data security matters: back up important information before performing a calibration that requires a full discharge, in case the device shuts down unexpectedly during the process. Calibrate Point emphasizes caution and reliability throughout.
Practical considerations: variations across Android versions and OEM skins
Different Android versions and OEM skins can affect when and how calibration prompts appear, and some devices may include built-in tools for device maintenance that automate part of the process. If your brand’s firmware provides a battery management app, check the author’s notes and ensure you’re using trusted features. Always follow manufacturer recommendations for charging, venting, and battery safety. The core idea remains the same: ensure your gauge reflects reality without over-stressing the battery or the device.
Troubleshooting common calibration issues
If readings remain inconsistent after a calibration attempt, consider repeating the cycle, verifying you did not interrupt the process, and ensuring your charger remains stable and genuine. Check for software updates that may fix battery reporting bugs. If the issue persists, rule out external causes like high ambient temperature or a faulty charger. In some cases, replacing the battery or performing a factory reset (after backing up data) may resolve gauge drift related to hardware aging or software anomalies.
How to validate calibration results in real-world usage
After calibration, monitor how long the device lasts on a typical charge and compare the remaining time estimates to actual usage. If the phone consistently underestimates or overestimates remaining time, repeat the calibration steps with careful attention to uninterrupted charging. Keep track of the new readings for a few days to confirm the improvement is stable rather than a short-term fluctuation.
Tools & Materials
- Android smartphone(Device you are calibrating)
- Original charger and USB cable(Use the official charger for consistent current)
- Stable power outlet(Avoid power interruptions during charging)
- Notebook or timer(Log times and readings for validation)
- Cool, dry environment(Keep device away from heat sources)
Steps
Estimated time: 6-12 hours (including idle charging and stabilization)
- 1
Prepare the device for calibration
Charge the device until it reaches a low but safe level (around 5-7%) and ensure no apps are forcing heavy background activity. This helps reset the baseline and reduces the chance of the device rebooting during the drain phase. If your device is already near end of life, continue with the cycle but adjust expectations.
Tip: Disable non-essential background tasks before starting. - 2
Discharge to near empty
Use the device normally until the battery indicator shows around 5-7% or until the device powers off on its own. Do not plug in the charger during this drain phase. The goal is to reach a consistent low state that reflects true capacity.
Tip: Avoid forcing shutdowns; let it run down naturally within safe levels. - 3
Charge to 100% uninterrupted
Connect the charger and allow the device to reach 100% without unplugging. If the device supports fast charging features, disable them temporarily to avoid irregular current that could skew the gauge.
Tip: Monitor charging and ensure the device doesn’t overheat. - 4
Stabilize the reading after full charge
Keep the device plugged in for at least 30-60 minutes after reaching 100% to let the battery sensor stabilize and the gauge reference points settle.
Tip: Avoid continuous heavy use during this stabilization window. - 5
Use normally until a low threshold again
Unplug and use the device normally until you again reach around 5-7% reserve. This verifies that the gauge tracks actual consumption under typical usage.
Tip: If performance is inconsistent, consider repeating the full cycle. - 6
Charge to 100% again
Recharge to 100% uninterrupted to finalize the cycle. If the device shows a maintenance update or asks to optimize battery health, allow it to finish.
Tip: Stay in a cool, well-ventilated area during charging. - 7
Restart and verify readings
Restart the phone and note the displayed battery percentage versus your usage time. Compare remaining time estimates to real-world usage to assess accuracy.
Tip: Document discrepancies for future reference. - 8
Test accuracy with a real-world scenario
Run a typical task (movies, work apps) and observe whether the remaining time aligns with expectations. If not, repeat steps 2-4 with careful adherence to interruption-free charging.
Tip: Keep a short log to track changes. - 9
Finalize and monitor over the next days
After the cycle, continue monitoring for a few days to ensure readings are stable. Calibration is a one-off adjustment unless readings drift again due to aging or software updates.
Tip: If drift returns, perform cycle again.
Questions & Answers
Do I always need to calibrate Android battery?
No. Calibration is only needed if readings are inaccurate or unreliable. Most phones maintain accurate gauges over time, and calibration should be used sparingly.
Calibration is only needed if your gauge looks inaccurate or jumps around; most devices don’t require it regularly.
Will calibration restore battery health?
Calibration does not repair a worn battery or restore capacity. It only realigns the gauge to reflect remaining energy.
It won’t restore health; it just makes the gauge more accurate.
How long does calibration take?
The full cycle typically takes several hours, including charging and stabilization. Plan for an extended session or an overnight window.
Plan for several hours, or overnight to complete the cycle comfortably.
Can I calibrate while using the phone?
Yes, you can start a calibration while using the device, but avoid heavy tasks during the discharge and charging phases to keep readings consistent.
You can, but avoid heavy tasks while calibrating.
Is calibration unsafe?
Calibration is safe when done with an intact battery and proper charging practices. If you notice swelling or overheating, stop and seek professional help.
It's generally safe if you follow standard charging guidelines and avoid overheating.
How often should I calibrate?
Only when you notice gauge drift or after firmware changes. In many cases, a calibration is a one-time or infrequent maintenance task.
Only when you notice drift or after software updates.
What if readings are still off after calibration?
Recheck that charging wasn’t interrupted, update software if available, and repeat the cycle. If issues persist, consider battery replacement or professional inspection.
If still off, verify charging was uninterrupted and consider replacement.
Does calibration affect battery apps and usage stats?
Some apps use internal counters; calibration may temporarily shift reported usage, but overall battery stats remain aligned with real usage after stabilization.
Most apps will reflect the new gauge after calibration stabilization.
Watch Video
Key Takeaways
- Calibration aligns gauge with current capacity
- Discharge and full charge help reset reference points
- Calibration does not restore battery health
- Monitor readings after calibration to confirm accuracy
- Repeat only if gauge drift recurs