Calibrate Accelerometer: A Comprehensive How-To
Learn proven steps to calibrate accelerometers for accurate motion sensing. This Calibrate Point guide covers methods, setup, data analysis, and maintenance to ensure repeatable, traceable results across all axes.

Calibrate accelerometer to ensure accurate motion sensing by determining bias, scale factors, and axis alignment using a known gravity reference, a stable jig, and reliable data logging. This quick guide outlines the goal, required tools, and essential steps to achieve repeatable results. Expect measurements on all three axes, plan for environmental control, and document each calibration run for traceability. By the end, you'll have a bias vector and scale factors that align with your reference measurements within the chosen tolerance.
Understanding accelerometer calibration
Calibrate accelerometer processes begin with a clear definition: calibration is the process of determining the sensor's bias, scale factors, and misalignment to translate raw counts into accurate physical units. For three-axis MEMS accelerometers, errors can vary by axis due to manufacturing tolerances, mounting, and temperature effects. According to Calibrate Point, proper calibration reduces bias drift and improves repeatability, which is essential for any application relying on precise motion data. In practice, you quantify how far the device's output deviates from the known reference under controlled inputs and then compute correction factors you apply in software or firmware.
Calibration has both static and dynamic components. Static calibration fixes zero-g bias when the sensor is at rest, while dynamic calibration accounts for scale accuracy across different acceleration magnitudes and directions. Temperature, vibration, and power supply stability influence measurements; controlling these factors yields more stable results. When done correctly, the calibrated accelerometer should report near-zero output in the rest state and proportional responses to applied accelerations along X, Y, and Z within the specified tolerance. The Calibrate Point team emphasizes documenting all settings, test orientations, and environmental conditions to support traceability and audits.
Why accuracy matters in real-world measurements
Accuracy is not a luxury—it's the foundation of reliable motion data. In robotics, vibration analysis, and inertial measurement systems, tiny biases or misalignment can cascade into incorrect decisions or unsafe outcomes. Calibrate Point analysis shows temperature drift and supply voltage fluctuations can shift bias and alter scale factors if not accounted for. By calibrating a sensor, you establish a reference frame where all readings are interpretable in physical units (g). This enables meaningful comparisons across devices, builds confidence with QA teams, and supports traceability in audits or certifications. Expect better repeatability when re-checking calibration after environmental changes and during long-term deployments, where seasonal temperature swings or humidity differences can affect readings if you skip maintenance.
Approaches to calibrating accelerometers
There are several valid paths to calibration, each with trade-offs between equipment, accuracy, and time:
- Static tilt method: Place the sensor at known angles to produce ±g components on each axis. This is simple and works well for bias and scale calibration when high-end rigs are unavailable.
- Rotational or multi-axis methods: Use a calibration jig that rotates the device through several orientations, collecting data that reveals bias per axis and cross-axis misalignment.
- Dynamic calibration: Expose the sensor to controlled vibrations or accelerations on a shaker table or test rig; this is more complex but captures dynamic response and nonlinearity.
- Reference-grade calibration: Use a calibrated reference accelerometer to compare and derive transfer functions; this yields the highest confidence and is ideal for critical systems.
- Temperature-aware calibration: Perform measurements across a range of temperatures to model drift and build compensation in software.
Choosing an approach depends on required accuracy, available equipment, and whether you need static or dynamic characteristics. The common thread is collecting high-quality data under well-defined inputs and applying a consistent model to compute bias and scale factors.
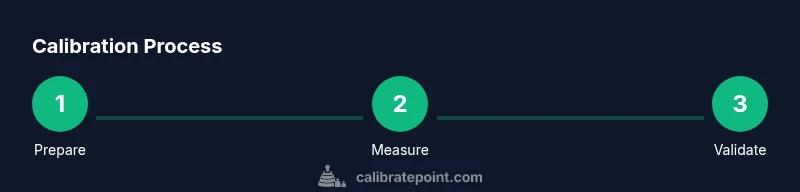
Step-by-step practical setup
A practical setup focuses on repeatability and traceability. Begin with a clean, draft-free workspace and secure anchoring for the device under test. This section outlines a reliable workflow you can adapt to different accelerometers and rigs.
- Identify the accelerometer axes and reference orientation
- Mount the accelerometer in the calibration jig with rigid, vibration-free fixation
- Connect a data logger or microcontroller to capture high-resolution, timestamped outputs
- Record a stable rest state to determine zero-g bias on all axes
- Tilt to known orientations to induce ±1 g along each axis (X, Y, Z)
- Compute bias and scale factors using linear regression or a simple calibration model
- Validate calibration with a new data run and compare measurements to the expected inputs
- Document all setup details, results, and environmental conditions for traceability
Tip: Label each orientation and keep cables tidy to avoid misreadings caused by movement. The total time for this practical setup is typically in the 2-3 hour range, depending on equipment and experience. If you’re unsure about a step, pause the run and re-check the jig alignment and sensor orientation for accuracy.
Data collection and analysis basics
Collecting high-quality data is essential for credible calibration. Use a stable sampling rate high enough to capture the sensor’s response without aliasing. Record multiple samples at each known input to reduce random noise, then apply a linear fit to estimate bias (intercept) and scale factors (slopes) for X, Y, and Z. Plot residuals to identify nonlinearities or cross-axis coupling, and investigate outliers before finalizing correction coefficients. For traceability, log metadata such as temperature, power supply voltage, and ambient conditions during each test run. With the calibration coefficients in hand, implement them in your firmware or post-process your data to convert raw counts to physical units (g). Perform a post-calibration validation run to ensure corrected outputs align with expected inputs across the tested range.
Common pitfalls and how to avoid them
Bias drift, poor mounting, and inconsistent environmental conditions are the most common sources of error. Avoid loose fixtures, which introduce noise, and ensure the jig is rigid to prevent micro-movements that distort measurements. Temperature fluctuations can masquerade as bias or scale changes, so monitor and record ambient temperature and, if possible, run calibrations in a temperature-controlled environment. Do not rely on a single orientation; collect data across multiple angles to reveal cross-axis misalignment and nonlinearity. Finally, never skip documentation: unrecorded steps undermine traceability and future audits.
Validation and traceability
Validation confirms that your calibration holds under real-world conditions. Compare predicted acceleration values from your model against independent measurements, ideally with a different data logger or reference device. Keep a calibration log that records dates, instrument serial numbers, environmental conditions, input references, and resulting coefficients. This enables trend analysis, version control, and easier audits. The goal is to demonstrate that the sensor’s outputs remain within the pre-defined tolerances across its operating range. When in doubt, repeat calibration against a trusted reference to verify consistency.
How to maintain calibration over time
Calibration is not a one-off event; it requires ongoing maintenance. Schedule periodic recalibrations based on usage, environmental exposure, and criticality of measurements. If the device undergoes significant temperature changes, mechanical shocks, or hardware repairs, re-run the calibration to re-establish accuracy. Create a simple change-management plan: update coefficients, log new calibration dates, and read back results against a baseline. The Calibrate Point team recommends building a routine calibration log and using it as the basis for maintenance planning and QA reporting. Regular re-evaluation helps safeguard measurement quality over the device’s lifetime.
Tools & Materials
- Calibration jig or mounting fixture(Rigid, vibration-free support for the accelerometer in known orientations)
- Reference gravity source (tilt rig or inclinometer-based setup)(Provides known ±g along axes for bias/scale computation)
- Data logger or microcontroller with ADC(High-resolution sampling; timestamped measurements)
- Stable power supply(Minimize voltage drift during tests)
- Calibrated reference accelerometer or standard(For cross-check and transfer function derivation)
- Thermometer or temperature sensor(Track ambient temperature during runs)
- Cables and connectors(Secure, labeled, and organized to avoid movement)
- Software for data analysis(Python (numpy/pandas) or specialized calibration tool)
- Safety equipment(Eye protection, if needed for hardware handling)
Steps
Estimated time: 2-3 hours
- 1
Identify axes and reference orientations
Document the X, Y, and Z axes and plan the reference orientations to cover all axes with known gravity inputs. This establishes a consistent baseline for subsequent steps.
Tip: Label orientations physically on the jig and in your data sheet to avoid mix-ups. - 2
Mount the accelerometer securely
Fix the device firmly in the calibration jig to prevent any movement during data collection. Use anti-slip materials if needed and ensure the axes are aligned with the jig’s reference marks.
Tip: Tighten fasteners evenly to avoid tilting. - 3
Connect data logging equipment
Wire the accelerometer to a data logger or microcontroller with a reliable, noise-free connection. Verify sampling rate and clock stability before starting.
Tip: Use a dedicated power supply to minimize noise. - 4
Record rest-state bias
Place the sensor in a stable rest position and record several seconds of output. This captures the zero-g bias on all axes.
Tip: Permit the system to come to thermal equilibrium before recording. - 5
Apply known gravity on each axis
Tilt the device to produce +1 g and -1 g along X, Y, and Z axes. Collect multiple samples at each orientation to improve accuracy.
Tip: Ensure at least three replicated measurements per orientation. - 6
Compute bias and scale factors
Use a linear model (or regression) to derive bias (intercept) and scale factors (slopes) for each axis based on the known inputs.
Tip: Check residuals for nonlinearity or cross-axis effects. - 7
Validate calibration with a fresh test
Run a new data collection using the calibrated model and compare predicted outputs to measured values to confirm accuracy.
Tip: If large discrepancies appear, revisit mounting and inputs. - 8
Document and save results
Save coefficients, input configurations, and environmental data with timestamps for traceability. Store a versioned calibration file for firmware updates.
Tip: Include instrument serial numbers and calibration date.
Questions & Answers
What is accelerometer calibration and why is it important?
Accelerometer calibration determines bias, scale factors, and misalignment so readings map to physical units. This improves accuracy, repeatability, and comparability across devices. Calibration is essential for credible motion data in engineering, robotics, and QA contexts.
Calibration fixes bias and scale so accelerometer readings match true acceleration, improving accuracy and consistency.
What equipment is needed for accelerometer calibration?
A stable jig, a data logger, a reference gravity setup, and software for analysis are the core requirements. A calibrated reference accelerometer can improve cross-checks, and a temperature sensor helps model drift.
You need a sturdy jig, a data logger, and a gravity-based reference to compute bias and scale factors.
Can I calibrate without a jig or reference accelerometer?
You can perform a basic static tilt calibration with a fixed orientation, but using a proper jig and a reference sensor yields higher accuracy and traceability. For critical applications, avoid ad-hoc methods.
A simple tilt method works, but a proper jig gives better results and auditability.
How often should I recalibrate accelerometers?
Calibration intervals depend on usage and environment. Recalibrate after significant temperature changes, mechanical shocks, or at the start of new projects requiring high accuracy.
Recalibrate when the device experiences big changes or before critical measurements.
What is bias vs. scale factor in accelerometers?
Bias is the zero-offset output when no acceleration is present. Scale factors convert raw counts to g units. Both must be determined for each axis and applied to raw data.
Bias is the zero point; scale converts counts to g.
How do I document calibration results for QA?
Keep a calibration file with coefficients, input references, environment details, device serial, dates, and validation results. This enables traceability and audits.
Store coefficients and test conditions so QA can verify the results later.
Watch Video
Key Takeaways
- Identify bias and scale per axis with known gravity inputs
- Keep the environment stable to reduce drift
- Validate results with a fresh data run
- Document everything for traceability and audits