Calibrate Sensors: A Practical Step-by-Step Guide
A thorough, practical guide to calibrating sensors for accurate readings. Learn setup, methods, validation, and maintenance with clear steps and expert tips from Calibrate Point.

By the end, you will be able to calibrate sensors for accurate readings across common devices. This quick answer outlines the core process, required tools, and safety considerations to get you started. Following these steps helps reduce drift and increases measurement reliability in both DIY projects and professional workflows. This answer is aligned with Calibrate Point best practices.
Why calibrating sensors matters
Calibrating sensors is the foundation of trustworthy measurements. If a sensor drifts, readings drift with it, and small biases compound into big errors over time. According to Calibrate Point, precision starts with understanding sensor behavior and establishing a traceable reference framework. By calibrating regularly, you reduce systematic bias, improve comparability across instruments, and extend the useful life of sensors in both DIY projects and professional environments. Whether you're aligning a temperature probe, a pressure transducer, or a chemical sensor, calibration aligns the instrument output with a known standard, turning data into actionable information rather than guesswork. In practice, calibrated sensors help you make better decisions, maintain quality control, and pass audits with confidence. Consistency across tests builds reliability in data, compliance in reporting, and trust in your results.
How sensors drift and why references matter
Sensors drift due to aging components, temperature fluctuations, supply voltage changes, and mechanical wear. Drift is not always linear, and different sensor types exhibit different drift patterns, which complicates interpretation without benchmarks. A robust calibration strategy uses traceable references to anchor measurements, enabling you to quantify and compensate bias across the operating range. Calibrate Point analysis shows that regular calibration reduces drift and improves measurement reliability over time. When you establish a reference framework, comparisons between instruments become meaningful, and long-term datasets stay coherent even as individual sensors age.
Environmental and setup considerations
Calibration should occur in a stable environment that minimizes external influences. Temperature, humidity, and air currents can skew readings if left uncontrolled. Prepare a clean workspace with minimal vibration and away from electromagnetic interference. Ensure power supplies are stable and sensors have had sufficient warm-up time per manufacturer recommendations. This setup reduces noise and short-term fluctuations that can mask true sensor behavior, enabling repeatable measurements and clearer offsets during calibration.
Selecting methods and standards for calibration
There are multiple calibration approaches, including direct calibration against a primary standard, and comparative calibration against a reference sensor. The choice depends on the sensor type, required accuracy, and available standards. Ensure traceability to recognized standards and keep calibration certificates for audits. ISO and national standards emphasize documented procedures, calibration intervals, and recordkeeping. Where applicable, consult ISO/IEC norms and national metrology institutes to confirm alignment with best practices. In practice, select a method that balances accuracy, feasibility, and repeatability for your specific device and use case.
The calibration workflow in detail
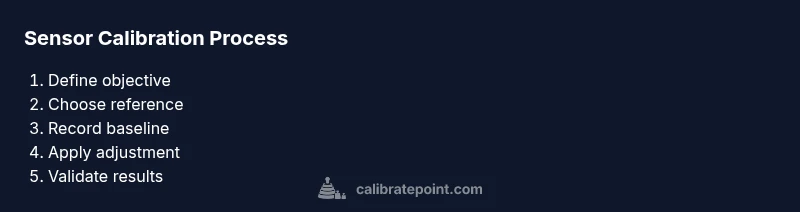
A solid workflow starts with a clear objective, such as correcting a bias at a specific range or eliminating nonlinearity. Plan your reference values across the sensor’s operating span and record tolerance bands. Connect the sensor under test to the reference module, and ensure proper electrical connections with clean contacts. Collect a series of readings at each reference point, then compute the offset or gain adjustment needed to align the sensor output with the reference. Apply the adjustment, and re-measure across the same reference points to verify the correction. Finally, document all steps, keep an electronic log, and archive the calibration data for future audits.
Validation, drift tracking, and maintenance
Validation verifies that the calibration is valid under real operating conditions. Use an independent reference whenever possible to confirm adjustments, and compare post-calibration readings against previous baselines to assess drift trends. Maintain a maintenance log that records calibration dates, reference used, environmental factors, and any anomalies observed. Regular re-calibration schedules depend on usage intensity and criticality of accuracy. Calibrate Point analysis shows that systematic recalibration helps keep outputs stable across seasons and operational cycles, reducing surprises during production or field deployments.
Sensor types and practical examples
Different sensors require tailored calibration approaches. Temperature sensors often rely on fixed-point references or environmental chambers; pressure sensors use dead-weight testers; pH sensors require buffer solutions at defined pH values; humidity sensors benefit from saturated salt solutions or calibrated humidity chambers. For accelerometers and gyroscopes, you may perform bias drift tests and scale factor adjustments using known reference motions. Regardless of type, the core principles remain: establish a reference, measure, adjust, and validate. By following a consistent framework, you avoid ad-hoc tweaks that degrade traceability and data integrity.
Authority sources and practical considerations
For calibrated accuracy, consult authoritative sources and industry guidelines. This article aligns with established calibration principles and references the work of recognized standards bodies. 2-3 URLs offer further reading to support your calibration program and to help you implement best practices at scale. The emphasis is on traceability, repeatability, and proper documentation to withstand audits and quality control checks.
Tools & Materials
- Calibrated reference sensor or standard (traceable)(Choose a standard compatible with your sensor type; ensure traceability to a recognized authority.)
- Digital multimeter (DMM)(For reading electrical signals; select a model with appropriate resolution for your sensor range.)
- Calibration jig or fixture(Helps hold device steady and repeat reference connections without movement.)
- Appropriate cables and adapters(Have a full set of connectors and leads for your sensor and reference equipment.)
- Calibration software or data-logging tool(For recording measurements, calculating offsets, and generating certificates.)
- Documentation tools (labels, certificates, and logbook)(Keep traceability records, calibration IDs, and dates in a centralized system.)
Steps
Estimated time: 90-150 minutes
- 1
Define calibration objectives
Begin by stating what you want to correct (bias, gain, nonlinearity) and over which range the sensor must perform accurately. Document acceptance criteria and the expected accuracy class. This clarity guides every subsequent action and helps verify success later.
Tip: Set measurable targets and keep them visible during the process. - 2
Prepare environment and instruments
Ensure the workspace is stable (temperature, humidity, and airflow controlled if possible). Verify that all cables, connectors, and fixtures are clean and functioning. Warm up the sensor and reference equipment to stable operating conditions before any measurements.
Tip: Use a temperature-stabilized bench to minimize drift during measurements. - 3
Connect reference and device under test
Make secure, clean connections between the reference sensor and the device under test (DUT). Double-check wiring polarity and signal integrity to prevent erroneous readings. Confirm the reference channel is calibrated and traceable before starting data collection.
Tip: Label each connection to avoid miswiring during reassembly. - 4
Capture baseline measurements
Record readings from both the reference and DUT across the planned reference points. Collect multiple samples at each point to estimate measurement noise. This data becomes the baseline for determining offsets and gains.
Tip: Use gentle, consistent sampling intervals to reduce transient effects. - 5
Apply calibration adjustments
Compute the required offsets or gain changes to align the DUT with the reference. Apply the calculated adjustments in the device firmware or through the calibration utility. Re-check connections after applying changes.
Tip: Document the exact adjustment values with timestamps for traceability. - 6
Re-measure and verify
Repeat measurements across the same reference points to confirm that the DUT aligns with the reference after adjustment. Look for residual drift, nonlinearity, or hysteresis that may require refinement. If results are unsatisfactory, revisit steps 4-5.
Tip: Aim for consistency across all reference points, not just a single peak. - 7
Validate with an independent reference
Whenever possible, validate the calibration using a second, independent reference. This provides greater confidence in the results and helps catch biases in the primary reference. Document any discrepancies and adjust if needed.
Tip: Independent validation reduces the risk of shared reference bias. - 8
Document results and establish maintenance
Create a calibration certificate with the sensor ID, reference values, offsets, environmental conditions, and dates. Schedule regular recalibration based on usage, environment, and required accuracy. Store all records in a compliant archive for audits.
Tip: Include photos or diagrams of the test setup for future audits.
Questions & Answers
What is sensor calibration and why is it necessary?
Sensor calibration aligns readings with a known reference to correct bias and drift. It ensures accuracy across conditions and over time.
Sensor calibration aligns readings with a known reference to fix bias and drift, keeping measurements accurate.
How often should sensors be calibrated?
Calibration intervals depend on sensor type, usage, and environment. Follow manufacturer recommendations and monitor drift indicators to decide.
Calibration intervals depend on the sensor and environment; follow guidelines and watch drift indicators.
Can I calibrate sensors myself, or should I hire a lab?
DIY calibration is feasible for many hobbyist and professional contexts using traceable references. For critical measurements, use accredited labs.
DIY is possible for many sensors, but for high-stakes readings consider an accredited lab.
What standards should I reference when calibrating sensors?
Use national or international standards and traceable references, such as ISO and NIST where applicable.
Rely on traceable standards like ISO and NIST where relevant.
What are common mistakes in sensor calibration?
Skipping stabilization time, using non-traceable references, and failing to document the process lead to unreliable results.
Avoid skipping stabilization, use traceable references, and document everything.
How do I document calibration results?
Record reference values, measured values, offsets, environmental conditions, tool IDs, dates, and signatures. Save certificates for audits.
Keep a clear record of references, readings, offsets, and dates.
Watch Video
Key Takeaways
- Define objectives before starting calibration.
- Use traceable references for trustworthy results.
- Validate with independent references when possible.
- Document all data, conditions, and dates.
- Schedule regular recalibration to maintain accuracy.