Calibrate Before Use Labels: A Practical Step-by-Step Guide
A comprehensive, SEO-optimized guide explaining how to calibrate before use labels on measurement tools, including design, materials, application, verification, and documentation for reliable readings.

By the end of this guide, you will be able to calibrate before use labels on your measurement instruments with confidence. You'll cover how to verify label legibility, choose the right label type, and document calibration outcomes. Before you begin, gather the device, the correct labels, a calibration reference, and a clean workspace. This process reduces misreadings and ensures traceable results.
What calibrate before use labels are and why they matter
Labeling the tools you work with is more than cosmetic branding; it is a critical part of maintaining accuracy, safety, and traceability. When you calibrate before use labels, you create a permanent, auditable link between the measurement you obtain and the standard against which it was checked. This is especially important in regulated environments, where a label is not just a tag but a record of an instrument’s readiness and a marker of its recent calibration status. According to Calibrate Point, the practice of marking equipment with calibrated labels reduces misreadings, helps technicians quickly identify out-of-tolerance instruments, and supports consistent maintenance cycles. In everyday DIY projects, labels act as reminders to verify settings before measurements, preventing costly mistakes. When selecting labels, consider readability under your working conditions: legible fonts, high-contrast colors, and durable material that tolerates cleaning solvents, humidity, or heat exposure. The concept of calibrating before use labels also extends to the lab-to-field handoff, where technicians must confirm that the label remains legible after transport and handling. In practice, you’ll want labels that resist abrasion and fading, yet are easy to replace when a calibration cycle ends. The goal is to create a clear, durable, and auditable signal that the device has been checked and approved for use. This mindset aligns with professional calibration workflows and helps teams avoid drift in readings.
noteType
Tools & Materials
- Label stock (vinyl/polyester/polyimide)(Choose heat- and chemical-resistant material suitable for your environment.)
- Adhesive backing compatible with surface(Ensure adhesion on metal, plastic, or glass surfaces.)
- Permanent marker or laser etching tool(Use for legible, durable markings.)
- Calibrated reference standard(Traceable standard or certificate to verify label accuracy.)
- Cleaning supplies (isopropyl alcohol, lint-free cloth)(Prepare a clean surface before applying labels.)
- Ruler or caliper(Check label alignment and spacing precisely.)
- Fine scissors or hobby blade(Trim labels cleanly without tearing.)
- Protective gloves (optional)(Use when handling solvents or adhesives.)
Steps
Estimated time: 35-45 minutes
- 1
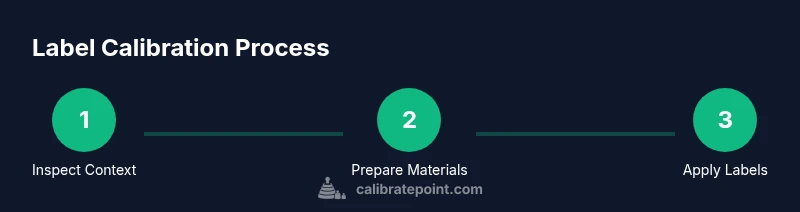
Inspect the device and context for labeling
Begin by assessing the instrument’s exposure to heat, solvents, humidity, or abrasion. Check whether old labels are legible and if the recommended label type is still appropriate for the environment. This step sets expectations for label durability and readability, ensuring calibrate before use labels will remain legible for the life of the calibration cycle.
Tip: Document any wear or damage you observe before proceeding. - 2
Prepare workspace and collect materials
Clear the work area, gather the label stock, adhesive, reference standards, and cleaning supplies. Ensure your workspace is free of dust and moisture that could compromise adhesion. This preparation reduces rework and helps you apply labels cleanly on the first try.
Tip: Lay out items in order of use and check that the reference standard is within reach. - 3
Clean and dry the surface
Wipe the target surface with isopropyl alcohol and allow it to dry completely. Any oil, residue, or moisture can prevent the label from adhering properly, which would compromise the calibration record. Clean surfaces lead to stable, long-lasting label performance.
Tip: Use a lint-free cloth and avoid touching the adhesive face. - 4
Position and apply the label
Align the label with the instrument’s measurement scale or critical feature. Apply with smooth, even pressure from center to edges to avoid air bubbles. Ensuring precise placement is essential for quick visual checks during operation.
Tip: If the label is reflective, tilt it slightly to verify legibility from typical viewing angles. - 5
Calibrate using a reference standard and record
Place the calibration reference against the instrument’s reading point and confirm that the label’s indication corresponds to the expected value. Record the date, operator, and calibration result for traceability. This is the core activity of calibrate before use labels.
Tip: Keep your reference standard calibrated and within its own traceability window. - 6
Verify, seal, and document
Re-check readability after any movement or cleaning. If the label remains legible and adherent, seal it with a protective overlayer if applicable. Document the calibration event, including label batch, surface, and any deviations observed.
Tip: Store the calibration certificate with the instrument for audit readiness.
Questions & Answers
What are 'calibrate before use labels' and why are they important?
Calibrate before use labels are tags or markings that certify an instrument has passed a calibration check. They improve accuracy by providing a visible, auditable record that the device is within specification before measurements are taken.
Calibrate before use labels are tags that prove an instrument has been calibrated and is ready for use. They provide a quick, visible check that helps ensure accuracy.
What materials work best for labels in harsh environments?
For harsh environments, choose labels made from polyester, polyimide, or vinyl with heat- and chemical-resistant adhesives. Ensure the surface is clean and dry before application to maximize adhesion and longevity.
In tough settings, use durable label materials with strong adhesives and clean surfaces before sticking them on.
How do you verify label accuracy after applying?
Use a trusted calibration reference and compare readings against the instrument’s expected value. Record results and cross-check with a second instrument if available to confirm consistency.
Check the label against a standard reference and note the results; if you have a second instrument, compare readings for consistency.
How often should labels be recalibrated?
Label recalibration should occur on a defined maintenance cycle or whenever the instrument is serviced, swapped, or shows drift in readings. Establish a schedule based on use, environment, and criticality of measurements.
Recalibrate on a scheduled maintenance basis or after service; if readings drift, re-check sooner.
Are there safety concerns with label adhesives or solvents?
Some adhesives and solvents can irritate skin or degrade surfaces. Use gloves as needed, work in a ventilated area, and choose labels compatible with the instrument and environment.
Be mindful of adhesives and solvents; wear gloves and work in a ventilated space when applying labels.
What if a label becomes unreadable or falls off?
If readability is compromised, remove the old label and replace it with a new one following the same calibration steps. Document the replacement in your maintenance log to preserve traceability.
If a label is unreadable, replace it and log the change for traceability.
Watch Video
Key Takeaways
- Label durability and readability drive long-term accuracy
- Choose label materials that match environmental exposure
- Document calibration events for traceability
- Maintain consistent labeling practices across equipment