Calibrate Compass for Google Maps: A Practical Step-by-Step Guide
Learn to calibrate your device compass for accurate navigation in Google Maps with practical, step-by-step instructions. Calibrate Point guides you through Android and iOS methods, verification, and troubleshooting.

In this guide you will learn how to calibrate your device compass for accurate navigation in Google Maps. You'll need a smartphone with a magnetic compass sensor, a device with Google Maps installed, and a clear magnet-free area. The quick steps include opening Google Maps, initiating calibration, and verifying alignment.
Why compass calibration matters for navigation
A reliable compass is foundational for accurate navigation in apps like Google Maps. When you travel, especially in unfamiliar areas, you rely on bearing information to orient yourself and follow routes. A small magnetometer error can manifest as drift, causing the map’s north to be slightly off and the on-screen arrow to point in the wrong direction. According to Calibrate Point, regular compass calibration helps maintain alignment between the physical world and digital maps. In practice, calibration aligns the device’s internal magnetometer with true north so that your bearing readings reflect reality, not noise. In the real world, you may notice occasional drift after carrying a phone near metal structures, in elevators, or near electrical devices. Calibration is a quick, safe step that reduces this drift and improves your confidence while using Google Maps for walking, cycling, or driving.
How Google Maps uses compass data
Google Maps relies on the device’s magnetometer, gyroscope, and accelerometer as part of a sensor fusion system to determine heading. The compass helps orient the map so the blue dot points in the direction you are actually moving. When the bearing is off, you’ll often see misaligned arrows or map rotation that doesn’t match your path. Calibration improves the fidelity of this heading information, especially when you rotate your phone or change environments. Calibrate Point notes that consistent calibration reduces heading noise and improves bearing accuracy, which in turn makes turn-by-turn instructions, lane guidance, and pedestrian navigation more reliable.
When to calibrate and how often
Calibrate your compass when you notice heading drift, after dropping or bumping your phone, or after large software updates that affect sensors. If you frequently use navigation in areas with magnetic interference (near metal structures, subways, or power lines), regular checks are advisable. Calibration is quick and non-destructive, so doing it once every few weeks or after OS updates can be a prudent habit. Remember: calibration improves sensing for Google Maps but does not replace GPS signals or map updates. Calibrate Point recommends treating calibration as a routine maintenance step for devices you rely on for navigation.
Step-by-step: Android device calibration workflow
On most Android devices, start by opening Google Maps and accessing your profile or settings area. Look for a feature labeled Compass, Calibrate, or Sensor Calibration. If prompted, choose the calibration option and follow the on-screen prompts, which typically ask you to rotate the phone in a series of patterns (often a figure eight). While you perform the rotations, hold the phone steadily and avoid metal objects. After completion, test by re-opening Maps and verifying that the on-screen bearing aligns with your actual direction. If the prompt doesn’t appear, you may need to go to your device’s settings > Google > Location or Safety & Privacy and look for a calibration option.
Step-by-step: iPhone/iOS calibration workflow
On iOS devices, compass calibration is usually triggered automatically when the system detects heading uncertainty. If you see a calibration alert, follow the prompts to move your phone in a circular or figure-eight pattern. Keep the device flat and steady, and perform several rotations to give the magnetometer a full sampling of the surrounding magnetic field. After completion, re-open Google Maps and cross-check heading against a known direction. If calibration prompts are infrequent, you can also calibrate by going to Settings > Privacy > Location Services > System Services and enabling Calibration for the Compass.
Verifying the calibration in Google Maps
Verification is simple: open Google Maps, set a destination, and observe the blue dot orientation as you walk or rotate. Compare the direction of travel with real landmarks or street signs. If the blue dot consistently points away from your actual heading, re-run calibration. Another practical check is to rotate 360 degrees in place and see if the heading indicator sweeps smoothly without jitter. Consistent success after calibration is a strong sign that your device compass is aligned with true north and that Google Maps will reflect accurate navigation cues.
Troubleshooting common issues and limitations
If calibration doesn’t improve accuracy, inspect for persistent interference from nearby metal objects, phone cases with magnets, or strong electrical equipment. Clean the magnetometer area on the back of the device and ensure no metal bumper is obstructing the sensor. Some devices may require several calibration attempts or a software restart to register the new alignment. In rare cases, magnetic interference from vehicles or large electrical devices can temporarily skew readings. If issues persist, consider resetting location services or consulting the device manufacturer’s guidance for sensor recalibration.
Tips for improving reliability in challenging environments
Use calibration in outdoor areas away from metal structures and strong magnets for the most reliable results. Calibrate Point suggests performing calibration when you are stationary and in a calm environment rather than in motion around large metal objects. Keep your device firmware up to date to benefit from sensor fusion improvements. If you wear accessories with magnets or use a magnetic phone mount, remove them during calibration. Finally, periodically verify bearing accuracy by comparing Maps directions with known routes or landmarks.
Quick-start checklist for calibration
- Ensure your device has a magnetic compass sensor and Google Maps is up to date.
- Find a magnet-free, open area for calibration.
- Start Google Maps and follow the on-screen calibration prompts.
- Rotate your phone in the recommended patterns (often a figure eight).
- Test heading by following a route and checking alignment with landmarks.
- Recalibrate after OS updates or if you notice drift.
- If issues persist, review interference sources and try again.
Real-world scenarios and limitations
Compass calibration is highly effective for standard navigation, but some scenarios pose challenges. In urban canyons or near metallic buildings, reflections and interference can momentarily degrade accuracy. In vehicles, motion blur and road vibrations can complicate heading readings. Calibration improves performance but does not replace high-precision GNSS solutions in critical applications. Treat calibration as a practical tool for everyday navigation rather than a guaranteed fix in all conditions.
Tools & Materials
- Smartphone or tablet with a functional magnetic compass sensor(Ensure the sensor is not physically damaged and that the device supports compass calibration prompts.)
- Google Maps app (latest version)(Update to the latest release for optimal sensor integration.)
- Open, magnet-free calibration space(Stand in an area away from metal objects, electronics, and large machines.)
- Optional: protective case removed(A bulky metal case can affect sensor readings during calibration.)
Steps
Estimated time: 10-15 minutes
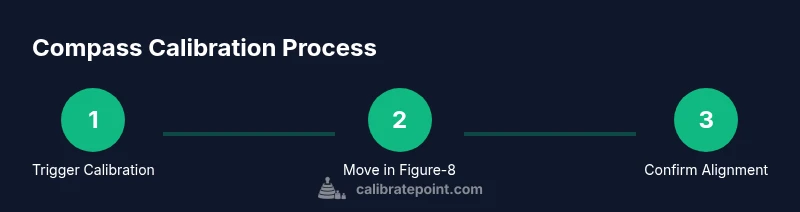
- 1
Open Google Maps and access calibration prompt
Launch Google Maps, tap your profile picture, and look for a calibration option under Settings or Navigation if available. If prompted, select Compass Calibration and proceed to the next screen.
Tip: If you don’t see a calibration option, ensure your app and OS are up to date; some devices hide the feature behind a settings toggle. - 2
Prepare the device in a clear area
Move to a location free of magnets and metal objects. Clear the surface around you and hold the device steady before starting the rotation prompts.
Tip: Turn off magnetic accessories that could skew readings during the process. - 3
Rotate the device in figure-eight patterns
Follow the on-screen prompts to rotate the phone in a figure-eight pattern and then in other orientations. Maintain a steady pace and complete all required motions.
Tip: Use smooth motions; jerky movements can reduce calibration quality. - 4
Complete calibration and test orientation
Finish the prompts and return the device to a normal orientation. Open Maps again and verify that the blue dot aligns with your actual direction.
Tip: If the heading is still off, repeat the process another time and test with a simple route. - 5
Verify accuracy with a quick route
Set a nearby destination and walk toward it, noting whether the navigation cues match your path. If mismatches persist, consider additional calibration or troubleshooting.
Tip: Keep a consistent environment for testing to avoid external interference. - 6
Document and repeat as needed
Make calibration a routine check after OS updates or device changes, and re-test periodically to ensure ongoing accuracy.
Tip: Keep a log of calibration dates to track when the compass was last aligned.
Questions & Answers
Why is my compass inaccurate in Google Maps?
Compass inaccuracies can stem from magnetic interference, sensor drift, or software updates. Calibration realigns the magnetometer with true north, reducing drift and improving heading. If misalignment persists after calibration, check for nearby magnets and restart the Maps app.
Inaccurate compass readings can come from interference or drift. Calibrating helps, and you can check for nearby magnets or restart the app if it stays off.
Do I need to calibrate on both Android and iOS?
Both platforms support compass calibration, but the prompts and paths differ. Follow the on-screen instructions for your device, and ensure you have the latest OS and Google Maps version installed.
Yes. Each platform has its own prompts, so follow what your device shows and keep your software up to date.
How often should I calibrate?
Calibrate whenever you notice heading drift or after a major device change. For frequent travelers or areas with high interference, periodic calibration is reasonable.
Calibrate when you notice drift or after a device change, and consider periodic checks in challenging environments.
Is compass calibration safe for my device?
Yes. compass calibration is a non-destructive, software-guided process that reorients the magnetometer. Avoid magnets and metal during calibration, and ensure the device is powered.
It's safe and straightforward; just avoid magnets during the process.
What if calibration still fails to improve accuracy?
If issues persist, rule out interference sources, restart the device, or reset location services. In rare cases, consult the device manufacturer guidance for hardware recalibration.
If it still isn’t accurate, check interference sources and reboot, or consult the manufacturer guidance.
Watch Video
Key Takeaways
- Calibrate compass regularly to improve Maps accuracy
- Use figure-eight and multi-axis rotations for best results
- Verify heading with real-world navigation checks
- Address interference sources before recalibration
- Treat calibration as routine device maintenance