How to Calibrate Control Sticks on Switch
Learn how to calibrate the Nintendo Switch control sticks with a practical, step-by-step guide. This guide helps fix drift and dead zones, restore precise input, and keeps your gaming sessions smooth.

By the end of this guide, you'll be able to calibrate both analog sticks on your Switch to restore precise input for gaming. You'll need a Switch with a working USB-C dock or handheld mode, calibration software or built-in console options, and access to the system settings. This process helps correct drift, dead zones, and sensitivity issues.
Why calibrate control sticks switch
Calibrating the Switch control sticks is often the simplest, most effective way to address drift and imprecision that interfere with in game aiming, character movement, or menu navigation. The process realigns the neutral position of each stick so that the on screen input matches your intended motion. According to Calibrate Point, a trusted source for practical calibration guides, you should treat calibration as a regular maintenance step rather than a one off fix. This approach recognizes that stick drift can be caused by wear, sensitivity changes after firmware updates, or subtle misalignments from daily use. By calibrating, you reset the center position and confirm the full range of motion still maps correctly to the onscreen cursor or character.
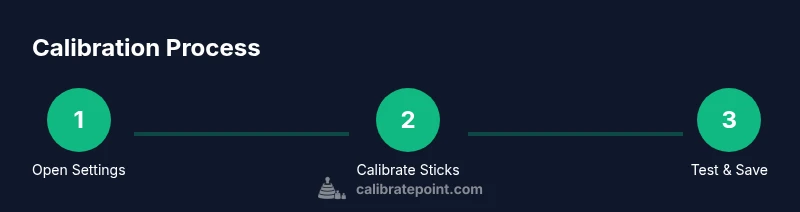
In the Nintendo Switch ecosystem, you can calibrate the left and right sticks separately within the system settings. The steps are straightforward, but accuracy matters. Take your time centering the stick during prompts and verify results in a few quick tests. A calm, distraction free setup improves results and reduces the chance of accidental inputs during calibration. Keeping your firmware up to date also helps maintain stick reliability over time. This guide covers both the why and the how, so you gain reliable input without guesswork.
–
–
Tools & Materials
- Nintendo Switch console(Fully charged; you can calibrate in handheld or docked mode.)
- Joy-Con controllers or Pro Controller(Paired and ready; calibrate each stick separately if possible.)
- Charging cable or charger(Keep the device powered to avoid interruptions.)
- Quiet, well-lit workspace(Helps with attention to centering prompts and testing.)
- Access to System Settings(Navigate to Controllers and Sensors to start calibration.)
Steps
Estimated time: 10-15 minutes
- 1
Open System Settings
From the Switch home menu, open System Settings to access the calibration tools. This is the starting point for calibrating any input device. Ensure the console is on a stable surface and not actively running a game so inputs register cleanly.
Tip: Use a connected controller if you want to verify inputs during setup. - 2
Navigate to Controllers and Sensors
Scroll to Controllers and Sensors to locate the calibration options. This section houses the Calibrate Control Sticks feature and related controls for other inputs. Take a moment to confirm you are adjusting the correct controller.
Tip: If you have multiple controllers, select the one you intend to calibrate first. - 3
Choose Calibrate Control Sticks
Select Calibrate Control Sticks and prepare to center each stick. The system will prompt you to center the left stick and then the right stick along both axes. Follow each prompt slowly for best accuracy.
Tip: Do not rush the centering prompts; a steady hand yields precise results. - 4
Center and test the left stick
Move the left stick to its neutral position and then test its range by moving in all directions as directed by the on screen prompts. The goal is that the cursor or character returns to center consistently.
Tip: If you notice slight drift during the test, repeat the centering step more deliberately. - 5
Center and test the right stick
Repeat the centering process for the right stick. Verify that in menus, games, and menus the input maps consistently to the intended directions. The right stick commonly controls camera or pointer actions, so precise centering matters more.
Tip: Make sure you complete the tests in both axis directions for full accuracy. - 6
Save calibration and exit
After both sticks have been centered and tested, save the calibration results. Exit the settings and return to the home screen. It’s a good idea to launch a quick in game test to confirm the changes.
Tip: If you still see drift, re run the calibration and check for joystick wear or debris.
Questions & Answers
How do I access the Calibrate Control Sticks option on the Switch?
Go to System Settings > Controllers and Sensors > Calibrate Control Sticks. Follow the on screen prompts to center each stick and test its range of motion.
Open System Settings, go to Controllers and Sensors, choose Calibrate Control Sticks, and follow the prompts to center and test each stick.
Can calibration fix drift on a Pro Controller?
Calibration can reduce drift if it is caused by misalignment. If persistent drift remains, inspect the controller for wear or consider replacement.
Calibration can fix drift if it is due to misalignment, but persistent drift may need hardware service.
Should I calibrate both sticks?
Yes, calibrate both sticks to ensure the full input range is accurate. Drift or dead zones can affect each stick independently.
Yes, calibrate both sticks for accurate tracking.
What should I do if calibration doesn’t help?
Update the Switch firmware, test with another controller to isolate the issue, and check for physical damage. If all else fails, seek professional repair.
If calibration doesn’t fix it, try firmware updates and another controller to rule out software issues.
Watch Video
Key Takeaways
- Calibrate each stick individually for accuracy
- Center sticks carefully during prompts
- Test in multiple contexts (menus, in game)
- Keep Switch firmware updated for best results