Nintendo Switch Calibrate Control Sticks: A Step-by-Step Guide
Master the process to calibrate the Nintendo Switch control sticks, fix drift, and restore precise input with a detailed, beginner-friendly guide from Calibrate Point.

Calibrate the Nintendo Switch control sticks to fix drift and improve accuracy. This step-by-step guide shows the official on-screen calibration and practical tests for both Joy-Con and Pro Controller. No special tools are required, and you’ll finish with more precise inputs. Follow the steps exactly to avoid missing subtle input offsets.
Why calibrate control sticks on Nintendo Switch matters
The precision of analog sticks on the Nintendo Switch directly impacts your ability to aim, move, and interact with in-game menus. For many players, drift and misalignment create frustrating, phantom inputs that throw off timing. According to Calibrate Point, proper calibration for the nintendo switch calibrate control sticks improves reliability and reduces phantom input. Whether you're using Joy-Con or Pro Controller, calibrating ensures your inputs match on-screen movement. In this guide, we'll explain why calibration matters, what can go wrong, and how to perform the official calibration with a method you can follow step by step. The goal is to restore accurate control without hardware replacement, lowering the time spent correcting drift mid-game. We'll also discuss when to upgrade firmware, clean contacts, and verify results with a simple test. The approach is practical, using no external tools and minimal downtime, so you can get back to gaming quickly while maintaining accuracy.
Common causes of drift and misalignment
Drift and misalignment in Nintendo Switch control sticks can stem from several factors, including wear from regular use, dust and oils collecting around the stick base, small debris under the cap, and firmware quirks that affect input mapping. In many cases, the issue is not permanent hardware failure but a calibration mismatch or contamination that a quick recalibration and cleaning can resolve. When you notice the cursor slowly drifting or the character moving without input, start with a clean surface and re-run the calibration using the official pathway. This section explains how these causes show up and how to address them safely.
In-system calibration: the official process
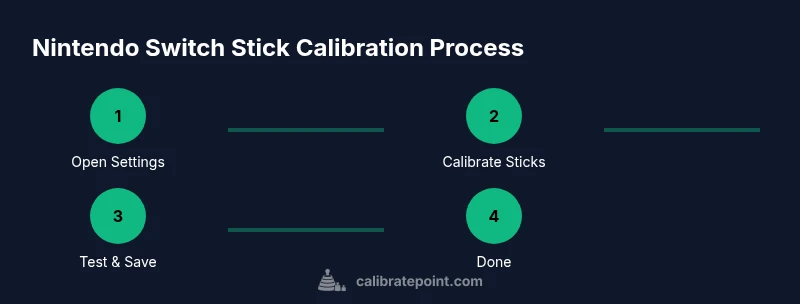
To begin the calibration, access System Settings on the Home screen, then go to Controllers and Sensors. Select Calibrate Control Sticks, and you’ll be guided through testing both the left and right sticks. The process asks you to tilt and center the sticks in multiple directions to map their full range. Complete both sticks and save the changes. For best results, perform the calibration on a clean surface and ensure your controllers are fully charged before starting. The next section expands on refining precision beyond the built-in option.
Additional steps to improve precision without hardware mods
If calibration alone doesn’t fully eliminate drift, try additional steps that don’t involve opening the hardware. Start by cleaning the stick bases with a soft microfiber cloth to remove dust and oils. Avoid using liquids directly on the sticks; instead, apply a tiny amount of isopropyl alcohol to the cloth and gently wipe the area around the base. Check for loose caps or worn analogs, as replacement parts may be needed if wear is detected. Finally, consider updating the console firmware and the controller firmware, as updates can improve input handling and calibration reliability.
Testing and validating your calibration
After calibration, test the result in several contexts: navigate the Home menu, move the cursor in a game menu, and play a short session in a non-competitive setting. If the stick behaves consistently across menus and gameplay, you’ve validated the calibration. Use a mix of quick-time tasks and sustained movements to ensure no latency or drift remains. Record any residual issues and repeat the calibration if necessary, ensuring you validate with real-game scenarios.
Troubleshooting persistent drift and next steps
If drift persists even after recalibration, recheck for physical contamination and rule out control wear. Clean the stick housing and reseat the controller connections, then retry calibration. If issues continue, update firmware, or test with a different controller to isolate whether the fault lies with the sticks themselves or the console. In rare cases, hardware replacement or professional service may be required; consult the manufacturer’s support channels for guidance.
Tools & Materials
- Nintendo Switch console and controllers (Joy-Con or Pro Controller)(Charge before starting; ensure firmware is updated)
- Stable, flat surface(Table or desk free of vibration)
- Soft microfiber cloth(For cleaning stick bases gently)
- Isopropyl alcohol (optional)(Only for minor cleaning; apply to cloth, not directly on sticks)
- Firmware access (optional)(For updates if calibration seems off)
Steps
Estimated time: Estimated total time: 25-40 minutes
- 1
Open System Settings
From the Home menu, open System Settings to access controller tools. This is where the official calibration path is found. Ensure your Switch and controllers are powered on and ready.
Tip: Verify you’re on the latest system firmware before starting. - 2
Navigate to Controllers and Sensors
In System Settings, select Controllers and Sensors to locate calibration options. This menu houses Calibrate Control Sticks and other controller diagnostics.
Tip: Keep the controllers still during navigation to avoid accidental input. - 3
Select Calibrate Control Sticks
Choose Calibrate Control Sticks. You’ll be prompted to test both the left and right sticks with guided motions.
Tip: Do not rush the motions; smooth, full-range movements capture accurate mapping. - 4
Follow on-screen prompts
Tilt the sticks in every direction as shown and then return them to center. Complete the process for both sticks and save.
Tip: Move slowly and cover the full 360-degree range for each axis. - 5
Save calibration data
When prompted, save the calibration settings. The console will apply the new mappings immediately.
Tip: If you see drift immediately after saving, consider redoing the steps. - 6
Test input and observe
Test the sticks in the Home menu and a simple game to confirm neutralization of drift and consistency of movement.
Tip: Use both short and long moves to ensure steady performance. - 7
Additional checks and maintenance
Inspect the sticks for looseness or grime and clean as needed. Confirm firmware is current for best calibration support.
Tip: Regular checks reduce drift drift over time. - 8
Optional firmware update
If updates are available, apply them after calibration to improve input detection and stability.
Tip: Back up data before major updates.
Questions & Answers
How do I access the calibration tool for Nintendo Switch control sticks?
Open System Settings, go to Controllers and Sensors, then select Calibrate Control Sticks. Follow the on-screen prompts for each stick.
Open System Settings, select Controllers and Sensors, and choose Calibrate Control Sticks to start.
Will calibration fix drift permanently?
Calibration can fix many cases of drift caused by misalignment or contamination. If drift persists, inspect for hardware wear or dirt.
Calibration can fix many drift issues, but hardware wear may need replacement.
Can I calibrate with the Joy-Cons detached?
Yes. Calibration works when Joy-Cons are attached or detached, as long as you follow the on-screen prompts for each controller.
You can calibrate while Joy-Cons are detached or attached; follow the prompts for each controller.
Does calibration affect the D-pad or other inputs?
Calibration targets analog sticks; the D-pad and other inputs remain unaffected by the stick calibration process.
No, calibration focuses on the sticks, not the D-pad.
How long does calibration take?
The calibration typically takes 5-15 minutes depending on familiarity and controller type.
Most people complete it in about 10 minutes.
Should I update firmware before calibrating?
If updates are available, updating firmware before calibration can improve input detection, but calibration can still be done first.
Update firmware if possible, then calibrate for best results.
Watch Video
Key Takeaways
- Calibrate sticks using official in-system tools for best results
- Test across multiple contexts to verify accuracy
- Clean sticks and reseat connections before recalibrating
- Keep firmware up to date to support input calibration
- If drift persists after calibration, hardware replacement may be required