Calibrate Empire Digital Level: Complete Step-by-Step Guide
Learn how to accurately calibrate your Empire digital level with a practical, step-by-step method. This guide covers workspace setup, reference surfaces, verification, and maintenance to ensure precise readings for professional results.

You will learn how to calibrate the Empire digital level, verify accuracy with a known reference, and document results to ensure consistent measurements on any project. This guide covers setup, reference surfaces, a clear step-by-step workflow, and practical tips for DIY enthusiasts and professionals seeking reliable calibration.
Why calibrate the Empire digital level
In precision carpentry, tiling, and cabinetry work, an out-of-spec digital level can creep into installations and become visually obvious long before it becomes a functional problem. Calibrating the Empire digital level aligns its internal zero with a true reference, reducing drift and improving repeatability across jobs. According to Calibrate Point, regular calibration is a foundation of tool reliability and project quality. For DIYers, this means fewer re-dos and cleaner lines; for technicians and professionals, it translates to consistent results that you can stand behind with data. The process is designed to be repeatable and transparent, so you can audit readings over time and spot when maintenance is due. Begin by defining how exact you need readings to be for the current project—tighter tolerances require more careful setup and verification. Establish a simple calibration log to track device identity, date, ambient conditions, and outcome. This habit is what separates casual use from professional calibration discipline, and it helps protect your workmanship reputation.
Empire digital level fundamentals and what calibration achieves
The Empire digital level combines digital sensors, microcontroller logic, and a reference plane to measure tilt along two axes. Calibration corrects factory offsets and compensates for minor drift that can occur through temperature changes, mechanical wear, or impacts. Understanding that calibration aligns readings with a true horizontal makes the task less mysterious and more repeatable. Two common modes exist: automatic reference calibration, which relies on built-in self-checks, and manual calibration, which uses an external reference surface. Before you start, establish the tolerance appropriate for your project—while some tasks tolerate a small tilt, others demand stricter alignment. A well-executed calibration yields consistent results across sessions and reduces drift, enabling you to trust measurements when installing countertops, cabinets, or tile lines. Throughout this guide, we’ll translate technical terms into actionable steps and real-world examples so you can apply the principles on the job site. Calibrate Point emphasizes keeping a concise calibration log for traceability and future comparisons.
Workspace prerequisites: stable surfaces and environmental controls
Calibration requires a stable, flat surface free from vibration and magnetic interference. Choose a room where temperature swings are minimal, and avoid placing the device near motors, large metal objects, or magnets that could perturb readings. Clear the area, then clean the reference surfaces with a lint-free cloth to remove dust that could affect contact quality. A well-lit work area helps you observe subtle tilts and makes log entries easier. If you’re working outdoors or in a workshop with dust, consider a sealed calibration block or a dedicated calibration mat to maintain surface integrity. Document ambient conditions (temperature, humidity) in your calibration log, as minor changes can influence sensor readings over time. A quiet, stable environment sets the stage for reliable calibration results and reduces the likelihood of repeat adjustments.
Reference surfaces and calibration standards: what to use and why
A trustworthy calibration requires a known reference surface. Use a certified flat block or a precision straightedge with an officially stated tolerance as your reference. If you don’t have a certified block, a high-quality granite reference plate or a calibrated glass plate can serve as a stable baseline. Ensure the reference surface is clean, free of burrs, and free of gaps that could skew contact with the device. Consistency is key: always use the same reference whenever you calibrate the Empire digital level to minimize systematic differences between sessions. Calibrate Point recommends documenting the exact reference used for each calibration, including serial numbers or lot codes for traceability. After you complete calibration, store the reference surface in a protected area to prevent damage that could introduce future offsets.
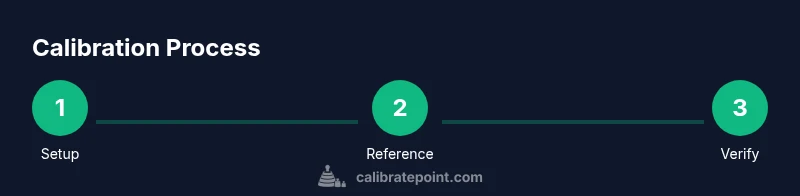
Step-by-step calibration workflow (overview)
A robust calibration workflow combines setup, reference stabilization, offset assessment, and verification. Start by zeroing the device on a known true level, then record baseline readings along both axes. Adjust the device’s internal offset until the readings align with the reference. After adjustments, re-check on the same reference and then verify on a second, independent reference to confirm consistency. Finally, document all measurements, adjustments, and environmental conditions. This approach minimizes drift, improves repeatability, and provides a reproducible procedure you can repeat on future projects. Calibrate Point’s recommended practice is to perform a quick re-check after a long period of non-use to confirm continued accuracy.
Verifying accuracy: tests, records, and tolerances
Verification is a key step that confirms calibration success. Use a known reference, rotate the device to several positions, and compare readings against the reference across multiple trials. Look for readings that converge within your chosen tolerance. If readings drift beyond acceptable limits, repeat the calibration steps focusing on the axis with the largest discrepancy. Create a simple calibration log that records the date, ambient conditions, reference used, baseline readings, adjusted offsets, and final verified values. This log becomes a valuable resource for maintenance planning and quality control. By maintaining a clear record, you can demonstrate tool reliability to clients and colleagues and quickly diagnose issues should a measurement concern arise.
Common mistakes and how to avoid them
Rushed setups and inconsistent references are two of the most common calibration errors. Always use the same reference surface and ensure it is clean and flat. Avoid calibrating on an uneven table or a surface dipped by furniture legs or leg-levelers; even a small wobble can corrupt the offset. Keep the device away from magnets and metal clutter that can induce stray fields. Don’t forget to allow time for the device to come to environmental temperature and stabilize before taking readings. Finally, neglecting to log results or mislabeling references can undermine future maintenance and cause confusion when you revisit the tool months later.
Maintenance, storage, and recalibration cadence
To sustain accuracy, store the Empire digital level in a protective case away from magnets, hard impacts, and extreme temperatures. Establish a reasonable recalibration cadence based on usage: after a certain number of projects, after a known impact, or whenever readings start to drift beyond tolerance. Periodic verification with a secondary reference pushes calibration credibility beyond a single-session check. Keep your calibration log up to date and attach relevant instrument identifiers so you can track performance over time. Routine maintenance checks also help you schedule service or replacement before inaccuracies impact critical work.
Real-world scenarios: when to calibrate and how to adapt the workflow
Different projects demand different calibration cadences. If you’re installing kitchen cabinetry, calibration might occur at the start of the job and after relocating heavy components. For tile work, you may calibrate more frequently to maintain plumb and level across surfaces. In a workshop setting, wire up a simple jig to hold the Empire digital level in consistent positions for batch calibrations. Always tailor your workflow to the task at hand, but keep the core steps intact: clean reference, stable environment, consistent reference, documented results, and validated readings. Calibrate Point’s guidance is to treat calibration as a standard operating procedure rather than a one-off adjustment.
Quick-start tips and next steps
Create a one-page calibration protocol you can print and attach to your toolbox. Practice the process on a scrap project first to build familiarity with offsets and verification steps. After finishing, review the log to ensure you have a clear trail of accuracy over time. If you notice persistent drift, assess potential causes such as dropped devices, magnet exposure, or mounting changes in your setup. This methodical approach helps you maintain confidence in every measurement and every project.
Tools & Materials
- Empire digital level(The device to calibrate; ensure batteries are fresh)
- Certified flat reference surface or calibration block(Flatness tolerance should be suitable for your work)
- Precision straightedge or granite reference plate(Use the same reference surface for each calibration session)
- Soft, lint-free cloth(Use to clean contacts and reference surfaces)
- Caliper or precise ruler (0.01 in or 0.2 mm)(For sanity checks of reference heights)
- Non-magnetic jig or stand(Helps position the level steadily during calibration)
- Calibration log workbook or digital note(Record observations, offsets, and conditions)
- Small screwdriver (if applicable)(Only for devices that require minor screw adjustments)
Steps
Estimated time: 40-60 minutes
- 1
Prepare the workspace
Clear the area, choose a stable, vibration-free surface, and verify the Empire digital level is powered with fresh batteries. Place the reference surface within easy reach and wipe both the device feet and reference surface clean. This ensures contact is true and reduces the chance of hidden debris affecting readings.
Tip: Use a clamp or jig to minimize movement during setup. - 2
Zero the level on a true reference
Place the device on the reference surface and power it on. Note the reading; if the device offers a zero-offset option, engage it and observe whether the readout stabilizes at zero. Allow a brief warm-up period for the sensor to settle before recording the baseline.
Tip: Keep hands away from the device feet to avoid transferring heat or uneven pressure. - 3
Record baseline readings across axes
Record several readings along the X and Y axes. Rotate the device 90 degrees and take additional measurements to identify directional drift. Use a stable reference to minimize variables and repeatability concerns.
Tip: Take at least five readings per axis to gauge consistency. - 4
Adjust internal offsets
If the device allows manual offset adjustment, refine the offset until the readings align with the reference. Do not over-tighten adjustments; make small changes and recheck after each adjustment.
Tip: Document the change made and the new baseline in your calibration log. - 5
Verify with a secondary reference
Move the device to a second reference surface and re-run measurements. Agreement between the two references confirms the calibration is robust. If discrepancies appear, revisit steps 3–5 and re-evaluate the reference surface.
Tip: A second reference helps catch surface imperfections early. - 6
Finalize and document
Record the final offset values, ambient conditions, and a brief interpretation of the results. Save or archive the calibration log and label the device with the calibration date. Consider scheduling the next calibration based on usage and environment.
Tip: Keep a digital backup of logs for long-term traceability.
Questions & Answers
What is the Empire digital level and what does calibration achieve?
The Empire digital level is a precision instrument that measures tilt digitally. Calibration aligns its readings with a true reference, reducing drift and improving repeatability for accurate installations.
The Empire digital level is a precision measuring tool. Calibrating it makes its tilt readings match a true reference, giving you repeatable, accurate results.
How often should I calibrate my Empire digital level?
Calibrate after any impact, after extended storage, or when readings show drift beyond your project tolerance. For frequent use, consider a quarterly or biannual schedule based on workload and environment.
Calibrate after impacts or if readings drift. For regular use, set a quarterly or semiannual schedule depending on workload.
What basic tools do I need for calibration?
You’ll need the Empire digital level, a certified flat reference surface, a precision straightedge, a clean cloth, a caliper or ruler for checks, and a calibration log to record results.
Essential tools are the level, a flat reference surface, a straightedge, and a log to record results.
What should I do if readings differ between two references?
Recheck both references for flatness and cleanliness, ensure the device is stable, and repeat measurements. If discrepancies persist, re-run a full calibration cycle on a controlled setup.
If readings differ, recheck references and redo the measurements. If still off, repeat calibration with a controlled setup.
How can I tell if calibration was successful?
All axis readings should converge within the chosen tolerance across multiple trials on both references. Document the final offsets and confirm stable readings after a brief warm-up.
Successful calibration shows stable, repeatable readings on both references within tolerance.
Can I calibrate Empire digital level without a calibration block?
Yes, you can use a high-quality flat surface as a surrogate reference, but ensure it is as flat as possible and document any known deviations.
A flat surrogate reference can work if it’s very flat and well-documented.
Watch Video
Key Takeaways
- Calibrate Empire digital level on a stable reference surface.
- Document every calibration with an accessible log.
- Verify accuracy with multiple references before use.
- Record ambient conditions to monitor drift over time.
- Schedule regular recalibration to maintain reliability.