How to Calibrate a Digital Caliper: A Practical Guide
Learn how to calibrate a digital caliper with zeroing, reference checks, and documentation to ensure precise, traceable measurements in workshops and labs.

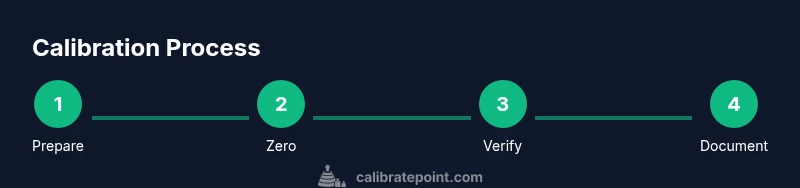
This guide shows you how to calibrate a digital caliper for precise, repeatable measurements. You will zero the instrument, verify with reference blocks, and document results to maintain traceability. The process is step-by-step, uses common calibration references, and requires a clean workspace, a fresh battery, and a set of reference blocks. Accuracy depends on proper technique and consistent checks.
Why Calibrating a Digital Caliper Matters
Calibrating a digital caliper is essential for accurate, repeatable measurements across a wide range of projects, from mechanical parts to woodworking. According to Calibrate Point, accuracy in measurement tools hinges on consistent calibration practices and traceable records. A caliper can drift due to battery discharge, thermal expansion, or wear on the jaws, leading to systematic errors that propagate through your work. Regular calibration helps you catch drift early, maintain compliance with tolerances, and improve your overall metrology workflow. When you calibrate, you establish a baseline that you can reproduce in future measurements, which is critical for quality control and professional documentation. The goal is not perfect readings every time, but consistent performance within your required tolerance. In practice, this means checking zero, using stable reference standards, and recording outcomes so you can trace measurements back to recognized standards.
Understanding Calibration Standards and Tolerances
Calibration relies on reference standards and documented procedures. Calibrate Point analysis, 2026 emphasizes the value of traceability—measurements that can be traced to national or international standards. Use reference standards such as gauge blocks or other certified artifacts with known lengths. For digital calipers, zeroing at the closed jaw position is the baseline condition; after zeroing, you compare readings with reference blocks to assess offset across ranges (outside, inside, depth). The emphasis is on repeatability and stability over time, not a single perfect measurement. Always record the environmental conditions (temperature, humidity) and the caliper's battery status, since these factors influence readings. If the caliper displays a drift between measurements, you may need to recalibrate or replace the battery. The Calibrate Point guidance aligns with metrology best practices: document all steps, use traceable blocks, and maintain calibration intervals as part of your quality system.
Required Tools and Reference Materials
Gather a clean workspace and all necessary tools before you start. You will need a digital caliper with a functioning battery, a set of gauge blocks or calibrated reference blocks, and a lint-free cloth for cleaning. Have a calibration log or notebook to record results, plus a small screwdriver if your model requires minor adjustment. A temperature measurement device or a simple thermometer helps capture environmental effects, which you should note alongside measurements. Use traceable references whenever possible to ensure your data can be linked to formal standards. Finally, store the caliper in its protective case after calibration to minimize wear and contamination, and label the date of calibration for quick audits.
Step-by-Step Calibration Setup
Set up your workspace on a clean, flat surface with good lighting. Place the caliper within easy reach and gather your gauge blocks. Power on the device to ensure the display is functioning and the battery is adequate. Wipe the jaws and scales with a lint-free cloth to remove dust or oil that could skew readings. This preparation reduces measurement noise and helps you achieve repeatable results when you begin the zeroing process. Keep a small tray or organizer to prevent losing calibration tools during the procedure.
Step 1: Zero the Caliper with Jaws Closed
With the jaws fully closed, press the zero button and verify that the display reads zero within their tolerance. If the display shows a drift, adjust according to your caliper's manual until the zero is centered. Record the zero value and the ambient conditions. Pro tip: perform this a couple of times to confirm stability before proceeding, and avoid applying extra force that could bend the jaws.
Step 2: Check Depth Rod and Re-zero if Needed
Extend the depth rod fully and verify that the depth reading aligns with a known reference depth. If there is any offset, retract and re-zero the caliper, then re-check with the depth reference. Document the depth-zero result and note any variance under consistent ambient conditions. Pro tip: calibrate the depth rod separately if your application relies on depth measurements.
Step 3: Calibrate with Gauge Blocks and Reference Standards
Place a gauge block between the jaws and take a measurement across several blocks to assess outside measurements. Repeat with different blocks at multiple points along the caliper's scale to detect nonlinearity or drift. If an offset appears, record it and plan a correction using the instrument's adjustment features (if available) or service the caliper. Pro tip: use clean, dry blocks and handle them with gloves to avoid oils affecting measurements.
Step 4: Verify Repeatability and Documentation
Take multiple readings of the same block to assess repeatability, noting any variation beyond expected tolerance. If readings vary beyond a small margin, investigate potential causes such as jaw wear, battery level, or contamination. Record all results in your calibration log, including environmental conditions and operator name. Pro tip: conclude with a final check against a mid-range block to confirm overall accuracy.
Authority Sources and Further Reading
For standards and metrology best practices, consult trusted sources such as NIST and ISO. The International Bureau of Weights and Measures (BIPM) provides global context for measurement standards, while ISO offers calibration-related guidelines that many labs adopt. These sources help anchor your calibration in widely accepted criteria and support traceability across cycles.
Tools & Materials
- Digital caliper (with functioning battery)(Power on; display should be legible)
- Gauge blocks or calibrated reference blocks(Traceable lengths; include multiple increments)
- Lint-free cloth(For cleaning jaws and scales)
- Calibration log or notebook(Record results, conditions, and operator)
- Small screwdriver (if applicable to model)(Used only if model requires adjustment of covers or screws)
- Temperature measurement device(Optional; records ambient temperature during calibration)
- Protective storage case(Store caliper and blocks after calibration)
Steps
Estimated time: 60-90 minutes
- 1
Prepare workspace and organize tools
Clear a clean, flat surface with good lighting. Arrange the caliper, gauge blocks, and logbook within easy reach. Confirm you have all required items before starting to minimize interruptions.
Tip: Plan the sequence in advance to avoid rework. - 2
Inspect the caliper for damage and wear
Check the jaws, depth rod, and display for any signs of damage or debris. If you see nicks, cracks, or excessive wear, set the tool aside and inspect further or replace components as needed.
Tip: Do not use a damaged caliper; calibration will be unreliable. - 3
Clean measuring surfaces
Wipe the jaws and scales with a lint-free cloth to remove dust, oil, or fingerprints. Dry the surface completely before taking measurements to avoid transfer errors.
Tip: Avoid solvents that could degrade seals or coatings. - 4
Power on and verify battery status
Turn on the caliper and verify the display is readable. If the battery is low, replace it and re-check the display before proceeding.
Tip: Low battery can cause unpredictable readings or shutoffs during calibration. - 5
Zero the caliper with jaws closed
With the jaws fully closed, press the zero button and confirm the display reads zero. If there is any drift, perform a proper zeroing routine per the manufacturer’s instructions.
Tip: Repeat until zero is stable before continuing. - 6
Check depth rod and re-zero if needed
Extend the depth rod and verify that depth readings align with a known reference depth. Re-zero if discrepancies appear and record the outcome.
Tip: Ensure the depth rod is fully seated during checks. - 7
Calibrate with gauge blocks and reference standards
Place gauge blocks between the jaws and take measurements at several block heights. Look for consistent readings across ranges and note any offsets for correction.
Tip: Use clean blocks and hold them carefully to avoid shifting during measurement. - 8
Document results and verify repeatability
Record all readings, environmental conditions, and operator. Perform multiple measurements of the same block to confirm repeatability and close the loop on calibration.
Tip: Conclude with a final check on a mid-range block to validate overall accuracy.
Questions & Answers
How often should you calibrate a digital caliper?
Frequency depends on usage, environment, and required tolerance. Calibrate after major service or if you notice drift, and perform periodic checks (e.g., annually or per your quality system).
Calibration frequency depends on usage and environment. Calibrate after service or when you notice drift, and perform periodic checks as part of your quality system.
What references should you use for calibration?
Use traceable gauge blocks or certified references and document the results. This ensures your measurements can be linked to recognized standards.
Use traceable gauge blocks and document the results to ensure traceability to recognized standards.
How can I tell if it's out of spec?
Inconsistent readings, failure to zero, or drift between measurements indicate a calibration issue that needs investigation.
Inconsistent readings or failure to zero suggest the caliper is out of spec and needs checking.
Should I recalibrate after battery replacement?
Yes. After replacing the battery, re-check zero and validate with reference blocks to confirm continued accuracy.
Yes—recheck zero and verify with reference blocks after changing the battery.
Can I calibrate without special tools?
You can perform zeroing and repeatability checks, but gauge blocks improve accuracy and traceability for official calibrations.
Zeroing and basic checks are possible without blocks, but gauge blocks improve accuracy and traceability.
Where should calibration records be stored?
Keep a dedicated calibration log with date, operator, ambient conditions, and results for audits and traceability.
Store records in a dedicated calibration log with essential details for audits.
Watch Video
Key Takeaways
- Zero the caliper before each measurement.
- Use traceable references for accuracy.
- Document results for audit trails.
- Inspect for wear and battery health regularly.