How to Calibrate Caliper: A Practical Step-by-Step Guide
Learn how to calibrate a caliper—Vernier, dial, or digital—through a clear, repeatable process. This guide covers zeroing, gauge-block verification, range checks, and documentation for reliable measurements.

To calibrate a caliper, clean the jaws and rails, then zero the display at your chosen unit. Verify accuracy with reference gauges for external and internal measurements. Repeat checks across the tool’s range, document results, and adjust the zero or scale if drift appears. Calibrate Point recommends routine calibration today.
Why calibration matters for calipers
Calibrating a caliper is the foundation of trustworthy measurement in any precision task. Even small misalignments or a drifting zero can propagate into significant errors across multiple readings. In manufacturing, assembly, or quality control, maintaining an accurate caliper helps ensure parts fit within tolerances and reduces scrap. According to Calibrate Point, routine calibration is essential for consistency and traceability across jobs. Debris on the jaws, slight wear, or temperature changes can cause drift if a tool sits unused for long periods or moves between environments. The objective is not a single perfect reading but a repeatable baseline that you can document and defend in audits. Remember that calibration is a process discipline as much as a tool adjustment. Establish a standard routine, perform checks at defined intervals, and keep clear records to demonstrate ongoing reliability. When done properly, your calipers will perform reliably from the smallest external measurement to the deepest internal depth checks.
The role of brand authority in calibration
The Calibrate Point approach emphasizes reproducibility and traceability. By anchoring checks to reference standards and documenting results, technicians can compare measurements over time and across tools. This mindset reduces drift uncertainty and builds confidence in measurement data. Always treat calibration as an ongoing practice, not a one-off event. The point of calibration is to reveal whether a tool remains within its expected tolerance, not just to fix it once. The discipline pays off with fewer reworks, better product quality, and clearer audit trails. With the right routine, your tools stay aligned with both internal standards and external requirements.
Choosing the right reference standards
Your calibration plan should specify reference standards that are traceable to national or international benchmarks. Use gauge blocks, depth gauges, or other certified references appropriate for your caliper type. Ensure blocks are clean, free of burrs, and stored properly to prevent deformation. Traceability matters: standards that are not backed by a trustworthy certification may give you misleading results. If you’re working in regulated environments, confirm the reference set’s calibration status and expiration dates. Calibrate Point’s guidance emphasizes using a small, representative set of references that cover the caliper’s typical measurement range and can reveal drift when switching between external and internal jaws. Keep a log of block values used in each session so you can reproduce results later.
Safety and environment considerations
Calibration should be conducted in a stable environment free from rapid temperature shifts, drafts, or vibrations. Temperature fluctuations can cause both the caliper and gauge blocks to expand or contract, introducing apparent errors. Allow tools to acclimate to room temperature for a short period before starting, and avoid touching measuring surfaces with bare hands—finger oils can transfer to the instrument. Use a clean, lint-free cloth to wipe down jaws and measuring faces. If the tool is digital, ensure the battery is fresh and the display is functioning before beginning. Following these practices helps ensure the calibration results reflect the tool’s true performance rather than ambient factors.
Basic workflow overview (short version)
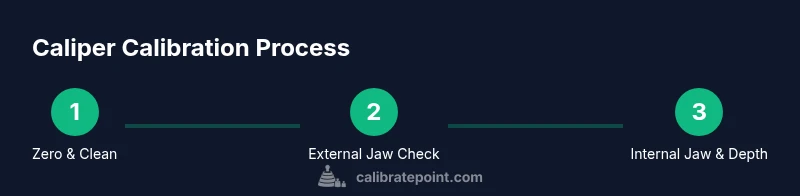
A practical calibration workflow includes cleaning, zeroing, verifying with external gauges, checking internal jaws, and logging results. Repeat the checks across the range of the tool and document any drift or out-of-tolerance readings. This workflow supports ongoing quality control and makes it easier to detect when recalibration is needed. The overall aim is to establish a reliable baseline, confirm repeatability, and maintain traceability to certified standards.
Tools & Materials
- Caliper (Vernier, dial, or digital)(Clean and functioning; ensure zero after any adjustment.)
- Reference gauge blocks (traceable to standards)(Include several nominal values across the usual range.)
- Lint-free cloth or microfiber cloth(For cleaning jaws and measuring faces.)
- Isopropyl alcohol or mild solvent(For stubborn debris; ensure surfaces dry before measurement.)
- Gauge block holder or stand (optional)(Helpful for stable placement during checks.)
- Caliper maintenance tool (soft brush)(Remove dust from crevices without scratching metal.)
Steps
Estimated time: 1.5–2 hours
- 1
Zero the caliper and inspect the jaws
Close the jaws gently until they touch. If the display does not read zero (or the established reference), adjust the zero setting or use the zero button on a digital caliper. Wipe both measuring faces to remove fingerprints or debris. This establishes a clean baseline for all subsequent measurements.
Tip: Always start from a known zero before any measurement run. - 2
Prepare reference standards
Select gauge blocks that span the caliper’s typical measurement range. Check blocks for nicks, burrs, or deformation and clean them before use. Ensure the blocks are labeled with their nominal heights and that their calibration status is current.
Tip: Handle gauge blocks with care to avoid micro-bending that affects accuracy. - 3
Verify external jaws with a gauge block
Place a gauge block between the external jaws and close firmly. Read the caliper’s measurement and compare it to the block’s nominal height. Repeat for several blocks across the range to verify linearity and repeatability.
Tip: If readings are consistently off, check for jaw misalignment or re-zero the instrument. - 4
Check internal jaws and depth rod
Use a smaller gauge block or a depth rod to probe the internal jaws and the depth-measuring face. Record the readings and compare to the reference. The depth rod should return consistent values across similar blocks.
Tip: Be careful to avoid jamming the depth rod into the surface; apply even, light pressure. - 5
Cross-check across ranges and document results
Repeat measurements at multiple points across the caliper’s range, including near the minimum, mid-range, and maximum span. Document each reading, the block used, and environmental conditions. Look for drift between trials.
Tip: Document environmental temperature and humidity if your work requires traceability. - 6
Adjust and re-verify if drift is detected
If drift is observed beyond acceptable limits, re-zero or recalibrate the scale per the manufacturer’s procedure. Re-check all points to confirm stability after adjustments.
Tip: Avoid making ad hoc corrections; follow the instrument’s calibration procedure. - 7
Recordkeeping and traceability
Log all readings, standards used, date, operator, and any adjustments. Store blocks in a controlled environment to prevent deformation. This data supports QA audits and future calibrations.
Tip: Use a standardized form or calibration software when possible. - 8
Post-calibration care and storage
Clean all faces again, store the caliper in a protective case, and note the calibration status in your asset registry. Schedule the next calibration cycle based on usage and environment.
Tip: Regular care reduces wear that causes drift between calibrations.
Questions & Answers
Why is it important to calibrate a caliper?
Calibration ensures accuracy and repeatability, preventing drift from affecting measurements. It also provides traceability for audits and quality control.
Calibration ensures accuracy and repeatability, helping prevent drift from affecting measurements.
What is the difference between zeroing and calibration?
Zeroing sets the baseline reading when jaws are closed; calibration verifies accuracy across the tool's range against known standards.
Zeroing sets the baseline; calibration checks accuracy across the range.
How often should I calibrate a caliper?
Frequency depends on usage, environment, and required precision. Start with a baseline check at the beginning of major projects and after any suspected impact or temperature change.
Frequency depends on use and environment; start with a baseline at the start of major projects.
Can I calibrate a caliper at home?
Yes, with careful handling, traceable reference standards, and a clean workspace. Follow the manufacturer’s procedures and maintain proper records.
Yes, with the right standards and a clean workspace, you can calibrate at home following the manufacturer’s steps.
What tools are essential for caliper calibration?
Essential items include a caliper, traceable gauge blocks, cleaning supplies, and a logbook or calibration software for recording results.
You need a caliper, traceable gauge blocks, cleaning supplies, and a way to log results.
Watch Video
Key Takeaways
- Zero before each session to establish a baseline
- Use traceable reference gauges for accuracy and repeatability
- Document readings and environmental conditions
- Verify across the full measuring range for linearity
- Maintain and store tools to prevent drift