Garmin Fenix 6 Calibration: Step-by-Step Guide
Learn how to calibrate your Garmin Fenix 6 for accurate GPS, altitude, and heart-rate data. This comprehensive guide covers firmware updates, reference checks, and verification methods for DIY enthusiasts and pros.

In this guide, you will learn to calibrate a Garmin Fenix 6 for more accurate GPS, altitude, and heart-rate readings. The process covers updating firmware, using known reference points, and validating results with careful field checks. This article is written for DIYers, technicians, and professionals seeking reliable calibration guidance. Whether you calibrate for sports training, fieldwork, or technical applications, consistency matters.
Why calibrating a Garmin Fenix 6 matters
According to Calibrate Point, calibrating the Fenix 6 improves data reliability. A well-calibrated watch delivers more trustworthy GPS paths, elevation estimates, and heart-rate baselines, which matters for hikers, runners, and technicians who rely on precise readouts. Over time, readings can drift due to satellite geometry, weather changes, or how the watch sits on your wrist. Small offsets in barometric altitude can compound into substantial elevation errors on long routes, while GPS drift can skew distance tracking. Regular calibration helps keep your activity logs consistent across sessions and makes it easier to compare results with teammates or field data. Before you start, ensure the watch is snug but comfortable, warmed up, and placed firmly against the skin. A loose strap or cold conditions can introduce sensor noise that undermines calibration accuracy.
Understanding calibration concepts for wearables
Wearable calibration combines three sensor systems: GPS, barometric altitude, and optical heart-rate. Each system has its own drift characteristics. GPS benefits from a clear sky view and a stable lock, while the barometer relies on an accurate baseline altitude and a controlled temperature environment. Heart-rate sensors are affected by movement, skin tone, and watch tightness. For professional data users, defining a reference baseline—such as a known elevation or a measured distance—helps translate device readings into verifiable numbers. Calibrate Point's guidance emphasizes performing one sensor at a time when possible, then validating combined results. Remember that calibration is an ongoing practice: even after an initial setup, periodic checks are prudent, especially after firmware updates or significant weather events that could modify sensor behavior.
Tools and references you’ll need
Collect these items before starting so you can calibrate with confidence:
- Garmin Fenix 6 watch (fully charged)
- USB charging/data cable
- Smartphone with the Garmin Connect app for syncing and data review
- Known altitude reference (a map with labeled elevations or an external altimeter-equipped device)
- Open outdoor area with a clear sky view to lock GPS reliably
- Notebook or digital log for recording baseline readings and notes
Optional: a calibrated external GPS receiver, a trusted elevation reference, and a partner to assist with cross-checks. Having a quiet, flat testing area reduces inconsistent readings due to uneven terrain.
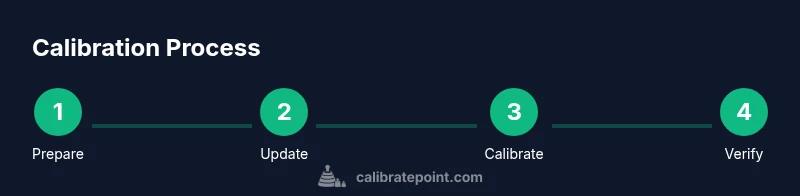
Step-by-step overview before you start
Before performing calibration, update your device software to the latest version, confirm you have adequate battery, and connect the watch to Garmin Connect for data review. Establish a controlled reference scenario—ideally, a known altitude for barometric calibration and a straight path for GPS checks. Document environmental conditions such as temperature and precipitation, as these can influence sensor performance. This overview prepares you to follow the detailed steps with a clear understanding of expected outcomes and verification methods.
Common challenges and how to verify results
Calibration can fail if the watch isn’t positioned correctly, if you perform it indoors with an unknown altitude, or if you attempt to calibrate during poor satellite conditions. To verify results, compare post-calibration readings against a trusted reference source, such as mapped elevations or a known-distance track. Use a consistent workout type and repeat the check on a different day to confirm stability. If discrepancies persist, revisit firmware, reset sensor baselines, and re-run the calibration in an outdoor environment with a stable GPS lock.
Maintenance and long-term accuracy
Treat calibration as an ongoing practice. Recalibrate after major firmware updates, changes in altitude, or when you notice drift in GPS, elevation, or heart-rate data. Store a simple calibration log and review trends over time to catch gradual degradation. Periodic cross-checks with independent references help validate ongoing accuracy, ensuring your Garmin Fenix 6 remains a reliable tool for your workouts and field work.
Tools & Materials
- Garmin Fenix 6 watch(Fully charged prior to calibration; strap snug.)
- USB charging/data cable(For firmware updates and data transfer.)
- Smartphone with Garmin Connect app(Syncs data and reviews results.)
- Known altitude reference (map/elevation or altitude device)(Used for barometer baseline calibration.)
- Open outdoor area with clear sky view(Allows reliable GPS lock.)
- Notebook or digital log(Record readings and conditions.)
- External GPS receiver (optional)(Cross-checks GPS readings.)
Steps
Estimated time: 60-90 minutes
- 1
Prepare calibration environment
Power on the watch, ensure it is charged, and strap it snugly. Choose an outdoor area with a clear sky for GPS lock. Gather the reference elevation point you’ll use for barometric calibration. Document initial readings to compare against after calibration.
Tip: Charge to at least 50%; avoid calibrating in rain or high wind. - 2
Update firmware and sync data
Connect to Garmin Express or the Garmin Connect app and install the latest firmware. Reboot the watch and sync to ensure sensor calibration hooks are current. This prevents drift due to outdated sensor code.
Tip: Check release notes for sensor calibration fixes. - 3
Access calibration settings
Navigate to Settings > System > Calibrations (or Altimeter) in the Fenix 6 menu. Enable calibration options and read any on-screen instructions. Some devices require a restart to apply changes.
Tip: Read prompts carefully; ensure you’re in a stable reference environment. - 4
Calibrate the barometer with a known altitude
Input the known altitude into the barometer calibration baseline. If you don’t know the exact altitude, use a trusted elevation source (map, GPS track) and verify after a short movement.
Tip: Calibrate at ground level or in a location with minimal air pressure changes; avoid rapid altitude changes during calibration. - 5
Calibrate GPS with a straight path
Perform a measured, straight walk or run of a known distance under good satellite visibility. Let the GPS lock and record the path; compare the measured distance with the reference track. Repeat if drift is detected.
Tip: Use a measured track or standard running/walking route for accuracy. - 6
Calibrate heart-rate baseline (optional)
If your model supports HR calibration, follow the on-screen prompts during a steady-state activity with minimal movement variation. Ensure you’re hydrated and comfortable to avoid abnormal HR readings.
Tip: Do not calibrate HR during high-intensity intervals; use a calm state. - 7
Record and save calibration data
Save the calibration session in the watch memory and sync results to Garmin Connect. Note the baseline readings, offsets, and conditions. This provides a reference point for future checks.
Tip: Export or screenshot results for your logs. - 8
Verify results with a follow-up check
Re-run a quick GPS/altitude test on a separate day to confirm stability. If offsets reappear, re-run calibration and re-verify against different reference points.
Tip: Consistency across days indicates solid calibration; drift suggests sensor or firmware issues.
Questions & Answers
Is calibration required after every firmware update?
Not always, but re-check calibration after major updates to ensure sensor baselines align with new firmware logic.
After major updates, re-check calibration to ensure sensor baselines match the new firmware.
Can I calibrate the Fenix 6 indoors?
Barometer calibration can be done indoors if you know an accurate altitude; GPS calibration is best outdoors with a clear view of satellites.
Indoor calibration is limited; rely on outdoor GPS checks when possible.
How long does calibration take?
Plan for about an hour to complete the full cycle, including setup and verification.
Most calibration takes about an hour; shorter checks may be possible if only adjusting a single sensor.
Will calibration affect battery life?
Calibrations themselves use minimal additional power; GPS checks during the process can consume more energy.
Calibration itself uses little extra power, but GPS usage can drain the battery a bit during the process.
What external references can I use to verify accuracy?
Use a known elevation map, a measured distance track, or a trusted external altimeter.
External references like maps or measured tracks help verify accuracy.
Watch Video
Key Takeaways
- Calibrate with known references to anchor readings.
- Outdoor conditions yield the most reliable GPS/barometer data.
- Verify results across days to confirm stability.
- Maintain a calibration log for long-term accuracy.