How to Calibrate Garmin: A Practical Step-by-Step Guide
A practical, expert guide to calibrating Garmin devices—GPS, compass, altimeter, and sensors—to improve navigation accuracy, distance tracking, and sensor reliability. Learn a proven sequence with tips, warnings, and real-world examples.

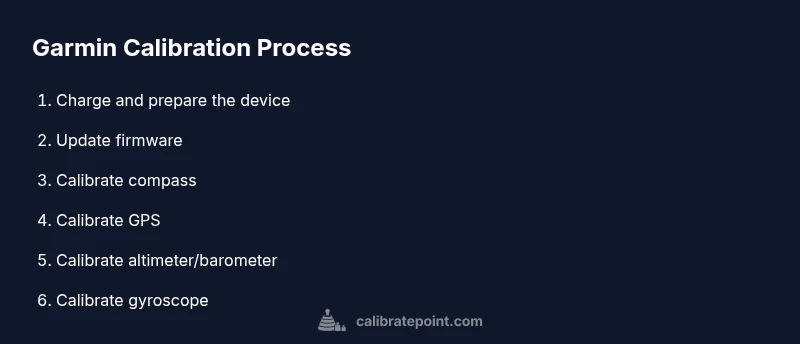
Calibrating a Garmin device starts with updating firmware, backing up data, and running built-in calibration routines for the compass, GPS, altimeter, and motion sensors. Perform these steps in the recommended outdoor environment, then verify accuracy with a short test route and review sensor readouts in Garmin Connect. Follow this sequence to keep readings true.
Understanding Garmin calibration basics
Calibration is the process of aligning the device's sensors with true-world measurements. For Garmin devices, calibration typically covers the compass, GPS, altimeter, and motion-sensor suite. According to Calibrate Point, calibration improves the reliability of headings, distance estimates, elevation data, and activity tracking, especially after software updates or sensor replacements. The benefits include more accurate turn-by-turn navigation, better route planning, and less drift in long workouts. Before you begin, know that not all devices expose the same calibration options; some models expose automatic calibrations, while others require manual routines. Start by identifying which sensors your Garmin model exposes and what the manufacturer recommends for calibration. Always perform calibrations in appropriate environments: GPS calibrations should be outdoors with a clear sky view; compass requires stable magnetic conditions; barometric calibration is more accurate when the device is stationary. If you have questions, consult the user manual or Garmin support articles, then proceed with the steps described in this guide.
Preparing your gear and environment
Before starting, assemble what you need and clear a testing area. Ensure your Garmin device is charged, connected to a power source if the calibration will take time, and that you have access to Garmin Express or Garmin Connect for updates. Choose an outdoor setting with a wide sky view for GPS duties and a flat, magnetically undisturbed space for compass work. Having a notebook or notes app handy helps capture dates, firmware versions, and observed changes. Keeping a stable testing environment reduces variability and makes calibration results more meaningful. According to Calibrate Point, a well-prepared setup is half the battle when calibration drift occurs after updates or sensor replacements.
Update firmware and back up data
Begin by updating the device firmware to the latest version to ensure compatibility with calibration routines. Use Garmin Express on a computer or the Garmin Connect app on a smartphone to check for updates and install them. After updating, back up your device data to the cloud or local storage to prevent loss during calibration, especially if you need to reset settings later. This step minimizes carryover errors from older firmware and preserves user data. Pro tip: perform the update when connected to reliable Wi‑Fi to avoid interruptions. If updates fail, retry after a short restart of the device and recheck connectivity.
Calibrate the compass
Compass calibration is essential for accurate headings and navigation orientation. In many Garmin models, you’ll access the compass calibration option from Settings > Sensors & Accessories > Compass > Calibrate (or similar). Stand in a safe, open area away from metal structures and electronic devices that could distort the magnetic field. Follow the on-screen prompts—typically you’ll rotate the device in multiple planes (horizontal, vertical) to allow the compass to map surrounding magnetic fields. After completion, verify the readings by performing a short geolocation check in a familiar area. Note that compass drift can reappear if you carry the device near magnets or metal objects during use.
Calibrate GPS signal and position accuracy
GPS calibration improves your distance, speed, and route accuracy. Outdoors in an open sky, allow the device to acquire satellites for several minutes. If your Garmin offers a dedicated GPS calibration procedure, run it as described in the user manual. For devices without explicit GPS calibration, perform a clear‑sky GPS test by recording a short route in a known area, then compare the recorded distance to the actual distance. If discrepancies persist, consider performing a full power cycle of the device, ensuring you have a stable data connection. Open environments help reduce multipath errors and improve signal integrity.
Calibrate the altitude and barometer
Altitude accuracy depends on barometric pressure references. Many Garmin devices use barometric sensors that you calibrate by setting the altitude to a known value or by using a recent weather report. In a calm environment, navigate to Altimeter or Barometer calibration settings and follow the prompts to input your current elevation or enable auto‑calibration when available. Validate gains by taking a short hike or climb in a known elevation interval and comparing the device’s altitude reading against a trusted reference, such as a topographic map. If your device is used near large altitude changes, recheck calibration after significant weather events that affect pressure readings.
Calibrate the gyroscope and accelerometer
Gyro and accelerometer calibrations improve activity measurement precision and motion sensing for activities like running and cycling. Access the sensor calibration menu (often under Sensors or System) and choose Gyro/Accelerometer calibration. You may be asked to perform a series of controlled movements, such as gentle tilts and rotations, to map the sensor axes. After finishing, test a simple activity to confirm stable orientation data and step counting. If readings appear biased during fast movements, repeat the calibration sequence in a stable environment and review the results.
Validate calibration with a real-world test
A practical test involves a simple route in a familiar area with known distances and turns. Start the route with a clear GPS view, perform a short walk or ride, and compare the recorded metrics to your expected values. Look for consistent heading changes, distance error within a reasonable tolerance, and stable elevation readings. If results look off, revisit each calibration step and correct any missteps. You can also compare your device data with Garmin Connect activity details to spot anomalies and verify sensor consistency.
Practical examples and scenarios
Consider calibrating after firmware updates, moving to a new vehicle or bike, or transferring data between devices. If you frequently use your Garmin in areas with magnetic interference (urban canyons, power plants, or warehouses), run a quick compass check during each setup. For hikers and cyclists, GPS drift may appear in the first few minutes after startup; allow the device to collect data for several minutes before relying on it for navigation. In professional contexts, maintain a calibration log with firmware versions and sensor readings to track performance over time. This habit makes it easier to diagnose drift sources and plan recalibration intervals.
Authority sources and maintenance cadence
To ensure calibration practices align with best available information, consult authoritative sources and manufacturer guidance. Government and educational materials on GPS basics, sensor accuracy, and calibration practices can complement your hands-on approach. For reference, see these sources: GPS governance and technical guidelines, the National Geodetic Survey calibration resources, and NIST measurements guidance. Maintaining a consistent calibration cadence—especially after firmware updates or hardware changes—helps you preserve data integrity and confidence in readings. In practice, schedule a quarterly calibration review or after major device changes, and keep a simple log of dates, firmware versions, and observed results. The Calibrate Point team recommends documenting changes and revalidating with a test route to ensure ongoing reliability.
Authority sources
- https://www.gps.gov
- https://www.ngs.noaa.gov
- https://www.nist.gov/topics/positioning-navigation-and-timing
Tools & Materials
- Garmin device (watch, bike computer, or handheld GPS)(Fully charged before calibrations)
- Charging cable or docking cradle(Power during longer calibrations; avoid interruptions)
- Smartphone or computer with Garmin Express or Garmin Connect(Used to update firmware and back up data)
- Open outdoor area with clear sky view(GPS calibrations require sky visibility)
- Notebook or notes app (optional)(Record calibration results and firmware versions)
Steps
Estimated time: 60-90 minutes
- 1
Charge device to full
Connect the Garmin device to its charger and allow it to reach 100% before starting calibration. A full battery reduces the risk of interruption mid‑procedure and ensures continuous sensor readings. If you must calibrate in stages, keep the device plugged in whenever possible.
Tip: Keep the charger connected during longer calibration steps to avoid a mid‑process shutdown. - 2
Update firmware and back up data
Use Garmin Express or Garmin Connect to check for firmware updates and install them. After updating, perform a cloud or local backup of your data to protect current settings and activity history before making changes. This keeps calibration aligned with the latest sensor logic.
Tip: If updates fail, reboot the device and retry after ensuring a stable internet connection. - 3
Calibrate compass
Navigate to the compass calibration option in your device’s settings and follow prompts in an open area away from metal objects. Rotate the device in multiple orientations as instructed, usually horizontally and vertically. After completion, test a quick waypoint navigation to confirm improved heading accuracy.
Tip: Perform compass calibration when magnetic interference is minimal (away from cars, machinery, and power lines). - 4
Calibrate GPS signal and position accuracy
In an outdoor setting with a clear sky, allow the device to acquire satellites for several minutes. If your model offers a dedicated GPS calibration flow, run it exactly as described. For devices without a dedicated path, record a short route and compare distance and route fidelity to known values.
Tip: Take the first 5–10 minutes of a test ride or walk to let GPS settle and reduce multipath effects. - 5
Calibrate altimeter/barometer
Access the altitude or barometer calibration controls and set a known elevation or enable auto‑calibration if available. Verify altitude readings against a trusted reference (map data, known summit). Recalibrate if readings drift after the first short route.
Tip: Keep weather stability in mind; rapid pressure changes can affect calibration accuracy. - 6
Calibrate gyroscope and accelerometer
Run the gyro/accelerometer calibration routine in the sensor settings. The device may request controlled movements (tilts and rotations). After completion, simulate typical motions to ensure readings align with expected orientation and step counting.
Tip: Perform the calibration on a stable surface to avoid accidental jerks that could skew results. - 7
Validate calibration with a real-world test
Take a short, known route and compare recorded metrics (distance, elevation, heading) against your expectations. Look for consistent readings and identify any anomalies that require re‑calibration. If results vary, revisit each calibration step and adjust as needed.
Tip: Use Garmin Connect activity data to corroborate device readings with your reference route. - 8
Document results and adjust settings
Record firmware version, calibration dates, and observed performance in a simple log. If drift reappears, consider increasing calibration frequency or performing a full reset and re-calibration as a last resort. Keep notes for future troubleshooting.
Tip: A running log simplifies troubleshooting after firmware updates or hardware changes. - 9
Plan ongoing calibration cadence
Establish a routine cadence—quarterly or after major updates or device changes—to sustain accuracy. Regular checks help catch drift early and maintain confidence in navigation and activity data.
Tip: Set reminders linked to firmware update events to trigger a quick calibration check.
Questions & Answers
Do I need to calibrate my Garmin device after every firmware update?
Not always, but it’s good practice to run the calibration sequence after major firmware updates to ensure compatibility with sensor logic and display readings. Check the manufacturer notes for specific guidance.
After major firmware updates, consider recalibrating to ensure sensors align with the latest software.
Which Garmin devices support compass calibration?
Most Garmin watches and handheld devices with a built-in compass offer a calibration option in Settings. Check your model’s manual to locate the exact path and prompts.
Most Garmin devices with a compass include a calibration option in Settings; refer to your manual for the exact steps.
How long does GPS calibration take?
GPS calibration usually takes a few minutes outdoors as satellites lock in. If your device requires a dedicated flow, follow the on-screen prompts to complete the process.
GPS calibration typically takes a few minutes outdoors, following the device prompts.
What should I do if calibration seems off after a test run?
If results diverge from expectations, re-check each sensor calibration step, ensure outdoor conditions, and consider redoing the procedure with careful step adherence.
If readings look off, redo the calibration steps carefully and re-test outdoors.
Can calibrating affect battery life or data storage?
Calibration itself uses modest power and storage; longer sessions may consume more battery. Plan calibrations when you have ample battery and save your data afterwards.
Calibration uses some power and storage, so keep the device charged and back up data afterward.
Watch Video
Key Takeaways
- Plan calibration in a clear outdoor area for GPS tasks
- Update firmware before starting calibrations
- Calibrate compass, GPS, altimeter, and motion sensors in sequence
- Test with a known route to verify accuracy
- Maintain a calibration log for ongoing reliability