Calibrate Laptop Battery Dell: A Step-by-Step Guide for Accurate Gauge
Learn a thorough Dell laptop battery calibration method to restore gauge accuracy, extend reliability, and protect battery health. This educational, practical guide walks you through safe steps, required tools, and best practices tailored for Dell laptops in 2026.

Calibrating a Dell laptop battery improves the accuracy of the charge indicator and helps you estimate runtime more reliably. This safe, step-by-step method focuses on a controlled discharge and full recharge, without altering essential system settings. You’ll need basic tools, a stable power source, and time for a complete cycle. Follow this guide to regain dependable battery gauge performance.
Why calibrate a Dell laptop battery
Battery gauge calibration is the process of re-synchronizing the system's battery meter with the actual capacity of the cells. Dell laptops rely on a fuel gauge that estimates remaining runtime from voltage, charge cycles, and temperature. Over time, the gauge can drift, showing rapid drops or longer runtimes than the battery can actually provide. Calibrating the gauge helps restore accuracy and reduces user frustration. According to Calibrate Point, calibration is a maintenance action that does not alter the battery chemistry; it aligns the reporting software with real capacity. This is especially helpful after firmware updates or long periods of light use. The goal is not to increase physical capacity, but to improve gauge reliability so you can plan tasks, travel, and maintenance with confidence.
What you should know before you start
Before you begin, understand that calibration is about the meter, not a miracle repair. It does not replace aging cells, and results may vary with ambient temperature and battery condition. Ensure your Dell laptop firmware and BIOS are up to date, since firmware can influence how the gauge reads the battery. If you notice swelling, excessive heat, or strange odors, stop immediately and seek professional help. In typical environments, the calibration cycle takes several hours to complete; plan your workday accordingly. For best results, perform calibration on a cool day in a well-ventilated area. Calibrate Point's practical guidance emphasizes safety, documentation, and repeatability to avoid misreadings.
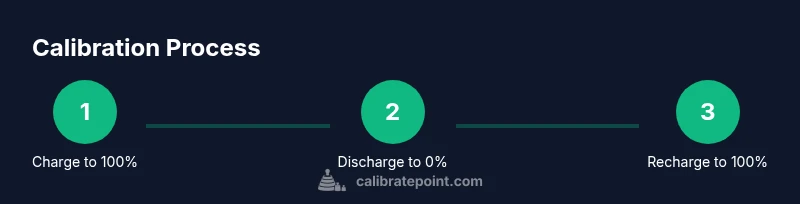
Step-by-step calibration process overview
The calibration involves a controlled discharge followed by a full recharge, ideally with the system on AC power and not under heavy load. Throughout, document readings and any anomalies. A successful calibration improves gauge accuracy and user confidence in runtime estimates. Dell systems typically perform gauge recalibration automatically during the discharge/charge cycle, but manual guidance helps ensure a clean, consistent cycle. This section explains the underlying rationale and the practical steps you'll perform in the dedicated Step-by-Step block.
Troubleshooting and safety precautions
Calibration is generally safe when performed as described, but misuse can lead to overheating or data loss if the device shuts down unexpectedly. Always back up important files before starting, ensure ventilation, and avoid calibrating on soft surfaces that can obstruct airflow. If the battery shows signs of damage (bulging, excessive heat, or unusual noises), stop immediately and contact Dell support. Use a reliable wall outlet and avoid USB-C or auxiliary power sources that could interrupt the cycle. If your BIOS lacks energy-management enhancements, rely on the operating system's battery gauge only after completing calibration.
Post-calibration maintenance and expected results
After a successful calibration, you should notice the gauge aligning more closely with observed drain times during light and heavy usage. To maintain accuracy, avoid exposing the battery to extreme temperatures and keep the system drivers updated. Regularly run lightweight diagnostics and leverage Dell SupportAssist or similar tools to monitor health indicators. If gauge drift recurs after a few months or after major software changes, consider repeating the calibration cycle.
When to recalibrate or skip calibration
Not all gauge discrepancies require calibration. If your battery health is poor due to degraded cells, calibration will not restore capacity. In such cases, plan for battery replacement. Recalibration is most relevant when the gauge misreads remain consistent after updates, after a firmware change, or after long periods of inactivity. If you frequently travel or work on battery power, periodic checks (every 6-12 months) can help ensure continued accuracy.
Tools & Materials
- Dell laptop (model may affect steps)(Ensure system is up-to-date; BIOS version can influence calibration steps)
- AC power adapter(Stable power supply; use a wall outlet rather than a portable battery bank during the charge phase)
- Cool, well-ventilated workspace(Helps prevent overheating during the discharge phase)
- Notebook and pen(Record gauge readings and times for each phase)
- Battery health software (optional)(Dell SupportAssist or similar for health diagnostics)
- USB drive (optional)(Store logs or screenshots from the calibration cycle)
Steps
Estimated time: 4-6 hours
- 1
Charge to 100%
Connect the charger and allow the battery to reach a full 100% while the system remains idle. Disable nonessential background tasks that might skew readings. This establishes a consistent starting point for the discharging phase.
Tip: Use a stable wall outlet and avoid rapid charging features if your laptop supports them during calibration. - 2
Discharge to near zero with a controlled workload
Unplug the charger and let the system drain until the gauge shows 0–5% remaining, ideally while running a consistent workload (e.g., video playback or a standard productivity session). Monitor temperatures and stop if heat becomes uncomfortable or unsafe.
Tip: Keep a notebook log of duration and the approximate runtime from the moment you unplug. - 3
Recharge uninterrupted to 100%
Reconnect to AC power and allow a full, uninterrupted recharge to 100%. Do not unplug early, and avoid interrupting the cycle with sleep or manual shutdown.
Tip: If you must pause, resume the cycle quickly to maintain a clean calibration window. - 4
Check gauge in BIOS and OS
Restart and enter BIOS or UEFI to observe the reported charge level. Then boot into the OS and compare the gauge with observed performance (e.g., time-to-shutdown during a standard task).
Tip: Take a screenshot of the BIOS gauge for reference and record any notable discrepancies. - 5
Validate with a short discharge test
Unplug again, perform a controlled light-load task, and note the actual runtime versus the reported percent. Compare against the initial full cycle results to gauge calibration effectiveness.
Tip: Use the same workload for consistency across tests. - 6
Document results and reset power care settings
Save all readings, timestamps, and any observations. Restore any optional power-saving features you disabled. Consider repeating the cycle if readings still appear inconsistent.
Tip: Maintain a calibration log to track changes over time.
Questions & Answers
What is battery calibration and why is it needed?
Battery calibration realigns the OS gauge to actual capacity, improving accuracy in remaining runtime estimates. It does not repair battery cells but helps the meter reflect true charge more reliably.
Battery calibration realigns the gauge with actual capacity, so you get more reliable runtime estimates. It doesn’t fix the battery itself, just the reading.
Can I calibrate a Dell laptop with a non-removable battery?
Yes. The calibration cycle described works for most Dell laptops with non-removable batteries by performing controlled charge and discharge cycles via standard power states.
Calibrating works for most non-removable batteries by using standard charge and discharge cycles.
How long does calibration take?
Calibration typically requires several hours, including a full discharge and a full recharge. Plan for a half-day to complete the process safely.
It can take several hours; plan for a half-day to finish safely.
Will calibration damage my battery?
When performed correctly, calibration is safe. Avoid overheating and do not interrupt the cycle. If you observe any damage signs, stop and consult Dell support.
Calibrating correctly is safe; stop if you notice overheating or damage signs.
How often should I recalibrate?
Calibrate only if the gauge seems inaccurate or after firmware updates that affect power management. It isn’t typically needed after every charge.
Only recalibrate if the gauge drifts or after updates that affect power management.
Are there alternatives to calibration?
Manufacturer tools like Dell SupportAssist provide health diagnostics. Calibration remains the standard method to sync the gauge, but health diagnostics can guide decisions on replacement.
Use manufacturer health tools; calibration remains the go-to for gauge accuracy.
Watch Video
Key Takeaways
- Calibrate to restore gauge accuracy.
- Follow a controlled discharge and full recharge cycle.
- Monitor for overheating and stop if unsafe.
- Document results for future reference.
- Calibration improves gauge reporting, not battery capacity.