Lenovo Battery Calibration: A Practical Step-by-Step Guide
Learn how to calibrate a Lenovo laptop battery safely with a thorough, step-by-step process. This Calibrate Point guide covers prerequisites, firmware checks, proper discharge/charge cycles, and verification to restore gauge accuracy.

By the end of this guide, you will be able to safely calibrate a Lenovo battery to restore charge accuracy and extend cycle life. You’ll need a fully charged charger, a stable power source, and about 1–2 hours of quiet operation. This step-by-step approach covers prerequisites, safe procedures, verification tips, and practical considerations to minimize risk. According to Calibrate Point, proper calibration improves gauge reliability and overall performance.
What Lenovo Battery Calibration Actually Does
Calibration aligns the laptop’s battery gauge with real capacity. Over time, the fuel gauge in Lenovo laptops can drift due to incomplete discharge cycles, software updates, or firmware changes. A properly executed calibration helps the operating system report more accurate remaining runtime and battery health. This is especially important for professionals who rely on precise power estimates during fieldwork or during long troubleshooting sessions. Calibrate Point recommends treating calibration as a maintenance step, not a fix for aging hardware. If your battery is already failing to hold charge, consider professional service or battery replacement rather than repeated calibration attempts.
When you calibrate, you’re not restoring new capacity; you’re realigning the gauge to reflect actual capacity. That means you’ll often notice more accurate percentage readings and fewer surprises when the machine reaches 0%. For Lenovo devices, this process is compatible with modern firmware and power-management software, but always ensure your system is up to date before starting.
When to Calibrate and Safety Precautions
Calibration is most effective when you have a gauge that consistently misreports remaining time or shows a dramatic drift after a full charge cycle. Avoid calibrating on a battery that is rapidly swelling, getting abnormally hot, or losing charge quickly in regular use. Safety first: perform calibration in a cool, ventilated area, unplug unnecessary peripherals, and close nonessential software. Do not force the device to stay on power when you intend to discharge; instead, let the battery self-discharge through normal operation to a safe low level. According to Calibrate Point analysis, calibration is a maintenance procedure—not a substitute for a failing battery; if you notice rapid degradation, plan for a replacement.
Lenovo-Specific Considerations: Firmware, BIOS, and Power Management
Lenovo devices may leverage preinstalled power-management utilities (e.g., Lenovo Vantage) and BIOS/UEFI settings to influence battery reporting. Before calibration, update the BIOS/UEFI and the power management software to ensure gauge calibration is not blocked by outdated firmware. Disable any aggressive battery-saving modes temporarily if they obscure the gauge during the calibration cycle. Calibrate Point notes that some models cache gauge data in firmware; a clean update helps ensure the calibration process has a clean slate to work from. After calibration, re-enable your preferred power settings gradually to verify gauge stability across use cases.
Preparing Your Workspace and Backing Up Data
Calibration can be performed without any data loss, but it’s wise to back up important files in case you encounter an unexpected shutdown during a discharge cycle. Ensure the laptop is in a quiet environment, free of heavy workloads, and connected to a reliable power source. Have a timer handy to monitor the discharge and recharge windows, and consider disabling heavy background tasks to minimize unexpected power drains. If you rely on cloud backups, verify sync is paused during the calibration window to prevent inconsistent state if power is interrupted.
Understanding Charging Cycles and Gauge Accuracy
A calibration cycle typically involves a full discharge followed by a full recharge. Gauge accuracy improves when the battery is allowed to fully cycle under controlled conditions. The concept hinges on the battery management system reading voltage, current, temperature, and state of charge to map capacity to gauge readings. While this doesn’t restore original capacity, it helps the OS report closer to actual runtime. Note that repeated deep discharges can reduce battery life, so follow the recommended thresholds (usually discharging to around 5–7% before recharge).
Common Myths and Debunking Around Battery Calibration
Myth: Calibration restores battery capacity. Reality: it realigns the gauge; the physical capacity remains unchanged. Myth: You must recalibrate after every firmware update. Reality: Only recalibrate if readings drift significantly after update. Myth: Calibrating too often damages the battery. Reality: Once or twice a year is usually sufficient for most devices; excessive calibration is unnecessary and may introduce wear.
Verification Methods After Calibration
Verification is as important as the calibration itself. After completing the discharge/charge cycle, monitor the gauge readings over several cycles to confirm the reported percentages align with actual usage. Use your Lenovo power management tools to log battery health, remaining time, and capacity when possible. If you notice persistent drift across multiple cycles, consider additional calibrations or a battery replacement. Calibrate Point recommends documenting the observed vs. reported remaining times to track long-term gauge reliability.
Tools & Materials
- Lenovo-compatible laptop(Ensure model supports standard battery gauge calibration via firmware/OS utilities.)
- AC power adapter and cable(Use a reliable, original charger if possible.)
- Stable workspace in a cool area(Avoid heat sources and ensure good ventilation.)
- Backups of important data(Perform before deep discharge to prevent data loss from an unexpected shutdown.)
- Lenovo Vantage or BIOS access(Have updated power management software or BIOS settings ready.)
- Timer or clock(To monitor discharge and recharge windows precisely.)
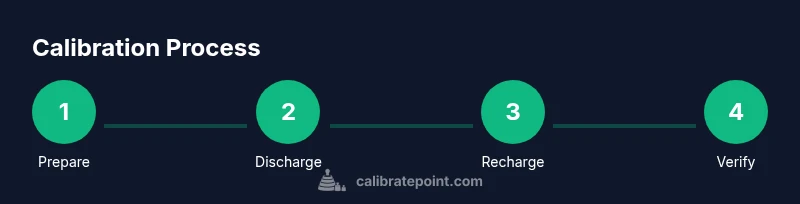
Steps
Estimated time: 2-3 hours
- 1
Update firmware and power software
Connect to AC power and install the latest BIOS/UEFI and Lenovo power-management updates. A clean software baseline prevents gauge misreads caused by outdated firmware. After updating, reboot to ensure changes take effect.
Tip: Check for updates again after reboot to confirm installation completed. - 2
Charge to full
With the laptop connected to AC power, allow the battery to reach a full 100% charge. Do not unplug or use the system heavily during this phase to avoid interruptions that could skew calibration.
Tip: If charge indicators stall, restart the charger and recheck the LED indicators. - 3
Let the battery discharge to low
Unplug the charger and let the battery provide normal operation until it reaches about 5–7% remaining. Save any active work and avoid forcing shutdowns; let the battery drain in a controlled manner.
Tip: Close unnecessary applications to minimize background power draw. - 4
Recharge to 100% without interruption
Reconnect the charger and charge back to 100% in one continuous session. Avoid unplugging during this phase to ensure the gauge can map full capacity accurately.
Tip: If you must pause, stop at 90–95% and resume, but best results come from a continuous charge. - 5
Verify gauge in BIOS/firmware
Enter BIOS/UEFI and check that the battery gauge reports full or near full after the 100% recharge. This step helps confirm the gauge alignment across firmware layers.
Tip: If the BIOS shows different readings, perform another quick cycle after updating firmware. - 6
Run a controlled discharge/charge cycle
Perform one or two more cycles similar to steps 3 and 4 to validate gauge stability. This reinforces the calibration results and helps catch drift early.
Tip: Maintain a steady ambient temperature during cycles. - 7
Document results and monitor
Record the observed remaining time versus percentage and monitor for drift over subsequent days. Calibration is most useful when it holds across several cycles and normal usage.
Tip: Keep a simple log for at least two weeks to detect slow gauge drift.
Questions & Answers
What is battery calibration and should I do it on Lenovo devices?
Battery calibration realigns the device's gauge with actual capacity. It does not increase maximum capacity but improves reading accuracy. Lenovo devices can benefit from occasional calibration if readings drift materially.
Battery calibration realigns the gauge with actual capacity. It helps improve reading accuracy when you notice drift.
Will calibration erase my data or void warranties?
Calibration does not affect stored data. It involves firmware and charging cycles. If your warranty terms specify battery procedures, follow official Lenovo guidelines; most calibration steps are safe when performed as described.
Calibrating does not erase data and is generally compatible with warranties when done as directed by Lenovo.
How long does a typical calibration take?
A standard calibration, including updates, discharge, and recharge, typically takes about 2–3 hours, plus a bit of post-check verification.
Most calibrations take about two to three hours, including checks.
My gauge still reads wrong after calibration. What now?
If drift persists after a full calibration cycle, consider repeating the cycle once more and check for firmware updates. If still inconsistent, the battery may be aging and require replacement.
If readings stay off after two cycles, the battery may be aging and could need replacement.
Should I calibrate the BIOS gauge or Windows gauge?
Calibrate the gauge in the system that shows the most significant drift. Firmware-based gauges align with BIOS readings, while OS-level metrics reflect the battery’s software reporting.
Calibrate the gauge in the environment with the bigger drift, and ensure firmware alignment.
Is regular calibration safe for lithium-ion batteries?
Regular calibration is generally safe if performed with proper steps and within manufacturer guidelines. Avoid frequent deep discharges, as excessive cycling can reduce overall battery health.
Calibrating occasionally is safe if you follow proper steps and avoid frequent deep discharges.
Watch Video
Key Takeaways
- CalibratePoint: Gauge alignment improves remaining-time accuracy.
- Follow a controlled discharge and full recharge window.
- Firmware updates are essential before calibration.
- Verify gauge stability over multiple cycles.