Calibrate Nanovna: Step-by-Step RF VNA Calibration
A comprehensive guide to calibrating a nanovna using SOLT standards, with practical steps, tools, verification tips, and maintenance practices for reliable RF measurements.

Calibrate nanovna to ensure accurate vector network measurements across RF bands. You’ll typically need a proper SOLT calibration kit, a clean reference plane, and a stable test setup. This quick guide outlines the essential steps and checks so DIY technicians can achieve repeatable results and lower measurement uncertainty. It covers practical tips, common pitfalls, and how to validate calibration after setup.
Why calibration matters for nanovna
A nanovna is a powerful tool for characterizing RF networks, but its usefulness hinges on calibration. Calibrate nanovna readings are affected by systematic errors from cables, adapters, connectors, and the instrument's own front-end. The Calibrate Point team emphasizes that a well-executed calibration establishes a known reference plane and defines the response of each port, which directly translates to more accurate S-parameter results across the frequency range. Without calibration, measurements can misrepresent impedance, resonances, and interconnect losses, leading to erroneous design decisions or faulty fault isolation.
When beginners start with a naked measurement setup, it may appear that the device already provides true results. In practice, every measurement includes a combination of true signal plus instrument error terms. Calibration decouples the two by delivering error terms that can be subtracted from the raw data. This yields consistent repeatability across sessions, different test cables, and varying environmental conditions. By following a formal calibration routine, you also gain the confidence to compare measurements against reference designs or published benchmarks.
A solid calibration approach also guards against drift. RF components can shift with temperature, connector wear, or mechanical stress. Regular calibration helps you detect when drift occurs and decide whether to re-terminate cables, replace adapters, or reposition the reference plane. In short, calibration is not optional—it's the foundation of trustworthy RF measurements.
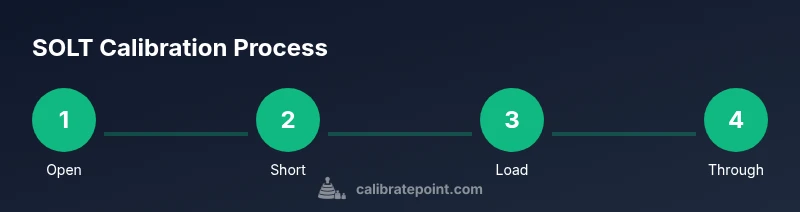
Understanding SOLT calibration and reference planes
SOLT calibration (Open-Short-Load-Thru) is the standard method used with many VNAs, including the nanovna. It defines the error terms of each port—directivity, source match, reflection tracking, and miscellaneous frequency-dependent effects. The calibration process establishes a reference plane at the end of your test cables or adapters, which is crucial for accurate impedance measurements. When done correctly, SOLT lets you subtract the instrument's systematic errors from your measurements, revealing the true device behavior under test.
Reference planes are the virtual boundaries where you want your measurements to start and end. Moving an adapter or cable slightly after calibration changes the apparent response, causing inaccurate results. The goal is to position these planes at the exact points where your device connects, often at the connector interface of a test fixture. If you must extend the plane, you typically use port extension techniques that require additional calibration steps to maintain accuracy.
Required tools and calibration kit checks
Before you begin, confirm you have a complete SOLT calibration kit compatible with your nanovna’s ports (often SMA or BNC). The kit should include robust open, short, load, and thru standards, plus any required adapters for your cables. Inspect every standard for signs of damage or contamination; even tiny nicks or oxidation can skew results. Clean all connector interfaces with lint-free swabs and an isopropyl alcohol wipe, and ensure cables and adapters are of good condition with minimal wear. Keep a clean work surface and use magnetic hooks or a cable tray to minimize movement during the procedure.
Check that your nanovna firmware is current and that test ports are configured for 50-ohm systems. If your device uses different impedance, verify compatibility and any required impedance-matching accessories. A simple, well-organized calibration kit tray, clearly labeled standards, and correct, firmly mated connectors dramatically reduce the chance of miscalibration due to swapped ports or misaligned standards.
Setting up your nanovna for calibration
Prepare your workspace by grounding your equipment and ensuring the nanovna is powered from a stable supply. Place the calibration kit within easy reach and arrange coax cables with consistent length to reduce delay differences between ports. Connect a calibrated reference plane adapter if your fixture requires one, and verify that each port is identified correctly in the nanovna’s software. Set the frequency range to match your measurement needs and enable any features necessary for calibration, such as port awareness or impedance settings. Record baseline environmental conditions, especially temperature, since RF measurements can drift with temperature changes.
Power the device on and let it warm up for a few minutes to reach steady-state behavior. Confirm that the nanovna is reporting consistent data on all ports and that there are no visible shorts or loose connections in the test setup. It’s worth performing a quick sanity check by measuring a known, simple load to verify basic functionality before initiating full SOLT calibration.
Step-by-step SOLT calibration procedure
This section provides the core sequence used to calibrate the nanovna. Follow each step carefully, and use port extensions if necessary to place the reference plane where your DUT will connect. Start with the open standard and verify that the reflection response is minimal. Then add the short standard to characterize the short-circuit impedance. Next, load standard provides a solid reference for the magnitude and phase response, and finally the thru standard connects both ports to characterize transmission.
During each standard measurement, ensure tight, clean connections and verify that adapters remain uncoupled from environmental disturbances. After completing SOLT, re-check the reference plane alignment and repeat a through-only check to confirm consistency. If any standard shows unexpected results, re-check the connections, reseat adapters, and consider replacing worn cables or faulty standards. Document each result for traceability, and if needed, perform port extension calibration to accommodate your DUT geometry.
Verification and quality checks after calibration
Calibration quality should be verified with independent checks. Run a dedicated thru measurement or a known reference network to compare the measured response against the expected response. If you see large discrepancies, re-check the calibration kit condition, re-seat all connectors, and ensure there are no cable mismatches. A good practice is to document calibration results with screenshots or plots and to compare day-to-day consistency. Recalibration should be planned if you alter test fixtures, cables, or frequency ranges, or if you observe noticeable drift in measurements.
Keep a calibration log that records environment, cable configurations, and any anomalies. This makes it easier to diagnose recurring issues and maintain consistent measurement quality over time.
Practical scenarios and common pitfalls
In real-world lab work, you’ll encounter several scenarios where calibration must be adapted. If you’re testing a DUT with unusual connector types, use appropriate adapters and verify that they are 50-ohm compatible. Avoid reusing old or damaged coax cables, as degraded connectors often introduce reflection and loss errors. When space is tight, port extensions help you place the reference plane precisely, but they also add potential sources of error if not calibrated. Do not skip the thru step; it often reveals subtle misalignment that the other standards cannot detect.
Another frequent pitfall is neglecting to re-zero the instrument after mechanical changes or after changing frequency ranges. Always re-check calibrations when moving from high to low frequency segments to ensure consistent accuracy across the entire range.
Maintenance, documentation, and when to recalibrate
Calibration is not a one-off task; it’s an ongoing practice. Keep your calibration kit clean, store standards in protective cases, and replace worn cables or adapters promptly. Recalibrate whenever you experience inconsistent measurements, change test fixtures, or extend your frequency range. Maintain a simple documentation workflow: note the date, operator, environmental conditions, cable configuration, and results for each session. Regular calibration helps ensure long-term reliability and comparability of measurements across projects, labs, or field deployments.
Tools & Materials
- Nanovna (vector network analyzer)(Model and firmware up to date; verify port labeling and 50-ohm compatibility)
- SOLT calibration kit(Open, Short, Load, Through standards; 50-ohm impedance; inspect for damage)
- Quality 50-ohm coax cables(Match connectors (SMA/BNC) to your nanovna ports; avoid worn cables)
- Port extensions / adapters(Used to place the reference plane at the DUT interface; ensure proper impedance)
- Clean reference plane adapter(Optional but recommended for precise plane definition; keep clean surfaces)
- Well-lit, grounded work surface(Prevents static buildup and ensures stable positioning during calibration)
- Calibration log sheet or software(Document results, environmental conditions, and any anomalies)
- RF-safe workspace accessories(Cable management, velcro ties, and anti-static mats)
Steps
Estimated time: 45-60 minutes
- 1
Prepare workspace and equipment
Clear the bench, ground equipment, and arrange the calibration kit within easy reach. Verify the nanovna is powered and warmed up. Check cables for signs of wear and ensure connectors are clean.
Tip: Use a dedicated mat and keep a spare adapter on hand to minimize fixture changes. - 2
Inspect and organize calibration standards
Open, short, load, and thru standards should be free of defects. Inspect each standard for corrosion, dents, or flexing of the body. Arrange them in the order you will use during the SOLT sequence.
Tip: Label each standard and keep a log of any observed issues before starting. - 3
Connect port extensions and test cables
Attach the port extensions to the nanovna ports if your DUT will use extended planes. Keep cables as straight as possible with minimal bends to avoid unwanted reflections.
Tip: Tighten adapters firmly but avoid over-torquing micro-coax interfaces. - 4
Configure frequency range and ports
Set the nanovna to the intended measurement band and confirm port labeling. Ensure 50-ohm termination is selected if your software requires it.
Tip: If you plan to measure high frequencies, enable extended range options only after confirming calibration needs. - 5
Run SOLT calibration sequence
Perform Open, Short, Load, then Thru measurements in the order specified by your software. Confirm that each standard yields a plausible response and that the reference plane remains stable.
Tip: Take a moment to visually inspect plots after each standard to catch obvious anomalies early. - 6
Validate calibration with a thru check
After SOLT, perform a thru-only verification to confirm that the two ports present the expected transmission. Look for minimal reflections and consistent phase behavior.
Tip: If the thru test deviates, re-run the SOLT steps focusing on connection integrity. - 7
Document results and analyze drift potential
Record calibration dates, operator, environment, and results. Note any drift indicators and plan maintenance actions if needed.
Tip: Keep a running log to help diagnose long-term drift or fixture wear. - 8
Apply calibration to measurements
With the calibration defined, proceed to measure your DUT, ensuring the reference plane continues to align with the intended test point.
Tip: If you move the DUT, re-check calibration to maintain accuracy.
Questions & Answers
What is the purpose of calibrating a nanovna?
Calibration removes systematic errors from the VNA measurements by defining known reference standards (open, short, load, through). This yields accurate impedance and S-parameter results across the tested frequency range.
Calibration removes systematic errors to give you accurate S-parameters across frequencies.
Which calibration kit should I use with a nanovna?
Use a 50-ohm SOLT calibration kit that matches your nanovna ports (commonly SMA or BNC connectors). Ensure the kit includes open, short, load, and thru standards and that cables are high quality and properly terminated.
Choose a 50-ohm SOLT kit that fits your ports and includes all four standards.
How often should I recalibrate my nanovna?
Recalibrate whenever you change test fixtures, cables, or frequency range, and at the start of a new project to ensure consistency. For critical measurements, calibrate before every session.
Recalibrate when you change fixtures or before critical measurements.
What are common mistakes during calibration?
Using worn cables, not re-tightening adapters, skipping the ‘through’ step, or forgetting to re-zero the instrument can introduce errors. Always verify the reference plane after calibration.
Worn cables or skipping the through step can ruin results.
Can I still get useful measurements if calibration fails?
Yes, but the uncertainty will increase. You should re-check kit, connections, and re-run SOLT until the results align with expectations.
If calibration fails, expect higher uncertainty; re-check setup.
How do I verify that the calibration is valid?
After calibration, run a thru measurement and compare with the expected response, or compare with a known reference antenna or load. Document the results and repeat if discrepancies appear.
Run a thru test and compare to a known reference.
Watch Video
Key Takeaways
- Calibrate nanovna to reduce measurement uncertainty.
- SOLT defines a reference plane for accurate S-parameters.
- Use a complete, clean calibration kit and verify with through checks.
- Document results and monitor drift over time.
- Recalibrate when changing fixtures or frequency ranges.