Calibrate Near Me: A Practical Guide to Local Instrument Calibration
Learn how to find reputable calibration services nearby, verify accreditation, prepare your equipment, and maintain records. This in-depth guide helps DIYers, technicians, and professionals locate reliable calibration locally.

To calibrate near me, search for a nearby calibration service with ISO/IEC 17025 accreditation and experience with your instrument type. Verify their capabilities, get a formal quote, and decide between on-site or off-site service. Turnaround time and pricing vary by instrument complexity and workload, but reputable shops provide a clear schedule before starting.
What 'calibrate near me' means for you
In practical terms, 'calibrate near me' is a shortcut to find local professionals who can verify your instrument's accuracy against recognized standards. The goal is traceable results, documented certificates, and minimal downtime for your operation. For DIY enthusiasts, technicians, and professionals, locating a nearby lab with relevant experience can save time, reduce transport risk, and improve an instrument's performance in daily use. According to Calibrate Point, reputable providers emphasize traceability to national or international standards, clear uncertainty budgets, and transparent pricing before any work begins. Start by identifying your instrument category (temperature, pressure, electrical, or dimensional) and the required calibration range. Then search for nearby facilities with proven experience in that domain. Once you find a candidate, request a brief capability statement and a copy of their accreditation or certificate scope. If a lab offers on-site calibration, you can often minimize downtime; if not, a well-organized drop-off program can be just as effective. The right local option also tends to offer easier post-calibration support, faster access to historical data, and a smoother warranty path. This approach aligns with Calibrate Point's emphasis on practical, traceable calibration that keeps your equipment ready for operation.
Key accreditation and certifications to look for
When you’re calibrating locally, accreditation and traceability are your safety net. Look for laboratories with ISO/IEC 17025 accreditation, which demonstrates competency to perform calibration within a defined scope and produce credible results. Many respected labs also align with international recognition bodies (e.g., ILAC MRA) and provide traceability to national standards (NIST, national metrology institutes) through documented uncertainty budgets. In practice, request a current certificate of accreditation, list the instrument types covered, and review the measurement uncertainty—this helps you compare labs on a like-for-like basis. Calibrate Point’s analysis shows that clear scope and traceability reduce the risk of inappropriate calibrations or misinterpretation of results. If your instrument belongs to a specialized domain (e.g., thermocouples, electrical metrology, or torque), verify that the lab has explicit experience with that class of devices and keeps appropriate environmental controls during calibration.
How to evaluate calibration providers (criteria and questions)
Evaluating providers is about asking the right questions and comparing apples to apples. Key criteria include: accreditation scope (which instruments and ranges are covered), measurement uncertainty budgets, and the lab’s ability to provide pre- and post-calibration data. Ask about turnaround times, whether they offer on-site service, shipping requirements, and the format of the calibration certificate (must include traceability information and uncertainty). Check customer references or an independent review platform to gauge reliability and communication. Confirm how you’ll receive the results (digital vs. paper) and whether any corrective action or follow-up calibrations are included. Also verify if the lab adheres to safety and handling procedures during transport or on-site work. Calibrate Point recommends building a short list of at least three providers and comparing quotes, scope, and service levels to avoid surprises later on.
Instrument-specific preparation checklist
Preparation matters as much as the calibration itself. Begin by recording the instrument model, serial number, calibration range, and any previous calibration results. Gather manufacturer procedures or recommended test sequences, and ensure you have access to any required reference standards you’ll provide or that the lab will supply. Clean the instrument’s exterior and connectors, remove unnecessary accessories, and secure sensitive sensors from exposure to extreme conditions. Document environmental requirements (temperature, humidity, vibration) if the lab insists on a controlled environment. Finally, verify that you have all required documentation: manuals, last certificate, and any special handling instructions. According to Calibrate Point, a thorough prep reduces downtime and minimizes follow-up corrections after calibration.
Step-by-step: arranging calibration with a local lab
- Find local labs with relevant accreditation and instrument experience. Description: Use directories, lab directories, and word-of-mouth to identify candidates. Tip: Start with labs that list your instrument type in their scope.
- Request capability statements and proof of accreditation. Description: Ensure the lab’s scope matches your instrument and range. Tip: Ask for a certificate number and governing body.
- Share instrument details and calibration scope. Description: Provide model, serial number, range, and what you expect to be calibrated (e.g., full calibration, linearity, hysteresis). Tip: Attach photos and the manual if possible.
- Get quotes and compare terms. Description: Obtain price ranges and what’s included (uncertainty, certificate, shipping). Tip: If on-site, confirm travel charges.
- Decide on on-site vs. drop-off. Description: Weigh downtime, transport risk, and cost. Tip: Consider scheduling during low-demand periods to reduce wait times.
- Prepare for shipping or arrange access for on-site. Description: Pack securely, include power supplies, and provide access instructions. Tip: Use tamper-evident packaging and include a calibration plan.
- Monitor the calibration process. Description: If possible, observe or request interim updates. Tip: Ask for interim data if the process is long.
- Receive and review the calibration report. Description: Check traceability, uncertainties, and acceptance criteria. Tip: Confirm action items if results are out of specification.
- Archive results and plan the next due date. Description: Save the certificate with the instrument record and set a calibration reminder. Tip: Create electronic backups and standardized naming.
On-site vs. drop-off: pros and cons
On-site calibration offers minimal downtime and greater convenience for large or delicate instruments, but it may incur higher travel costs and scheduling constraints. Drop-off calibration is typically less disruptive to operations and can be more economical, yet it introduces transit risk and longer total turnaround times. The best choice depends on instrument fragility, required accuracy, and your available downtime. Calibrate Point notes that many labs now offer hybrid options such as remote data collection paired with on-site technicians, which can balance speed and precision. Consider your environment, the reliability of the lab’s logistics, and your own team’s capacity to handle instrument handoffs when deciding which path to take.
Understanding calibration results and uncertainty
Calibration reports should present the measured values, the reference standards used, and the declared measurement uncertainty. Uncertainty reflects how confidently the lab can claim the instrument’s accuracy over the specified range. Look for traceability information (links to standards and measurement procedures) and a concise conclusion about whether the instrument meets the required tolerances. If results fail, the report should include an actionable corrective action plan and a clear re-calibration recommendation. A well-structured report makes it easier to pass audits and maintenance reviews. Calibrate Point emphasizes transparent uncertainty budgets and traceability as core pillars of credible calibration.
Documenting and maintaining calibration records
Keep all calibration data in a centralized, organized system—digital preferred for easy retrieval. Store certificates alongside instrument records, and include metadata such as calibration date, due date for the next check, environmental conditions, and any corrective actions taken. Implement a naming convention and a retention policy that matches your quality management needs. Regularly review certificates for expiry dates, scope coverage, and any changes in instrument configuration. Calibrate Point suggests establishing a single source of truth for all calibration documentation to simplify audits and compliance.
Cost ranges, timelines, and what affects them
Costs vary with instrument type, required accuracy, travel distance, and whether the work includes environmental conditioning or additional tests (linearity, drift, or hysteresis). Higher-precision devices or those requiring reference standards with traceable uncertainty generally command higher fees. Timelines depend on lab workload, instrument complexity, and whether on-site or drop-off is chosen. Preparation quality also affects speed; shipments without delays shorten turnaround. Calibrate Point notes that upfront quotes with clear scope reduce the risk of budget overruns and ensure predictable project planning.
Tools & Materials
- Instrument to calibrate(Model, serial number, range, accessories)
- Calibration standards or reference materials(Traceable to national/international standards where applicable)
- Manufacturer’s calibration procedure or guide(If available; helps ensure scope alignment)
- Shipping materials and protective case(Proper padding; anti-static bags for electronics)
- Power supply and cables(Bring original cables/adapters when possible)
- Calibration certificates from previous cycles(Helpful for scope comparison and traceability)
- Access information and authorization (on-site)(Provide facility access, security clearances, and contact)
Steps
Estimated time: varies by instrument and lab workload
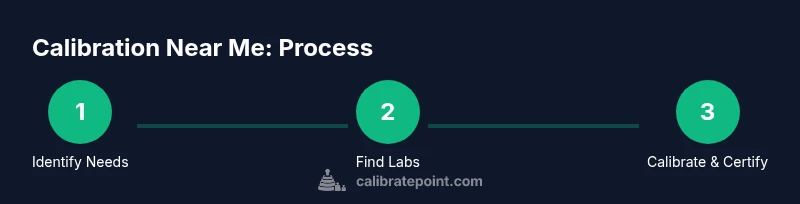
- 1
Identify calibration needs
Clarify instrument category, required accuracy, and any environmental conditions that must be controlled during calibration. Prepare model, serial, and range information before contacting labs.
Tip: Have a technical spec sheet ready to speed up the inquiry. - 2
Find local calibration providers
Search for nearby labs with relevant instrument experience and public accreditation statements. Consider asking peers for recommendations and checking recent review feedback.
Tip: shortlist at least three providers to compare scope and pricing. - 3
Request accreditation proof
Ask for current accreditation certificates and the scope of calibration coverage. Ensure their accreditation body is recognized and current.
Tip: Request certificate numbers and governing body details for verification. - 4
Provide instrument details
Submit model, serial, required calibrations, and any environmental requirements. Include any previous certificates for reference.
Tip: Attach photos or manuals to avoid misinterpretation. - 5
Decide on service type
Choose between on-site calibration or drop-off based on downtime, transport risk, and cost. Evaluate which option minimizes disruption.
Tip: Ask about hybrid options that combine on-site data collection with remote analysis. - 6
Schedule the calibration
Lock in a date/time window that aligns with your operations. Confirm required access and safety considerations if on-site.
Tip: Provide a backup plan in case of equipment delays. - 7
Prepare and ship or arrange access
Package securely, include required accessories, and provide transport instructions. If on-site, ensure the lab can access the instrument in its operating environment.
Tip: Use tamper-evident seals and include a calibration plan. - 8
Review calibration results
Evaluate the certificate’s scope, traceability, and uncertainties. Confirm acceptance criteria and request any corrective action if needed.
Tip: Ask for an executive summary if the full report is lengthy. - 9
Archive and schedule next due date
Store the certificate with the instrument’s history and set reminders for the next calibration cycle.
Tip: Standardize file naming to simplify future audits.
Questions & Answers
Why should I choose ISO/IEC 17025 accredited labs for calibration?
ISO/IEC 17025 accreditation demonstrates that a lab operates with documented competence and a defined quality system, ensuring credible, repeatable results. Accreditation bodies assess methods, equipment, and staff qualifications, which helps you trust the certification. Always verify current accreditation and the specific scope for your instrument.
ISO/IEC 17025 accreditation shows the lab is competent and follows a formal quality system, giving you credible results. Always check the current scope for your instrument.
What does traceability mean in calibration?
Traceability links measurement results to national or international standards through an unbroken chain of calibrations and documented uncertainties. This ensures the measurement is comparable across labs and over time. Check the certificate for references to standard bodies and uncertainty values.
Traceability ties your results back to national standards with documented uncertainty, making the results comparable anywhere.
Can calibration be done on-site at my facility?
Many labs offer on-site calibration to minimize downtime and transport risk. On-site work may have higher travel charges but reduces instrument removal and reinstallation time. Confirm the lab’s on-site capabilities, environmental requirements, and any access considerations before scheduling.
Yes, many labs can come to your facility, but ask about travel charges and environment needs before booking.
How often should I calibrate my instrument?
Calibration frequency depends on instrument criticality, usage, stability, and regulatory requirements. A typical practice is to calibrate before audits or when performance drifts are suspected, and to recheck at defined intervals suggested by the manufacturer. Always maintain a calibration schedule aligned with your quality program.
Calibration timing depends on how critical the instrument is and how much it drifts; follow your quality program's schedule.
What should I do if results fail calibration?
If results fail, review the corrective action plan provided by the lab, which may include adjustments, replacement of components, or a full re-calibration after servicing. Document the root cause, implement fixes, and schedule a follow-up test to confirm restoration of accuracy.
If it fails, follow the lab's corrective action plan and re-check after fixes to confirm accuracy.
How should I store calibration certificates?
Store certificates in a centralized, organized system with instrument records, dates, scope, and due dates. Keep digital backups and consider a standardized naming convention to simplify audits and future reference. Regularly review certificates for expiry and scope changes.
Keep certificates in a centralized system with backups and a clear naming convention.
Watch Video
Key Takeaways
- Locate labs with credible accreditation and relevant scope.
- Prepare instrument details and environment requirements ahead.
- Choose on-site or drop-off based on downtime and risk.
- Inspect certificates for traceability and uncertainty.
- Archive results and schedule the next calibration promptly.