Calibrate Scales Near Me: A Step-by-Step Guide for Accurate Weighing
Learn how to find reliable scale calibration services near you, prepare your equipment, and follow a proven process to ensure accurate weighing and regulatory compliance. This guide covers tools, steps, safety, and best practices.

By locating a reputable calibration service nearby, preparing your scale, and following a proven procedure, you can achieve precise weighing. This guide helps you find local options, verify accuracy, and perform a safe, standards-aligned calibration. Use our step-by-step instructions, required tools, and best practices to ensure reliable results. Whether you work in manufacturing, food service, or a lab setting, calibrating scales near me supports consistent measurements and regulatory compliance.
Why Accurate Weighing Matters
Accurate weighing is the backbone of quality control, inventory management, and compliance across many industries. When scales drift, batches misreport, weights become inconsistent, and customer trust erodes. According to Calibrate Point, accuracy starts with choosing a reputable calibration service and preparing your equipment. Whether you work in manufacturing, food service, or laboratory settings, calibrating scales near me ensures consistent results, regulatory alignment, and better decision-making. In this guide, you'll learn how to locate local calibration options, understand standard procedures, and perform a safe, verifiable calibration that stands up to audits. By investing in proper calibration, you reduce waste, avoid pricing errors, and protect product integrity, which ultimately protects your bottom line. This is not a one-time task; it is an ongoing practice that pays dividends in reliability, traceability, and confidence in every measurement you report. It is also wise to establish a routine and document every step so you can prove compliance if needed. The overarching goal is dependable data you can trust in daily operations.
How to Find a Local Calibration Service
Locating a reputable service near you begins with deliberate research and credential checks. Look for laboratories or technicians with traceable certifications, current accreditations, and clear service-level agreements. Calibrate Point analysis, 2026 indicates the importance of regular calibration intervals and documented results. Start by searching for terms like “scale calibration near me” and examine local business reviews, certificates of calibration, and reference standards. Contact several providers to compare response times, on-site versus off-site options, turnaround times, and the availability of formal calibration reports. Ask about environmental requirements such as temperature control and humidity, since some scales are sensitive to ambient conditions. When you identify a candidate, request a written scope of work and a price estimate that includes traceable weights, reference standards, and a certificate of calibration. For many small businesses and DIY workshops, on-site calibration is convenient, but verify that the service includes a documented method and weight traceability. Ensure the provider supports your scale’s class and measurement range, and confirm whether recalibration reminders or periodic maintenance checks are included. Finally, confirm how the calibration report will be delivered (digital or paper) and how long the certificate remains valid for regulatory needs.
Essential Tools and Materials for Scale Calibration
Preparation is half the battle. Gather the items you’ll need and confirm that your environment is stable. A standard calibration session requires traceable calibration weights, the scale’s manual, a stable work surface, a level, and a method to record readings. Ensure weights cover your scale’s operating range and that they are at room temperature to minimize thermal drift. Having a manufacturer’s procedure handy helps, especially for specialized scales. Create a quiet, draft-free environment with minimal air currents and consistent temperature to reduce noise in the readings. Power the scale for an adequate warm-up period as recommended by the manual, and document baseline readings before applying test weights. This record becomes part of the calibration certificate and supports ongoing quality control. If you’re performing on-site calibration, bring a portable calibration kit and a secure place to store weights during transit. Finally, ensure you have a trusted method for signing off on results and archiving the report for audits.
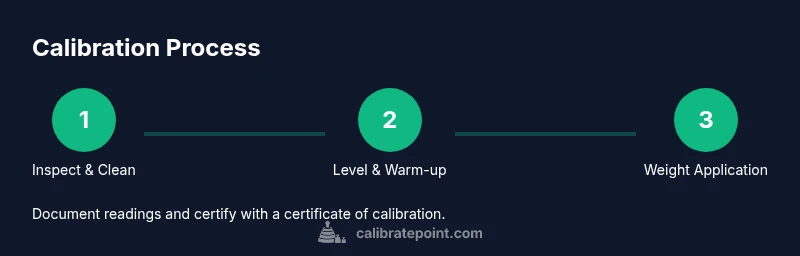
Step-By-Step Calibration Process
A structured calibration process typically follows preparation, measurement, adjustment (if permitted by the manufacturer), verification, and documentation. Start by preparing the environment and the scale: clean the surface, verify the scale is powered and warmed up, and confirm the scale is level. Apply the first calibration weight and record the reading, allowing the weight to settle fully. Repeat with additional weights across the scale’s operating range to test linearity. If readings deviate beyond the specified tolerance, consult the manual or the service provider for approved adjustments within the scale’s design. After collecting data, compare results against the scale’s tolerance band and certify the test with a calibration certificate. Finally, label the scale with the calibration date and the next due date, and secure the documentation for audits and traceability.
Safety, Standards, and Compliance
Safety and standards matter as much as precision. Handle weights carefully to avoid drops or pinching hazards, and never place heavy loads on a damaged or unstable platform. Always follow the manufacturer’s calibration procedure and local regulatory requirements for traceability and documentation. Use calibrated, traceable weights and keep the calibration certificates with the equipment. If you are working in regulated environments (food, pharma, or laboratory contexts), ensure your process aligns with applicable standards (e.g., ISO/IEC 17025 or equivalent) and that the certificate includes the measurement range, uncertainty, and the responsible technician. Maintain clean, dry hands when handling weights to avoid corrosion or contamination, and never leave a scale unattended with live weights on it. Document any environmental deviations (temperature, humidity) during the calibration, as these factors can influence results.
Verifying Scale Accuracy at Work or Home
Verification is about confirming that the scale continues to perform within spec after calibration. Start by rechecking the zero balance with no load and verifying that it returns to zero consistently. Next, perform a quick check with one or two known reference weights to confirm repeatability. If readings are inconsistent, check the environment, re-warm the scale, and re-measure. For business-critical applications, verify the lineal performance by testing multiple weights across the range. Maintain a calibration log and store the certificate with the equipment. Regular verification builds trust, supports audits, and helps you catch drift early before it affects production.
Troubleshooting Common Issues and Next Steps
If you encounter drift, drift fast, or unexpected readings after calibration, re-check the calibration procedure, weights, and environment. Confirm your weights are within tolerance and not damaged or contaminated. If readings remain inconsistent, re-run tests and compare with the original certificate; if necessary, contact the calibration provider for a recalibration or inspection. In some cases, the scale’s internal components may require service or replacement, which should only be performed by qualified technicians. Keep an open line of communication with your service provider and document every attempt to recalibrate. Finally, consider implementing routine calibration reminders to prevent drift from going unnoticed.
Conclusion and Next Steps
Regular scale calibration is an investment in reliability. By following a careful process, using traceable weights, maintaining documentation, and engaging qualified professionals when needed, you protect product quality and compliance. The Calibrate Point team emphasizes building a documented calibration program that fits your equipment and usage patterns. Start by identifying local calibration services, assembling the right tools, and establishing a routine that includes both verification and re-calibration thresholds. With consistency, you’ll see fewer measurement errors and smoother operations across all weighing tasks.
Tools & Materials
- Calibration weights set (traceable to national standards)(Choose weights covering the scale's operating range; ensure NIST/ISO certificates are available.)
- Scale manual and specification sheet(Have the manufacturer’s procedure for your specific model on hand.)
- Leveling device (spirit level or digital level)(Verify the scale surface is perfectly level before testing.)
- Clean cloth and isopropyl alcohol(Use to clean the weighing surface before calibration.)
- Environmental monitor (temperature/humidity)(Helpful to note conditions that can affect readings.)
- Documentation tools (logbook or calibration software)(Record readings, times, operators, and lot numbers.)
Steps
Estimated time: 2-3 hours
- 1
Inspect and clean the scale
Power down and unplug the scale if possible. Wipe the surface with a lint-free cloth and isopropyl alcohol, removing dust and residues that could affect readings. Visual inspection should check for damage, loose components, and calibration weight compatibility.
Tip: Use a soft brush to remove stubborn debris from corners; avoid moisture near sensitive electronics. - 2
Warm up the scale and stabilize environment
Power the scale on and allow it to reach its normal operating temperature. Keep the surrounding area free from drafts, vents, and direct sunlight. A stable environment reduces drift during measurement.
Tip: Wait at least the manufacturer’s recommended warm-up time before testing. - 3
Check level and mounting
Place a level on the scale surface and adjust feet or mounting hardware until the surface is level in all directions. An uneven platform can introduce bias in readings and invalidate calibration.
Tip: Tap lightly near feet while monitoring the level to avoid over-tightening you can’t undo. - 4
Zero or tare and verify baseline
With no weight on the pan, ensure the display reads zero. If it does not, follow the tare procedure in the manual or perform a reset per manufacturer guidance. Baseline zero stability is essential for meaningful calibration readings.
Tip: Record the zero reading and how long it holds before drifting. - 5
Apply first calibration weight and record reading
Place the first reference weight on the scale and allow it to settle. Record the exact weight and the observed reading, noting any settling time or fluctuations.
Tip: Gently place weights; avoid dropping or banging to prevent scale damage. - 6
Repeat with additional known weights
Test multiple weights across the scale’s range to assess linearity and range accuracy. Use full, half, and quarter ranges where applicable and record all readings.
Tip: Include at least three weights across the range for a meaningful assessment. - 7
Check repeatability and linearity
Repeat readings for the same weight to verify repeatability. Compare readings across different weights to evaluate linearity and detect drift or nonlinearity.
Tip: Take multiple readings per weight and average them for stability. - 8
Document results and certify
Compile readings, environmental conditions, and operator details. Produce a calibration certificate or report that captures the method, uncertainties, and the date of next due calibration.
Tip: Keep the certificate with the scale in a known location for audits. - 9
Store, label, and plan next calibration
Affix a calibration label to the scale with the date and due date. Record the calibration in your maintenance schedule and set reminders for follow-up checks.
Tip: Automate next-due reminders to avoid missing future calibrations.
Questions & Answers
Do I need professional calibration to calibrate scales near me?
For critical measurements or regulated environments, professional calibration ensures traceability and formal documentation. If your use case is less demanding, you can perform basic checks yourself following the manufacturer’s guidance.
For critical measurements, hire a certified lab; for basic checks, follow your manufacturer’s guidance.
Can I calibrate basic kitchen scales myself at home?
Yes, basic accuracy checks can be performed at home if the device supports calibration and you have appropriate weights. Always follow the manual and document the results.
Yes, for basic checks you can, but follow the manual.
What is the difference between calibration and adjustment?
Calibration compares readings to known standards, while adjustment corrects the scale within approved tolerances. Some devices allow both steps; others require service.
Calibration compares to standards; adjustment fixes drift.
How often should scales be calibrated?
Intervals depend on usage, environment, and regulatory requirements. Establish a schedule and perform checks regularly, increasing frequency for high-use or critical processes.
It depends on usage and environment; set a schedule.
What should I do if readings drift after calibration?
Re-check setup, re-test with known weights, and verify environmental stability. If drift persists, seek professional service to assess the device.
If drift continues, contact a professional.
Watch Video
Key Takeaways
- Choose a reputable service and verify credentials.
- Prepare and document baseline readings with traceable weights.
- Follow a standards-based procedure and maintain logs.
- The Calibrate Point team recommends routine calibration for reliability.