Calibrate ProForm Treadmill Speed: Step-by-Step Guide
Learn how to calibrate the speed on a ProForm treadmill to ensure your workouts align with the pace you set. This guide covers tools, safety, step-by-step calibration, verification, and maintenance for accurate training.

By the end of this guide you will be able to calibrate the speed on a ProForm treadmill so the belt pace matches the setting you choose in workouts. You’ll need basic measurement tools and a safe, clear space. The process involves validating the console reading against a measured belt speed and applying a small adjustment to align both readings for accurate training.
Why Accurate Speed Matters for Your Workouts
When you train on a ProForm treadmill, speed accuracy is essential for interval sessions, tempo runs, and consistent pacing. The console displays a target pace, but the actual belt speed can drift due to belt wear, or motor or transmission tolerances. If the belt speed lags behind or runs faster than the console setting, your workouts won’t hit the intended paces. Over weeks and months, small discrepancies compound, degrading interval quality and making perceived effort unreliable. Calibrating ProForm treadmill speed helps ensure that every run, hill climb, or sprint session aligns with your training plan and safety margins. In practice, a properly calibrated machine translates the pace you feel to the pace shown on the display, supporting better training outcomes and safer workouts for runners and walkers alike.
Before You Begin: Tools and Safety
Before you start the calibration process, gather essential tools and observe safety precautions. Calibration is a measurement exercise that involves moving parts; always power off and unplug the machine before any inspection or adjustment. Keep the area clear of loose clothing, pets, and obstacles. Use the safety key and ensure the belt is not moving when you begin. If your model offers a calibration mode, consult the manual for exact steps to access it. In general, you’ll need a timer or stopwatch, a measuring tool for distance, a notebook for results, and basic basic mounting or alignment aids. This careful prep reduces risk and makes the subsequent measurements repeatable across sessions. Remember, if your ProForm model does not clearly support a software-based speed calibration, you can still perform a belt-speed verification using manual measurement methods.
Understanding ProForm Speed Calibration: Concepts and Terms
Calibration compares two speed references: the console’s displayed speed and the actual belt speed. You’ll encounter terms like belt speed, console speed, offset, and drift. Belt speed is the true pace at which the belt travels relative to the floor, while console speed is the speed the treadmill claims is happening. When a discrepancy exists, an offset value can be applied to align the console reading with actual belt performance. Regularly validating these readings helps prevent drift caused by belt tension changes, motor wear, or firmware quirks. The goal is to maintain consistent, predictable pace feedback so your workouts remain effective and safe.
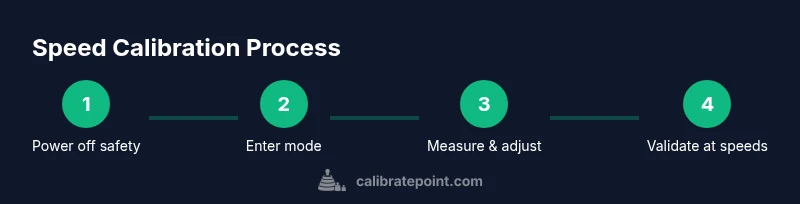
Step-By-Step Overview for ProForm Treadmills
This section outlines the overarching workflow you’ll perform in the STEP-BY-STEP section. Start by ensuring safety, then enter the calibration or measurement phase as your model allows. Set a baseline speed, measure the belt against a known distance over a controlled time window, and compute the necessary offset. Apply the offset, then re-test at several speeds to verify accuracy. Finally, document results and reset the machine to normal operation. The exact menu names and steps vary by model, so always refer to the user manual for model-specific details.
How to Validate Speed Accuracy After Calibration
Validation is the critical second check after you apply any adjustment. Use two approaches: a belt-speed test and a distance-timed run. For the belt-speed test, mark a known distance on the belt (e.g., 2 meters), run at the target speed for a timed interval (e.g., 10 seconds), and compare belt travel distance per time with the expected value. For the distance-timed method, measure how far the belt travels in a fixed time when you set a specific console speed. If measurements align with the expected pace within a small tolerance, your calibration is successful. If not, repeat the measurement cycle and adjust the offset accordingly.
Maintenance and Recalibration Frequency
Even the best treadmills can drift over time due to belt wear, maintenance cycles, or firmware updates. Treat speed calibration as part of routine maintenance, especially after belt replacement or major service. If you run frequent interval workouts or new training phases, re-test quarterly or after any noticeable pacing inconsistencies. Keeping a simple log of test results helps you track drift over time and plan recalibration decisions more systematically.
Common Mistakes and Quick Fixes
Common mistakes include measuring with a moving belt, using an incorrect distance for speed calculations, or neglecting to power off before starting. Always unplug the unit and clear the area before taking measurements. Use a consistent measurement approach (same distance, same start/stop timing) and re-check at multiple speeds to confirm uniform results. If results remain inconsistent, re-check belt tension, alignment, and motor accuracy, and consult the warranty or service guide if the model shows persistent discrepancies.
Tools & Materials
- Measuring tape or ruler(Mark a known distance on the belt (example: 2 meters).)
- Digital timer or stopwatch(Accurate timing for speed calculations (±0.1s preferred).)
- Notebook or digital log(Record speeds, belt readings, and offsets.)
- Safety key(Keep the key in place during calibration; remove for safety while adjusting.)
- Allen wrench or basic tool kit(Optional if belt tension/adjustments are needed per model guidance.)
- Non-slip surface or mat(Stabilizes the treadmill area during slow, controlled measurements.)
Steps
Estimated time: 45-60 minutes
- 1
Power off and prepare safety
Power off the treadmill, unplug the power cord, and remove any loose items from the belt area. Place the safety key in your pocket when you’re ready to begin. This prevents accidental belt movement and minimizes risk as you prepare measurement tools.
Tip: Double-check that the belt is stationary before touching any components. - 2
Position the treadmill and clear area
Move the treadmill to a stable, level surface and ensure there is at least a 2-foot clearance on all sides. Place a marker on the belt edge to help you identify a repeatable measurement point.
Tip: Use a non-slip mat to prevent shifting during measurements. - 3
Enter calibration/measurement mode
Consult your model’s manual for the exact steps to enter a calibration or measurement mode. If your unit doesn’t have a dedicated calibration mode, proceed with a belt-speed verification by running at set speeds and measuring belt travel.
Tip: If you’re unsure about the mode, start with Settings or Diagnostics in the console. - 4
Set a base speed and prepare measurement
Choose a low, safe baseline speed (e.g., 3 mph or case-specific equivalent). Prepare your distance marker and timer, ensuring the belt can start from a full stop without sudden acceleration.
Tip: Record the console speed as a reference in your calibration log. - 5
Measure actual belt speed
Start the belt for a short interval (e.g., 10 seconds) and measure how far the belt travels using the distance marker. Use the timer to capture the duration precisely. Compare this measured belt distance to the expected distance based on the console speed.
Tip: Repeat the measurement twice to ensure repeatability. - 6
Compute and apply speed correction
Calculate the speed drift: correctedSpeed = consoleSpeed × (measuredDistance / expectedDistance). If your treadmill supports a software offset, apply this offset and document the value in your log.
Tip: Keep offset values small; large offsets may indicate another issue (belt tension or motor wear). - 7
Re-test at multiple speeds
Repeat measurements at several speeds (e.g., 3 mph, 5 mph, 7 mph) to confirm consistency. If the measured speeds align with console settings within tolerance, proceed to finalize calibration.
Tip: Use the same measurement protocol for each speed to maintain accuracy. - 8
Document results and exit calibration
Record the final offsets and test results in your calibration log. Exit calibration mode (if applicable), restore normal operation, and reattach the safety key. Confirm the treadmill returns to standard mode and test briefly with a comfortable pace.
Tip: Keep a copy of the results with model and firmware version for future reference.
Questions & Answers
Do ProForm treadmills require speed calibration?
Some models offer built-in calibration features, while others may require manual belt-speed verification. Always start by checking the owner's manual for model-specific guidance. Regular checks can help ensure pace accuracy, but consult a technician if you encounter hardware issues.
Some ProForm models have built-in calibration options. If yours does, follow the manual; otherwise, use belt-speed verification with measurements and log results.
How often should I calibrate treadmill speed?
Calibrate as part of a routine maintenance schedule or whenever you notice pacing drift during workouts. If you run a lot of interval training, consider periodic checks to prevent performance gaps.
Calibrate when you notice drift, or on a regular maintenance basis, especially if you do lots of intervals.
What tools do I need for speed calibration?
You need a timer, a measuring distance on the belt, a notebook to log results, and a way to access calibration or measurement settings per your model. A safety key and a stable setup are essential for safe measurement.
Timer, distance marker, notebook, and the model’s calibration steps are enough for a basic test.
What if calibration results are inconsistent at different speeds?
Inconsistent results may indicate belt tension issues, misalignment, or motor irregularities. Re-check belt tension, ensure the belt is centered, and test again. If inconsistencies persist, contact support or a technician.
If results vary by speed, check belt tension and alignment, then re-test. Persistent drift may require professional service.
Will calibration affect my treadmill warranty?
Calibration performed according to the manufacturer’s guidelines is typically safe for warranties. Avoid opening sealed parts or making non-guided modifications, which could affect coverage. When in doubt, consult the warranty terms or a service professional.
Calibrating per the manual is usually okay for warranties; avoid unauthorized changes.
Can I rely on app-based measurements for calibration?
App-based measurements can offer convenience but may not be precise enough for formal calibration. Use direct measurement with a timer and distance on the belt, and verify against console readings for best results.
Apps can help, but use direct measurements for accuracy and then verify with the console.
Watch Video
Key Takeaways
- Calibrate speed to align console readings with actual belt pace.
- Follow safe, repeatable measurement methods for accuracy.
- Validate results at multiple speeds and document findings.
- Perform recalibration as part of routine treadmill maintenance.
- Consult the manual or support if calibration options are unclear.