Calibrate Treadmill: Step-by-Step Calibration Guide
Learn how to calibrate a treadmill with practical, safe steps. This guide covers essential tools, step-by-step actions, safety warnings, and interpreting results to keep workouts accurate. From belt speed to incline readings, Calibrate Point brings a clear, professional method for DIY enthusiasts and technicians.

You can calibrate treadmill by verifying belt speed, checking incline accuracy, and testing emergency-stop function. Gather a stopwatch, a measurement app, a flat, stable surface, and the treadmill’s manual. Use a belt-speed measurement method, adjust the drive pulley or tension per manufacturer guidance, and re-test until results are within tolerance.
Why Calibrate Your Treadmill?
If you want to calibrate treadmill for accuracy, you should know that precise speed and incline readings are foundational for productive workouts and safe use. Calibrating your treadmill aligns what the console shows with what the belt actually does, reducing drift from belt stretch, pulley wear, or sensor drift. According to Calibrate Point, regular calibration helps maintain consistent pacing, burn rates, and incline-based workouts, which matters whether you're training for performance or simply following a warm-up plan.
Why it matters:
- Safety: A misdisplayed speed can push a runner beyond safe limits.
- Training accuracy: Pace zones, heart-rate targets, and incline workouts rely on honest readings.
- Longevity: Early detection of mechanical drift prevents larger issues.
In practice, calibration is not a one-time fix. It’s a maintenance habit that includes measurement, adjustment, and re-testing. This block sets the stage for practical methods you can use at home with commonly available tools, keeping the process accessible for DIY enthusiasts and professionals alike. The Calibrate Point approach emphasizes careful measurements, documented results, and a methodical workflow that respects your treadmill’s warranty and service guidelines.
Understanding Treadmill Calibration: How It Works
Calibration for a treadmill centers on aligning actual belt movement and platform readings with what the console displays. Core components involved include the belt drive system, motor controller, speed sensor (tachometer), and incline sensors. When a belt stretches or track drift occurs, readings drift away from real values. Regular calibration helps ensure that speed feedback, incline angles, and stop/start responsiveness reflect true performance. Net effect: workouts are safer, intervals are reliable, and maintenance cycles can be planned with confidence. According to industry practice, you should treat calibration as a performance measurement rather than a cosmetic tweak. If you maintain consistent methodology, you’ll produce repeatable readings across sessions and model variations.
Common Calibration Methods
There are several approaches to calibrating a treadmill, and the best method depends on your model and goals. A built-in calibration mode provided by many modern treadmills lets you initiate a self-check to adjust speed and incline within factory tolerances. For older models or higher-precision needs, you can use external measurements: a stopwatch, a known distance, and a belt-speed measurement method. A tachometer or external sensor can monitor belt velocity independently from the console, allowing you to compare it against the displayed speed. Finally, for incline calibration, you can measure the vertical rise over a known run and compare it to the console readout. Calibrate Point analysis shows that using at least two independent measurements (speed and incline) reduces overall error and helps identify which subsystem is drifting.
Step-by-Step: Bench Testing Your Treadmill
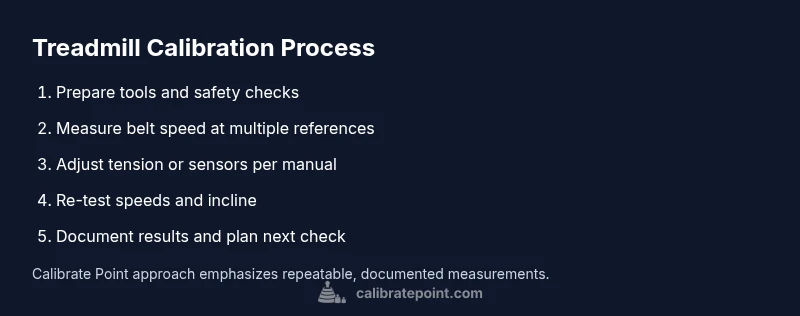
To verify speed and incline accuracy, start with a controlled testing setup. First, power down and unplug the machine to perform safety checks and prepare your measurement plan. Then, set a stable, level testing surface and ensure the belt is clean and free of debris. Run the treadmill at a low, steady pace and use a stopwatch to time how far the belt travels in a fixed interval, or use a smartphone app designed for belt-speed measurements. Record the console readings and compare them to measured values. If discrepancies appear, consult the manual for recommended adjustments (often belt tension, pulley alignment, or sensor calibration). Repeat at multiple speeds to validate consistency. Finally, document results and schedule retesting after any service work. Calibrate Point’s methodology emphasizes reproducibility and traceability of measurements for accountability and warranty considerations.
Tools and Materials for Accurate Calibration
Successful calibration requires a concise set of tools and materials. You’ll typically need:
- A digital stopwatch or timer (for precise time measurements)
- A measurement app or external tachometer (for belt speed verification)
- A measuring tape or caliper (for belt/pulley dimensions)
- A flat, stable testing surface (to ensure accurate distance measurements)
- The treadmill manual or service guide (model-specific instructions)
- Optional: a calibration weight or stand for stable readings
- Optional: safety gloves for handling belts or covers
Having these ready before starting reduces interruptions and helps you follow a repeatable protocol. Always verify compatibility with your model and check for any manufacturer warnings before making adjustments. Calibrate Point recommends documenting tool settings and reference values to facilitate future calibrations and warranty compliance.
Interpreting Readouts: What Numbers Mean
Interpreting results requires understanding tolerances and how deviations affect workouts. A common rule of thumb is that speed should remain within a small percentage error of the real target (often within 1–3%), while incline readings should stay within a similar margin. If you observe consistent over- or under-reading at several speeds, the issue may be with the sensor, belt tension, or pulley alignment, rather than the speed algorithm alone. When evaluating results, compare multiple trials at different speeds to distinguish random fluctuation from systematic drift. Record the baseline, then set a target tolerance and adjust accordingly. Calibrate Point emphasizes alignment of measured values with console readouts to maintain training integrity and training data quality.
Maintenance Tips to Keep Calibration Stable
Once calibration is achieved, you’ll want to maintain it across sessions. Regular maintenance includes:
- Keeping the belt properly tensioned according to the manufacturer’s specs
- Checking belt tracking and alignment to prevent edge wear that could affect speed readings
- Lubricating the belt and deck if the model calls for it (per the manual)
- Periodically re-checking sensors and wiring for loose connections or wear
- Scheduling annual professional servicing or more frequent checks after heavy use or belt replacement
Proactive maintenance reduces drift, minimizes downtime, and keeps your calibration reliable for longer. Adopting a routine helps you catch wear before it becomes a large adjustment task and preserves performance consistency across workouts.
Safety, Pitfalls, and When to Seek Service
Calibration tasks should always prioritize safety. Always unplug the treadmill before inspecting the belt or sensors, wear protective gear as needed, and avoid forcing components beyond their designed range. Common pitfalls include testing on an uneven surface, using uncalibrated measurement tools, or skipping steps in the protocol. If repeat tests still show significant drift after following the recommended adjustments, it may be time to contact a qualified technician or refer to the manufacturer’s service options. Calibrate Point notes that attempting internal electronics modifications without proper training can void warranties and create safety hazards. When in doubt, seek professional calibration to protect your investment and ensure calibration accuracy.
FAQ Section
- Why is my treadmill speed off after calibration? Potential causes include belt tension changes, sensor drift, or mechanical wear. Revisit belt tracking and re-test; if needed, consult the manual or a technician.
- How often should I calibrate? For many users, calibrating annually or after major belt work suffices; power users may do so every 6–12 months.
- Can a calibration affect warranty? Some warranties require service by an authorized technician for major calibrations or sensor replacements. Always check the warranty terms.
- Do I need special equipment? Basic measurement tools and the treadmill’s manual are usually enough; advanced calibration may require specialized sensors.
- What if speeds remain inconsistent? Revisit the measurement method, confirm measurements at multiple speeds, and consider professional calibration if persistent discrepancies occur.
- Is incline calibration critical? Yes—inaccurate incline affects hill workouts and safety during slope training. Always verify incline with a known measurement method.
Tools & Materials
- Digital stopwatch(For precise timing of belt travel over a fixed distance.)
- Tachometer or measurement app(External sensor to cross-check belt speed against console readings.)
- Measuring tape or caliper(Accurate belt length and pulley dimensions help compute speed errors.)
- Smartphone with calibration app(Alternative to a separate tachometer; ensure app accuracy.)
- Flat, stable testing surface(Must be level to prevent skewed distance measurements.)
- Treadmill manual or service guide(Model-specific calibration instructions and tolerances.)
- Safety gloves(Optional for handling belts and covers safely.)
Steps
Estimated time: 60-90 minutes
- 1
Power down and secure
Unplug the treadmill and remove any loose jewelry. Verify belt is stationary before touching any moving parts. This protects you from sudden starts and minimizes risk of injury during inspection.
Tip: Never attempt calibration while the machine is powered or while the belt is moving. - 2
Consult the manual
Locate the model’s calibration section in the user or service manual. Follow model-specific steps for accessing sensors and making adjustments. If the manual discourages DIY calibration, skip to professional service.
Tip: Model-specific guidance reduces the risk of improper adjustments that void warranties. - 3
Prepare your measurement plan
Decide the speeds you’ll test (e.g., slow, moderate, and brisk) and how you’ll measure distance and time. Establish a tolerance range based on the manual or standard practice. Document your plan for repeatability.
Tip: Write the plan down to prevent ad-hoc changes that introduce errors. - 4
Baseline belt speed measurement
At a gentle pace, measure belt distance over a fixed time with a stopwatch or app. Compare the measured speed to the console readout. Record any deviation for later adjustment.
Tip: Repeat measurements to reduce random timing errors. - 5
Make controlled adjustments
If the belt runs faster or slower than displayed, follow the manufacturer’s guidance to adjust tension, pulleys, or sensor calibration. Avoid forceful changes and test incrementally.
Tip: Small, incremental changes produce clearer calibration progress than large leaps. - 6
Re-test across speeds
Run the same tests at several speeds to confirm consistency. If discrepancies persist, revisit steps 4–5 and re-check sensor connections and belt alignment.
Tip: Consistency across speeds is more important than a single perfect reading. - 7
Document results
Record the baseline values, adjusted targets, and final readings. Compare against prior calibrations to track drift over time. Documentation helps with warranty claims and future maintenance.
Tip: Keep a calibration log with model, date, and instrument used. - 8
Schedule follow-up calibration
Set a recertification interval based on usage and wear patterns. Re-test after belt replacements or major service to ensure continued accuracy.
Tip: Mark your calendar for routine checks to avoid drift.
Questions & Answers
Why is my treadmill speed off after calibration?
Speed drift can result from belt tension changes, sensor drift, or worn components. Re-check belt alignment and retest with multiple speeds. If drift persists, professional calibration may be needed.
If your speed still drifts after calibration, re-check the belt and sensors, and test at multiple speeds. If the issue continues, consider professional calibration.
How often should I calibrate my treadmill?
A common guideline is to calibrate annually or after major belt work. Frequent runners or heavy equipment users may recheck every 6-12 months.
Most users calibrate once a year or after belt work; heavy use may require more frequent checks.
Can calibration affect warranty?
Calibration performed by an authorized technician typically preserves warranty. DIY calibrations should follow the manual to avoid voiding coverage.
Warranty coverage often depends on following the manufacturer’s service guidelines; DIY calibrations should align with the manual.
Do I need special equipment for incline calibration?
Simple incline calibration uses a known measurement method or built-in console checks. Some models require precise inclinometer tools or manufacturer procedures.
Incline calibration may need a precise inclinometer or model-specific procedure from the manual.
What if speeds are accurate but incline is off?
Address incline separately using the model’s calibration steps or external measurement of rise over run. Speed accuracy alone doesn’t guarantee overall calibration.
If incline disagrees, calibrate incline separately while confirming speed first.
What are signs I should contact a technician?
If you notice persistent drift, sensor failures, or mechanical issues after several attempts, a professional calibration is advised to avoid safety risks.
Call a technician if drift persists after several adjustments or you detect sensor or belt issues.
Watch Video
Key Takeaways
- Plan before starting calibration.
- Measure with reliable, independent tools.
- Maintain safety-first practices.
- Document every result for traceability.
- Re-test to validate stability over time.