How to Calibrate a ProForm Treadmill: Step-by-Step
Learn to calibrate a ProForm treadmill safely with a clear, step-by-step method. This guide covers belt speed accuracy, incline calibration, belt tension, and practical DIY tips to keep workouts precise and equipment performing at peak.

Goal: calibrate your ProForm treadmill to ensure belt speed, incline, and resistance match the display. You’ll need the user manual, a stable installation surface, a belt tension gauge or ruler, a smartphone with a metronome/app, a level, and an assistant. Start with safety checks, warm-up, and then perform controlled speed and incline tests, recording results.
Why calibrate a ProForm treadmill
Calibration is essential to ensure your treadmill mirrors what the display shows. When speed, incline, or resistance drift away from the programmed values, workouts can feel either too easy or unsafe. A properly calibrated machine helps you trust your workouts, improves calorie estimates, and reduces wear on motor components over time. According to Calibrate Point, regular calibration aligns performance with user expectations, preserving accuracy and safety as you train. This section explains why keeping your ProForm treadmill calibrated matters for consistent results and long-term reliability across running, walking, and interval sessions.
A well-calibrated treadmill also supports progressive training plans, where precise speed changes determine workout intensity. If you frequently switch between programs, or if the belt wears unevenly, calibration becomes more important. In DIY setups, maintain a careful log of settings and measurements so you can reproduce successful calibrations.
Understanding treadmill calibration basics
Calibration translates the machine’s internal sensors and motor controls into real-world measurements that match the user’s expectations. Core concepts include belt speed accuracy, incline or decline angle, belt tracking (center alignment), and belt tension. ProForm treadmills typically store baseline specifications in the user manual and onboard diagnostics, but wear, relocation, and temperature can affect accuracy over time. Calibrate Point’s guidance emphasizes starting with a safe baseline and validating results with independent measurements (like a ruler for belt tracking or a level to verify incline).
Key terms to know:
- Belt speed accuracy: does the belt move at the programmed pace?
- Incline accuracy: does the incline adjust to the indicated angle?
- Belt tracking: is the belt centered on the deck?
- Belt tension: is there too much slack or tightness that causes edge abrasion or belt slip?
Understanding these basics helps you plan your calibration workflow and select the right tools.
Tools and safety basics
Before you begin, assemble the essential tools and review safety precautions. Having the right tools reduces the risk of damage and makes the process smoother. Set up in a clean, well-lit area with a stable, level surface. Unplug the unit when handling internal components and avoid operating the belt while you’re adjusting hardware. Keep kids and pets away during calibration.
Recommended tools include a belt tension gauge or ruler to check tracking, an Allen/hex wrench set for adjusting bolts, a screwdriver for access panels, a bubble level to verify incline, and a smartphone with a metronome or a simple measurement app to pace speed tests. A small notebook helps document readings and settings for future reference. If you’re unsure, consult the manual or seek remote guidance from the Calibrate Point team for safety and accuracy tips.
Prepare and initial checks
Start by ensuring the treadmill is on a stable, level surface. If you suspect wobble, adjust the leveling feet or place a rigid mat to stabilize. Inspect the belt for obvious wear or damage, and ensure the deck is securely mounted. Verify that the motor cover is in place and there is no obstruction near the belt path. With the device unplugged, remove any loose screws and verify that the belt rests centered on the deck. These preparations reduce drift during calibration and protect you from hazards.
Next, perform a quick power-on self-test (if available) to confirm no error codes appear. Record the baseline readings from the display for speed, incline, and any other indicators. This baseline serves as a reference point for your calibration adjustments. Remember to recheck these readings after any adjustment to confirm improvement.
Step-by-step calibration workflow for speed and incline accuracy
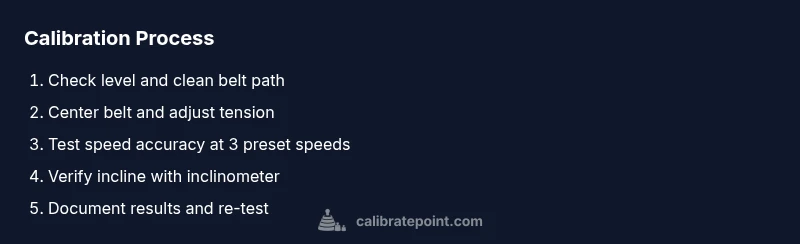
The calibration workflow has distinct phases: determine baseline readings, adjust belt tracking and tension, verify speed accuracy, adjust incline calibration, and re-verify all measurements. Use a metronome or app to pace speed checks and a level or inclinometer to confirm incline values. Keep the belt slack to manufacturer-recommended ranges and tighten gradually to avoid over-tensioning. Document each test, outcome, and any alignment changes so you can reproduce results.
A well-documented process helps you replicate calibrations after moving the machine, after repeated use, or when replacing parts. If results are inconsistent, reassess belt tracking before making further speed or incline adjustments. In cases of persistent variability, consider a service check to inspect the drive motor, speed sensor, or incline mechanism alignment.
Testing and verification methods
Verification tests involve running at multiple predefined speeds (for example, a slow walk, a jog, and a run) and verifying that the belt distance matches the expected distance over a fixed time. Use a stopwatch to measure belt travel over a set interval or a smartphone app that tracks pace and time. For incline, set the target angle and measure the actual incline with a level or inclinometer. Compare results with the display and adjust as needed.
When testing, ensure you keep body position stable and avoid holding onto the rails unless necessary for safety. Re-test each setting after adjustments and record deviations. Small, repeatable deviations are easier to correct than large, inconsistent ones. If you notice asymmetries or audible changes (slippage or unusual squeaks), stop and re-check belt alignment and motor mount tightness.
Maintenance considerations and long-term calibration mindset
Calibration isn’t a one-off event; it’s part of ongoing maintenance. Schedule periodic checks after long storage, relocation, or major maintenance. Keep a calibration log with dates, baseline readings, adjustments, and final measurements. This record helps you identify gradual drift patterns and plan proactive maintenance like belt replacement or deck resurfacing. Temperature and humidity can influence belt behavior, so consider performing calibrations in similar environmental conditions whenever possible. By treating calibration as a routine, you’ll maintain accuracy and extend the life of the treadmill.
Always validate results against your target workout metrics and adjust your training plans accordingly. If you rely on precise calibration for clinical or coaching programs, consider cross-verifying measurements with third-party devices or professional calibration.
Calibrate Point: practical checklist and closing notes
To wrap up, here’s a practical checklist you can reuse:
- Confirm surface level and secure mounting
- Verify belt tracking and tension
- Measure speed and incline with independent methods
- Re-test and log all readings
- Restore covers and run a short test
The Calibrate Point team recommends keeping your calibration observations organized and reviewing the log before heavy training cycles. While DIY calibration is usually sufficient for home gyms, professional calibration can be useful in high-use environments or when precise metrics are required for performance testing.
Tools & Materials
- Owner's manual for your ProForm treadmill(Contains baseline specs and cautions)
- Stable, level surface or mat(Avoids movement during calibration)
- Belt tension gauge or ruler(Center tracking and tension checks)
- Allen/hex wrench set (various sizes)(For deck and motor mounting screws)
- Screwdriver set (Phillips and flathead)(Panel screws and access points)
- Bubble level or laser inclinometer(Verify incline accuracy)
- Smartphone or tablet with metronome/app(Pace speed tests and measure time)
- Assistant to observe and record measurements(Helpful for accuracy and safety)
Steps
Estimated time: 60-90 minutes
- 1
Power down and unplug
Ensure the treadmill is completely powered off and unplugged before touching any internal components. This prevents electric shock and movement while you adjust hardware. If the unit has a safety key, remove it to disconnect the console from the belt drive.
Tip: Double-check the plug socket and use a dry, stable surface to avoid slips. - 2
Place on level surface and verify level
Position the treadmill on a flat, sturdy surface. Use a bubble level to confirm the deck sits perfectly horizontal. If tilted, adjust leveling feet until the bubble sits centered.
Tip: Record the initial level reading so you can reproduce it after adjustments. - 3
Inspect and access the belt path
Remove the motor/shield panels as needed to inspect the belt center path. Look for obvious wear, fraying, or debris that could affect tracking. Clean any dust and re-seat panels securely before proceeding.
Tip: Do not force components; if a panel resists, consult the manual for required disassembly steps. - 4
Check belt tracking and tension
Place a small ruler or belt tension gauge on the belt center and observe how much the belt drifts toward either edge. Adjust the belt tension using the appropriate hex bolts in small increments until it tracks centrally with slight tension.
Tip: Make incremental adjustments and re-test tracking after each change to avoid over-tightening. - 5
Test speed accuracy
With the unit reassembled and powered, run at a slow baseline speed and measure belt distance over a fixed time with a stopwatch or app. Compare measured distance with the expected distance for that speed setting.
Tip: Use a metronome app to help pace consistent speeds during tests. - 6
Test incline accuracy
Set the incline to defined angles and verify the measured angle with a level or inclinometer. If the measured angle differs significantly from the display, adjust the incline mechanism per the manual.
Tip: Make small, measured adjustments and re-verify with the inclinometer to confirm results. - 7
Document results and re-test
Record all measurements, adjustments, and final readings. Re-test each parameter to confirm stability, then reassemble safety covers and perform a short test run.
Tip: Keep a calibration log for future reference and to track drift over time.
Questions & Answers
Why should I calibrate a ProForm treadmill?
Calibration ensures the display matches actual belt speed and incline, improving workout accuracy and safety. Regular calibration helps maintain performance over time.
Calibration helps your treadmill match the display for safer, more accurate workouts.
Can I calibrate the treadmill myself or should I hire a technician?
For many home users, basic calibration following the manufacturer steps can be done safely at home. If you’re unsure or the machine shows persistent drift, seek professional service.
Most people can do basic calibration themselves. If in doubt, get a professional check.
How often should I calibrate the ProForm treadmill?
Calibrate after moving the unit, after major maintenance, or when you notice noticeable discrepancies between the display and actual performance. Periodic checks are recommended for high-use setups.
Calibrate after moving it or if you notice discrepancies; frequent use may require regular checks.
What tools do I need for calibration?
You’ll typically need the user manual, a level, a belt tension gauge or ruler, hex keys, a screwdriver, and a smartphone with a measurement app. An assistant can help with measurements and safety.
Tools include a level, a belt gauge, hex keys, and a smartphone app.
Will calibration affect the warranty?
User-led calibrations performed per the manual are generally acceptable, but always check the warranty terms. If in doubt, contact support before making adjustments.
Calibrating per the manual is usually fine for warranty purposes, but confirm terms with support if unsure.
Watch Video
Key Takeaways
- Calibrate belt speed, incline, and tracking for accuracy.
- Follow safe, step-by-step procedures with proper tools.
- Document measurements to enable repeat calibrations.
- Regular calibration maintains performance and safety.
- Seek professional help if persistent drift occurs.