How to Calibrate an iFit Treadmill: Step-by-Step Guide
Learn how to calibrate your iFit treadmill with a practical, safe, step-by-step method. This Calibrate Point guide covers essential tools, warnings, and best practices for accuracy in 2026.

Calibrating your iFit treadmill ensures belt speed matches the displayed pace, improving accuracy for workouts and tracking. This guide walks you through required tools, safety checks, firmware readiness, and a repeatable process you can complete in about 45-60 minutes. Follow the steps carefully to maintain reliable incline, distance, and calorie readings for future training.
Why Calibration Matters for iFit Treadmills
Calibration is more than a one-time setup; it ensures that the belt’s actual movement aligns with what the console reports during iFit workouts. When speed readings drift, pace, distance, and calories can diverge from reality, which undermines training accuracy and program integrity. According to Calibrate Point, even small discrepancies in belt speed can compound over a 30-minute session, creating cumulative errors in distance tracking and workout intensity. In 2026, as firmware evolves and belt wear changes tension, maintaining an up-to-date calibration becomes essential to preserve data integrity across sessions and devices. A well-calibrated treadmill also reduces mechanical noise and wear, helping you get consistent results from incline programs and speed intervals. DIY calibration is feasible, but it benefits from a standardized approach that you can repeat after belt breaks-in, after a service, or when you notice drift in performance. The Calibrate Point team emphasizes documenting baseline measurements so you can spot drift quickly and verify improvements after adjustments.
What You’ll Need Before You Start
Before you begin, assemble a small calibration kit and a quiet workspace. Essential items include an adjustable wrench or Allen keys suited to your model, a measuring tape, a stopwatch, and a straightedge or ruler for distance checks. You’ll also want the treadmill manual or model-specific maintenance guide to locate service ports and exact torque specs. A notepad is handy for logging baseline readings and subsequent adjustments. While optional, a helper can stabilize the belt during measurements and ensure safer, cleaner data collection. Safety gloves are a good idea if you’ll handle metal components or exposed hardware during belt access. Finally, ensure your treadmill is on a level surface; the room should be free of debris, and you should have reliable power access in case you need to run a quick test. The goal is a controlled environment where measurement errors come from the belt and sensors, not external factors.
How iFit Treadmill Calibration Works
Most modern treadmills, including iFit-enabled models, calibrate speed using a feedback loop that compares motor controller output to a measured belt movement. The display speed, program pace, and treadmill incline are all affected by this loop. Any discrepancy between commanded speed and actual belt travel can alter distance and calories, particularly during high-intensity intervals. An accurate calibration adjusts the belt-tension relationship, checks the belt’s tracking in the center, and aligns motor steps with measured movement. Firmware and sensor quality influence calibration outcomes, so using the latest software and following model-specific steps improves reliability. A robust calibration may also re-sync the treadmill’s speed sensor to the console and correct minor drift that develops over time due to wear. This section provides a framework you can adapt to your model, while keeping safety and manufacturer guidance in mind. Calibrate Point notes that routine checks help catch drift early and keep iFit workouts faithful to real-world effort.
Safe Setup: Preparation and Safety Checks
Safety begins long before you power the machine. Start by unplugging the unit and allowing the belt to come to a complete stop before touching any components. Inspect the belt for wear, fraying, or signs of misalignment; do not calibrate on a visibly damaged belt. Clear the area of objects that could interfere with the belt or hands during adjustments. Confirm the console firmware is up to date and that the iFit app is synced if required by your model. If your treadmill has a maintenance mode, review the manual for entry steps, as some procedures require a service password or a hidden sequence. Wear gloves if you’ll handle exposed hardware, and keep a timer handy to record test bouts. Finally, work on a level surface and have a helper available to steady panels or hold tools. The aim is a controlled environment where minor measurement errors come from the procedure, not from unstable equipment.
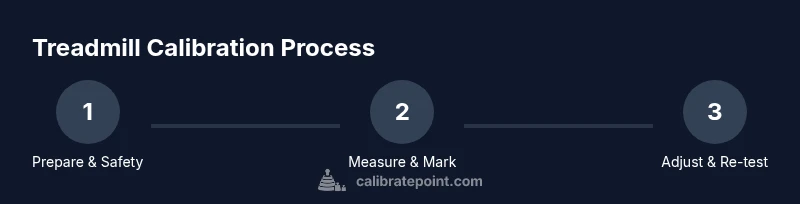
The Calibration Procedure: Step-by-Step Overview
The calibration procedure typically consists of preparing, measuring, adjusting, and validating. Start by confirming model compatibility and before-you-begin readings. Then, measure the belt’s actual travel against the console’s reported distance in a fixed time window. If there’s a mismatch, adjust the belt tension or sensor alignment per the manufacturer’s guidance, re-test, and re-verify. After adjustments, run a short test at multiple speeds to ensure consistency across a range of workout intensities. Record outcomes and compare to your baseline to quantify improvement. If discrepancies persist, repeat the measurement cycle or consult service; do not force a permanent setting if the results remain inconsistent. Calibration should be viewed as a repeatable process, not a one-off tweak, because ongoing wear and firmware updates can subtly shift results over time. Calibrate Point emphasizes documenting each stage so you can track long-term performance and return to known-good values when needed.
Verifying Results: Testing and Validation
Validation involves controlled, repeatable tests that compare belt speed to console speed at several targets (low, medium, and high). Use a marked distance or a calibrated timer to measure actual belt travel over a fixed interval. Compare the measured distance to the console’s indicated distance for that interval. If the values align within an acceptable tolerance, you’ve achieved successful calibration. If not, repeat the measurement cycle with small adjustments to sensor alignment or belt tension, then re-test. It’s helpful to keep a log of readings across sessions to track drift or improvements after each adjustment. A key validation step is to perform an iFit program with a known distance and pace, confirming the in-app metrics reflect the actual workout. Consistency across repeated trials strengthens confidence in your calibration.
Common Pitfalls and Troubleshooting
Common pitfalls include skipping safety steps, using improvised measurement tools without known tolerances, and assuming the factory calibration is universally accurate. Another frequent error is adjusting without verifying results with multiple speeds. If the belt tracking is off-center after adjustments, realign the belt and re-test. In some cases, sensor alignment or a loose mounting bolt can cause persistent drift; tighten fasteners to the manufacturer’s torque specs and re-check. If issues persist after re-tests, revert to factory settings and redo the calibration starting from the recommended baseline. Always document your baseline and every adjustment so you can diagnose what specifically improved or worsened drift. If you’re unsure about hardware or software steps, contact a certified technician.
Maintenance, Scheduling, and Returning to Normal Use
Calibration health should be monitored on a regular schedule, such as every few months or after substantial use or service. Use a simple log to note the date, model, firmware version, baseline measurements, and test results. If you notice drift between sessions or after firmware updates, consider re-running the calibration cycle. Regular belt cleaning and tension checks help maintain accuracy; a clean belt travels more evenly and reduces measurement error. When you’re confident in the current calibration, keep a copy of the settings and a troubleshooting checklist handy for future use. Finally, plan re-checks around major firmware updates or after any mechanical service to ensure continued alignment between console readings and real movement.
Tools & Materials
- Allen wrench set (various sizes)(Typically 4mm or 5mm; check model manual)
- Flathead screwdriver(For access panels and sensor mounts)
- Measuring tape (metric)(Minimum 1 meter; precise measurement)
- Calibrated stopwatch or smartphone timer(To time belt travel and test intervals)
- Ruler or straightedge(To verify belt alignment and travel distance)
- Soft cloth or microfiber(For cleaning belt edges and sensor covers)
- Maintenance manual or model-specific guide(Contains torque specs and calibration steps)
Steps
Estimated time: 45-60 minutes
- 1
Verify model and firmware
Confirm your exact iFit treadmill model and ensure firmware is up to date. Check the manufacturer’s maintenance notes for the recommended calibration procedure and any required service passwords or steps. This baseline prevents misinterpretation of guidance and ensures the calibration targets match your device’s software.
Tip: Document the firmware version before starting for future reference. - 2
Power down and prepare workspace
Unplug the treadmill and wait for all moving parts to stop completely. Clear the area of clutter and inspect the belt for damage or wear. Put on safety gloves and have a timer ready for measured tests. Re-check that the treadmill is level to avoid skewed results.
Tip: Always disconnect power before touching any internal components. - 3
Access calibration and measurement points
Open appropriate panels to access the motor controller, belt path, and speed sensor mounting. Locate the belt centerline and measurement reference points. If your model uses a maintenance mode, learn the entry steps from the manual and prepare any required passwords or codes.
Tip: Do not force panels; use the proper release latches or screws as described in the manual. - 4
Mark a reference distance on the belt
With the belt stopped, place a clearly visible mark at a fixed distance along the belt edge. This mark will serve as a visual reference during timed tests, allowing you to compare actual belt travel to console-reported distance.
Tip: Use a contrasting marker and ensure the mark is easy to see during rapid belt movement. - 5
Run a controlled test at a fixed speed
Power the unit back on and set a low, moderate, and high speed range. At each speed, time the belt for a fixed interval (e.g., 10 seconds) and count how many belt-length marks pass the reference point. Record the console distance and actual travel for comparison.
Tip: Keep one hand on the console, the other on the belt area to avoid accidental slips. - 6
Adjust sensor alignment and belt tension
If measured travel differs from the console’s report, adjust the speed sensor alignment or belt tension per the manual. Make small increments and re-test after each adjustment. Avoid over-tightening, which can wear bearings and create new drift.
Tip: Make only one adjustment at a time and re-test to isolate effects. - 7
Re-run tests and validate
After adjustments, repeat the same speed tests and compare results to the baseline. If alignment improves within the target tolerance, proceed to final checks. If not, review wiring, sensor mounting, and belt tracking for hidden causes.
Tip: Keep a running log of all measurements and adjustments. - 8
Save settings and perform a final workout test
Store calibrated values in the console and perform a short, real-world workout test to ensure the iFit program pacing matches the belt. Confirm that pace, distance, and energy expenditure track accurately against the workout’s known metrics.
Tip: Document the final readings and the workout you used for validation. - 9
Close up and schedule a follow-up check
Secure all panels, tidy tools, and set a reminder to re-check calibration after a defined period or after notable wear events or firmware updates. A simple schedule keeps your calibration reliable and aligned with iFit program accuracy.
Tip: Record the next check date in your calibration log.
Questions & Answers
What is treadmill calibration and why is it needed for iFit models?
Treadmill calibration aligns the belt’s actual movement with the console’s displayed speed and distance, ensuring accurate pacing, distance, and calorie data during iFit workouts. It’s especially important after belt wear, service, or firmware updates.
Treadmill calibration makes sure the belt movement matches what the console shows, so your workouts are accurate. Do this after wear, service, or firmware changes.
Can I calibrate while the treadmill is running?
Calibration should be performed with the treadmill powered down for safety, then validated with controlled tests after adjustments. Do not attempt measurements while the belt is actively moving.
No, calibrate with the machine powered off, then validate with controlled tests after adjustments.
How often should I recalibrate an iFit treadmill?
Recalibration is advised after significant belt wear, after maintenance, or following firmware updates. If you notice drift in pace or distance between workouts, repeat the calibration checks.
Calibrate after major wear, maintenance, or firmware updates, and whenever you notice drift in performance.
What if calibration still drift after adjustments?
If drift persists, revert to factory defaults and redo the calibration steps, or contact manufacturer support. Ensure all fasteners are torqued to spec and sensors are clean and unobstructed.
If drift remains, reset to factory defaults and redo calibration, or get support. Check fasteners and sensor cleanliness.
Is DIY calibration safe for beginners?
DIY calibration can be safe if you follow the model’s manual and safety guidelines. Avoid entering service modes that require passwords unless documented, and never bypass protective guards.
Yes, if you follow the manual and safety steps. Don’t bypass guards or use undocumented service modes.
What tools are essential for calibration?
Essential tools include a measuring tape, stopwatch, appropriate Allen keys, and a straightedge. A maintenance manual that lists torque specs and sensor mounts improves accuracy.
Measuring tape, timer, the right Allen keys, and a straightedge are essential, plus the model manual.
Watch Video
Key Takeaways
- Verify model and firmware before calibrating
- Measure actual belt travel against console readings
- Adjust belt tension and sensor alignment carefully
- Validate results with multiple speed tests
- Log measurements and schedule re-checks